Grant's Back Yard Build

Guitars by Grant Goltz of Hackensack, MN
User avatar
whitespruce
Site Admin
Posts: 4367
Joined: Thu Aug 21, 2008 6:53 am
Include Off Topic: Yes
Location: Northern Minnesota, USA

Grant's Back Yard Build

Post by whitespruce » Sat Oct 11, 2008 10:10 pm

Well, I had this started on the other place, but it was not all done. So I am going to post up the photos and stuff that I had up to about mid Summer, and then get on with finishing it here. I have been doing a bit more on this one lately and should soon have it done.

This is my attempt to demonstrate, to myself as much as anybody, that a decent guitar can be built with locally available woods. Now, that might seem odd coming from a person who probably has more wild and exotic wood to choose from than anybody short of Randy B, but I gotta do it anyway :lol:

For tops, this is not a problem because I almost always use my own local white spruce, even though I have all those weird versions of sitka plus Italian and Engelmann, too. But for this one, I chose to not take the easy route and am using black spruce, Picea mariana. This is the "other" local spruce here that is probably about the best there is. It has the longest fibers of any spruce and is incredibaly strong. About the same density as red spruce. So why don't we see more of it? Well, the main reason is that it rarely gets much bigger than about 12" in diameter, and 16" is a huge tree. So what I needed to do is make a 4-piece top, which will be obvious s we go along..

After I glued it up, which I actually did several years ago, my first step was to put in the rosette. One thing that does not grow locally is a dark colored wood. So I had to really scrounge to get some contrasting woods to use for trim and such. I ended up with a palette made up of butternut for the dark, maple for the light, and sumac for the basic pizazz. Ya sumac. it just grows as a very small tree, but has this almost metallic golden olive wood, unlike anything else I have ever seen.

Image
So here is my rosette glued in. Just a simple double ring with the wide one having a sumac center. I will also use that wood for the end graft and bindings. After I glue it in, I cut the sound hole. Notice the nice rays.

Image
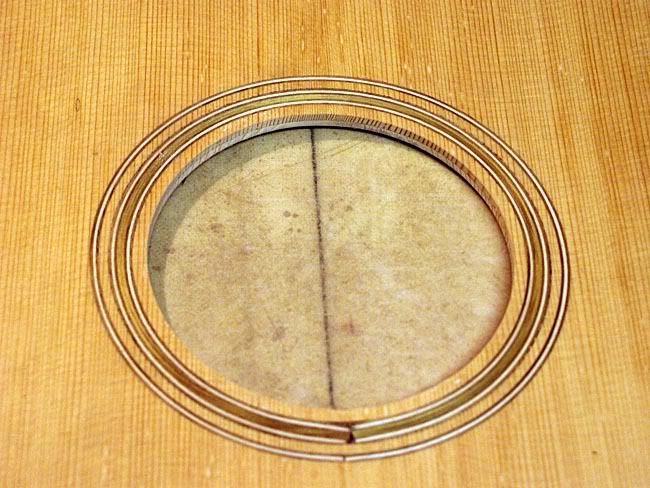
Here that is. What you don't see is that first I added a cross grain spruce patch on the inside to double up the thickness immediately around the sound hole, inside the soundhole braces. This wood does have a scattering of tiny 'pecky" spots, but it does not seem to affect the tone. I am using it because it is the only black spruce I have at this time and i want to try it.


Image
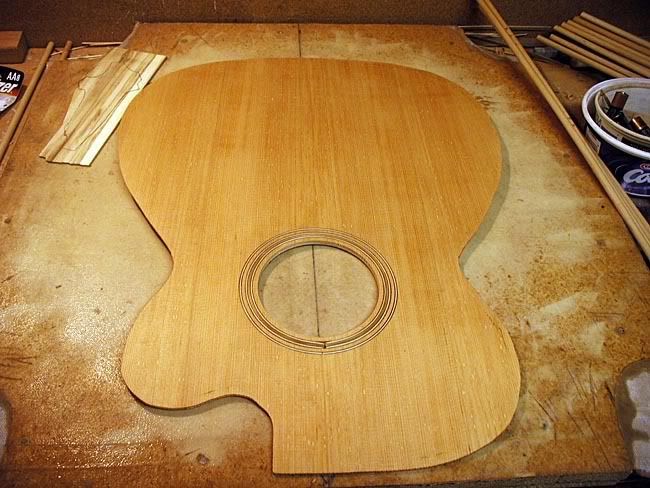
Here is the top ready to brace.

Image
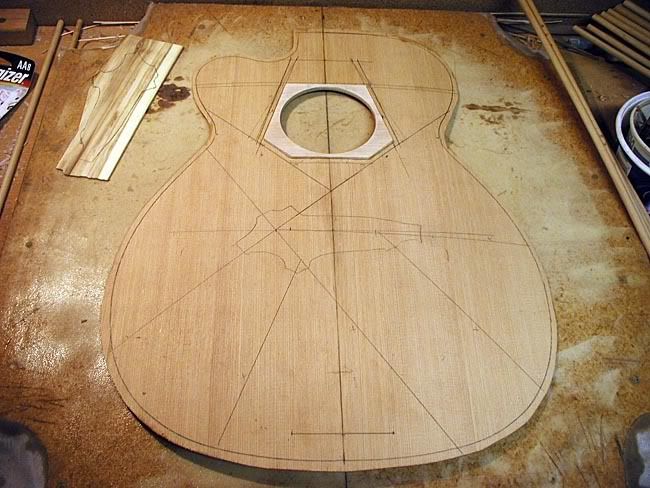
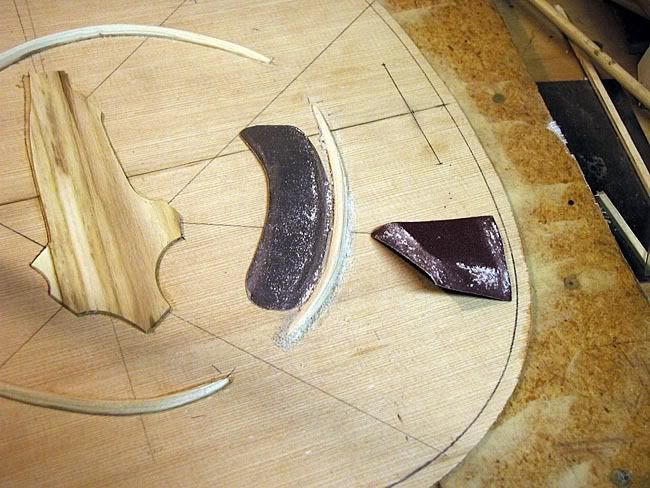
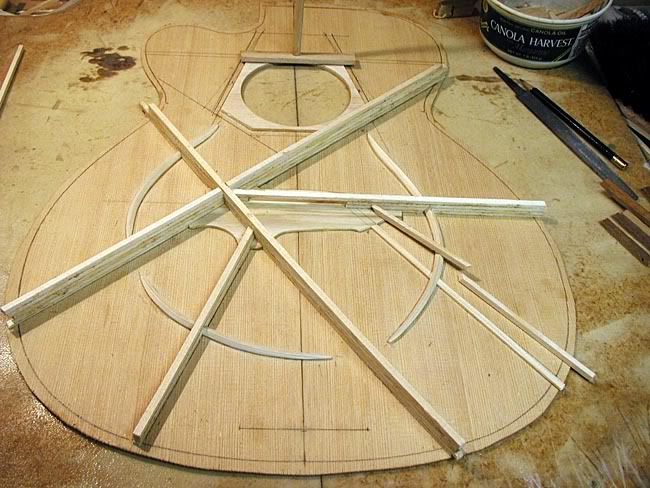
You can see the crossgrain patch in this photo, and I have drawn on the bracing pattern. I have a whole topic on my bracing pattern, so I will run through this rather quickly. Note my bridge plate ready to cut out at the upper left. This is of black locust, which I will also be using for the bridge, fingerboard, and peghead overlay.

The first thing to get glued in is my odd shaped bridge plate
Image
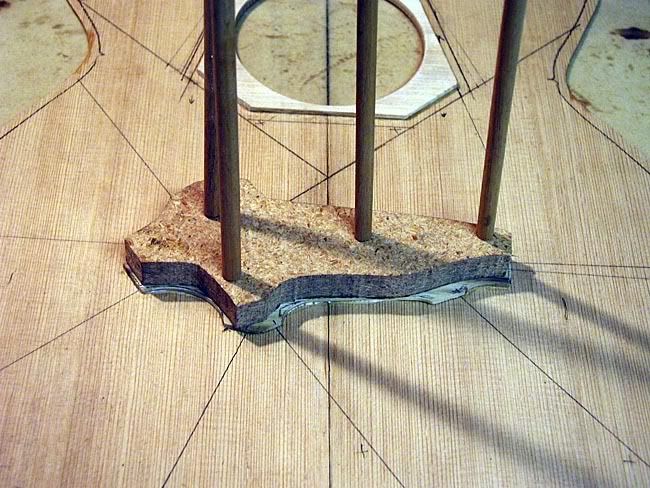
Here it is clamped with a shaped caul.

Image
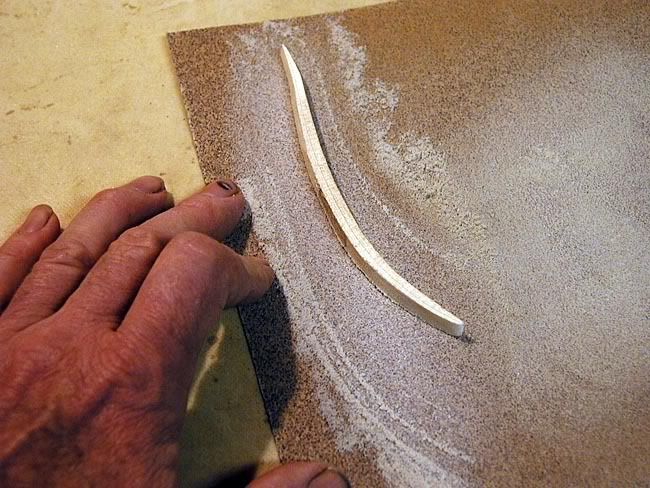
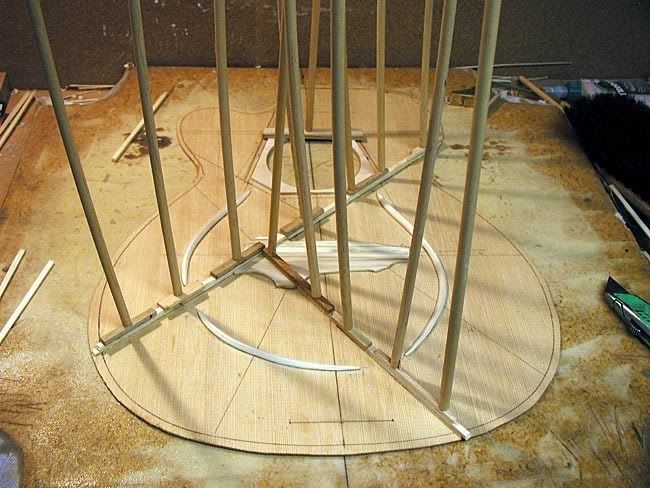
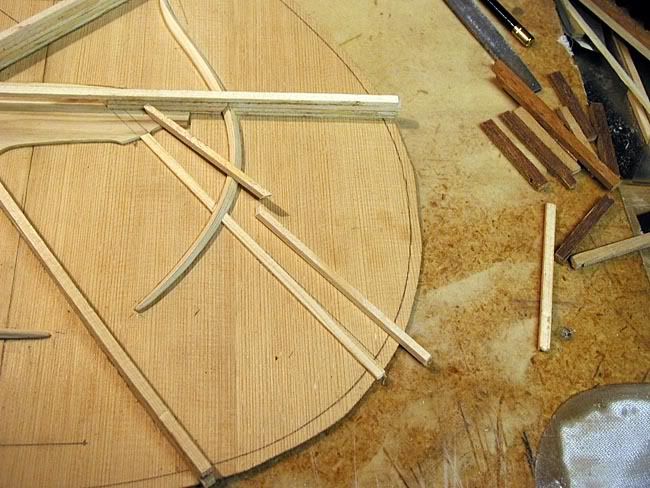
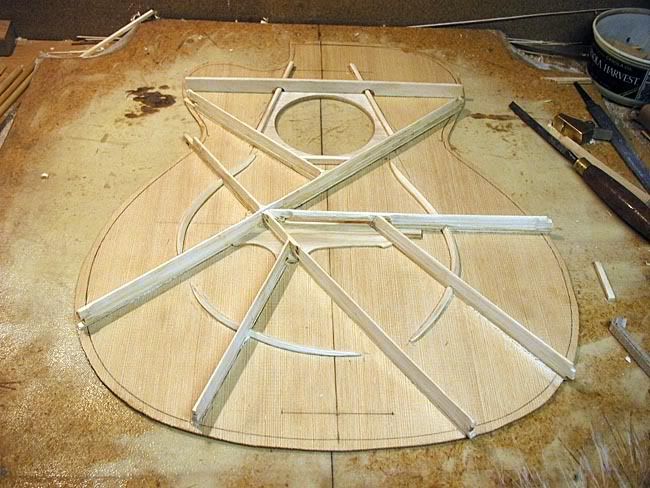
A major component of my bracing pattern is a series of three curved braces. These are made from two laminations of bent 1/8" thick spruce. Here is one being sanded to the top radius.

Image
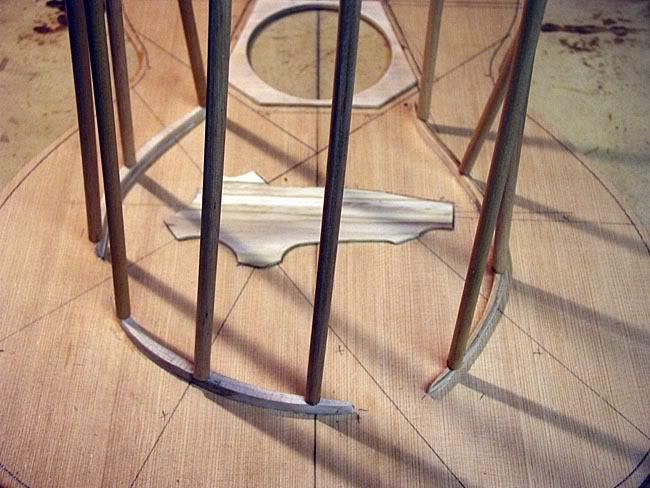
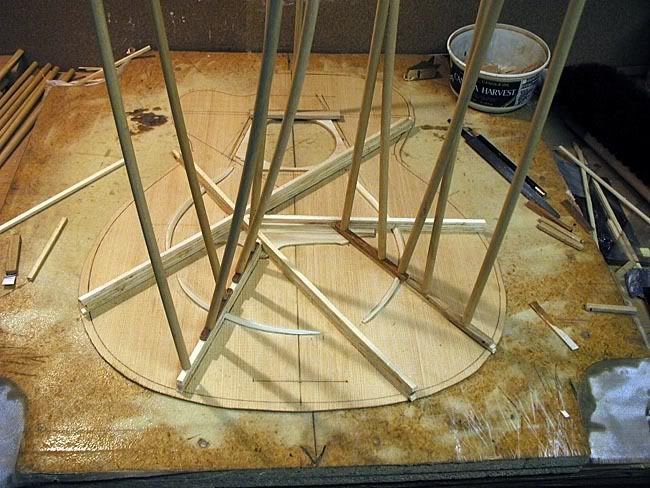
And here are the 3 of them being glued in.

Image
They are then carved to a triangular cross section and sanded smooth. I have now gotten smarter and carve and sand these braces before I glue them in.

I make my brace stock from split billets of straight grain white spruce sapwood.
Image
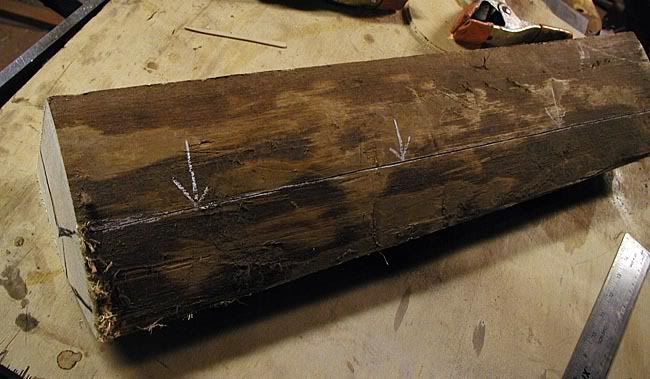
You can see the check in the surface of this billet that shows the run of the grain

I am now laminating most of my braces as they are glued in with the top in the radius dish
Image
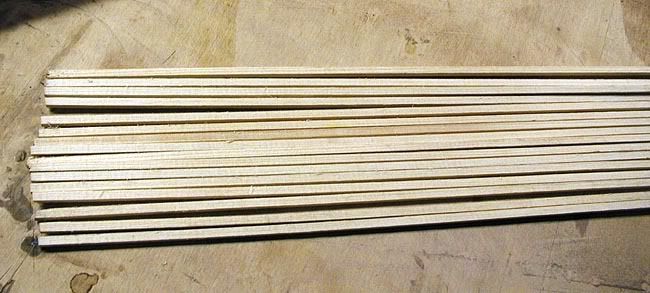
I cut the split brace stock into 3/16" wide by 5/32" thick strips to do the laminations. I glue up a total of 5 layers.

This series of photos shows stages of the glue up. At the offset "X", alternating layers cross over different directions to lock the joint together. All other joints are just butted.
Image

Image

Image

Image

Image

Image
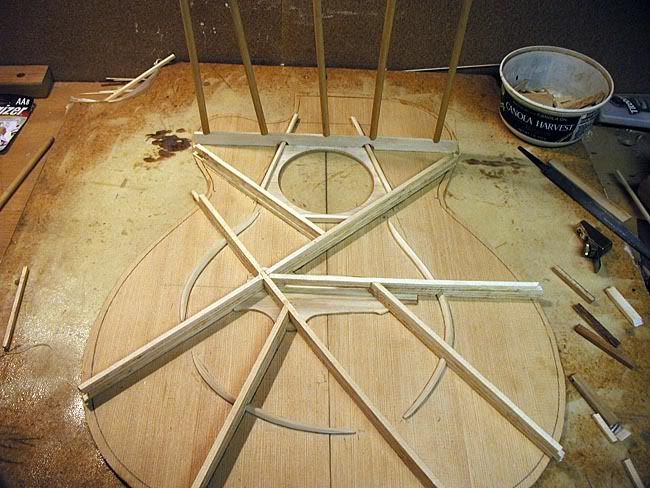
The braces on the upper end of the soundboard are not laminated. This part of the bracing arrangement is designed to accomodate my adjustable neck.

Image
Note the gap left under the brace that is under the bridge saddle location. This is to allow a space for a stick-on pickup such as a B-Band. After all the gluing is finished the braces are profiled with a specially ground router bit to a tapered, almost knife edge cross section.

Image
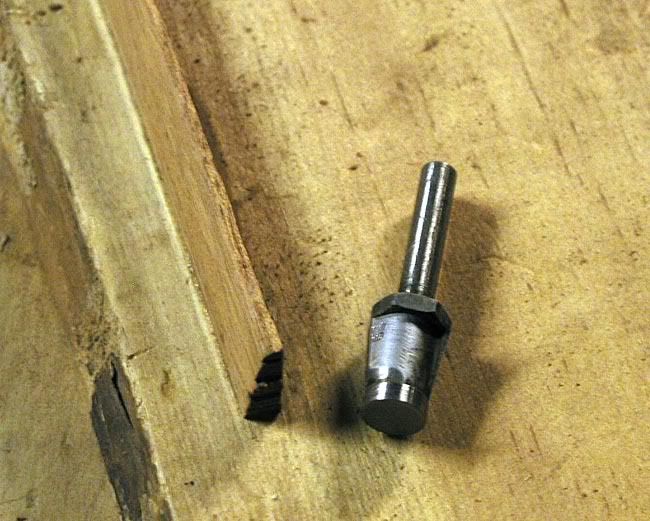
Here is the bit I use for that and the final result on a scrap sample.

Image
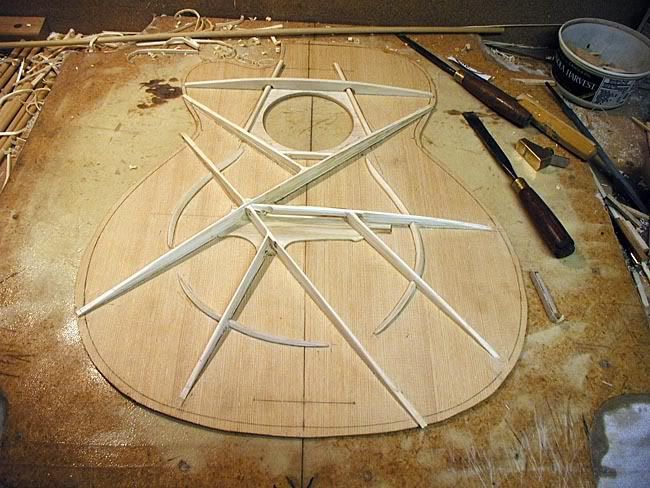
Here are the braces roughly carved, and...

Image
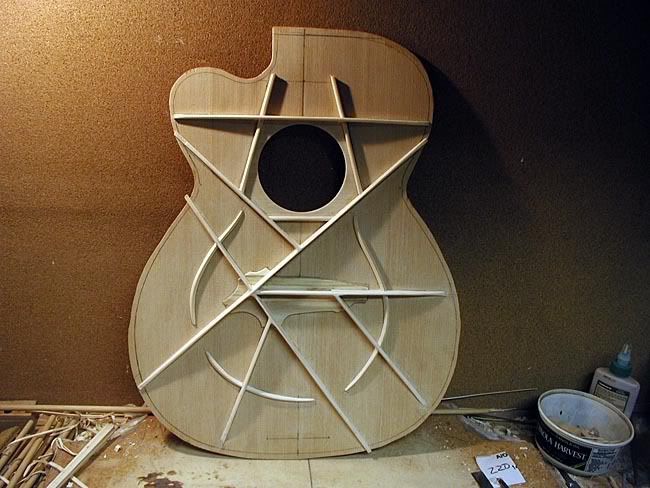
here is everything sanded and ready to go.

I will take a break now and will pick up with the neck and body tomorrow.

User avatar
Hesh
Posts: 260
Joined: Sun Aug 31, 2008 5:34 pm
Include Off Topic: Yes
Location: Tecumseh, Michigan USA
Contact:

Re: My "Back Yard" build

Post by Hesh » Sun Oct 12, 2008 6:45 am

Excellent post Grant - Thank You!

I have been wanting to see how you brace a top with the curved braces and now we know.

Also Black spruce sounds like a great top wood and great for braces too.

Thanks for sharing! :)
Hesh

Tecumseh, MI USA
http://www.heshtone.com

User avatar
Joe Sustaire
Moderator
Posts: 2640
Joined: Sat Aug 23, 2008 6:41 pm
Include Off Topic: Yes
Location: Talihina, Oklahoma

Re: My "Back Yard" build

Post by Joe Sustaire » Sun Oct 12, 2008 8:27 am

Great to see you back on this Grant. I remember this build and am happy to see it continued here. As I recall you're going to use birch for the back and sides? I'm interested in that since so many of the stella type guitars from the 30s used birch, be fun to see what you think of it. And I love the dark color of that black spruce in the 4 piece top.

Great stuff,
Joe
"I tell you we are here on earth to fart around, and don't let anyone tell you any different!"
Kurt Vonnegut

User avatar
Dennis Leahy
Dishwasher
Posts: 7082
Joined: Thu Aug 21, 2008 1:59 am
Include Off Topic: Yes
Location: looking for a place to live

Re: My "Back Yard" build

Post by Dennis Leahy » Sun Oct 12, 2008 9:30 am

Hi Grant,

Yeah, I'm excited to see this one back on the bench. I am very interested to hear how the Black Spruce sounds. And the Sumac - well, you saw my reaction when I picked up a stick at your house. Unbelievably metallic bronze look and even a metallic surface sheen. I thought it was dye when I picked up a piece.

Very cool guitar!

Dennis
Dennis Leahy

Ron
Posts: 209
Joined: Thu Sep 18, 2008 9:00 am
Include Off Topic: Yes
Location: ventura ,calif
Contact:

Re: My "Back Yard" build

Post by Ron » Sun Oct 12, 2008 10:54 am

Hey Grant

Its alway nice to see you back in the shop building.

black spruce wow ..


ron
http://www.harpguitar.info" onclick="window.open(this.href);return false;
If you can think it, Ill try to make it

User avatar
Eben
Chairman Emeritus
Posts: 6150
Joined: Thu Aug 21, 2008 9:58 am
Include Off Topic: Yes
Location: Lummi Bay, WA
Contact:

Re: My "Back Yard" build

Post by Eben » Sun Oct 12, 2008 3:14 pm

Right on, G!

I hate to say Id forgot about these, but I remember now and good on ya for bringin' it back to light!

E
‘I love America - I just dont know how to get there anymore.’

John Prine

UrbanMonique Food Blog

User avatar
Raymond
Posts: 421
Joined: Tue Aug 26, 2008 3:12 pm

Re: My "Back Yard" build

Post by Raymond » Sun Oct 12, 2008 8:45 pm

Very nice Grant.

Is Sumac soft or hard? Makes such a great rosette I'm wondering... How would it do as a binding?

Raymond
I wondered why the baseball kept getting bigger. Then it hit me.

User avatar
whitespruce
Site Admin
Posts: 4367
Joined: Thu Aug 21, 2008 6:53 am
Include Off Topic: Yes
Location: Northern Minnesota, USA

Re: My "Back Yard" build

Post by whitespruce » Sun Oct 12, 2008 9:16 pm

Raymond wrote:Very nice Grant.

Is Sumac soft or hard? Makes such a great rosette I'm wondering... How would it do as a binding?

Raymond
It is not real hard, but I am going to use it as binding anyway.

Hey, I gotta take a few more photos and edit some already in the computer before I post. Did not get that done today because Nathan (2nd grandson) and I were tearing down the trailer end of our cabin in preparation of building the real walls for new bunk space for next Summer. i will take a couple of photos of that, too.

G

Post Reply