
2 new bar fret guits, sound file added

Re: 2 new bar fret guits
Wow Grant, that is some inspired bracing. I am curious if the total weight of your brace pattern is lighter than a typical x-brace pattern? I was also curious if you have made various size guitars this way? Just looking it seems a small body could be very light this way. I am sure the top is incredibly stiff with the laminations and interlocking joints. Very interesting and nice work. Tim
-
whitespruce

- Site Admin
- Posts: 4367
- Joined: Thu Aug 21, 2008 6:53 am
- Include Off Topic: Yes
- Location: Northern Minnesota, USA
Re: 2 new bar fret guits
Tim, I have made 3 different body sizes/shapes using this bracing pattern. My small jumbo shape (the one in this thread) a dread, and an OM size (several of each).
I will check the weight of this top as braced and the sister top that does not have braces yet. One thing about the laminated braces is that I make them quite narrow. The final stiffness of the top relative to the weight of the braces is likely higher than a standard X brace, but I will get some figures.
G
OK, I weighed the braced top (after trimming and carving the brace ends). It weighs 261 grams (I expect it to lose 30 or 40 grams after final sanding)
I weighed the sister top which has the soundhole patch and the bridge plate on. It weighs 228 grams.
So the total weight of all of the braces comes out to 33 grams. The laminated braces are made from 3/16" wide spruce stock...5 layers averaging 1/8" thick. After tapering, the cross section is carved to a width of about 3/32" at the top edge.
I have no idea how this compares to what others are doing. Any info or comments?
Re: 2 new bar fret guits
Thanks Grant. Very interesting, the L-00 I just posted came to 264 grams ready to glue up, with bridge patch. The top alone weighed 206 grams. So you are saving quite a bit of weight. My double UTB adds a bit. My bracing is pretty typical for a L-00, 1/4" x 9/16" at the X. Thanks for sharing. I should be sending some bar fret stock this weekend. T
-
whitespruce
- Site Admin
- Posts: 4367
- Joined: Thu Aug 21, 2008 6:53 am
- Include Off Topic: Yes
- Location: Northern Minnesota, USA
Re: 2 new bar fret guits
A bit more progress...bits and pieces before I can put the box together.
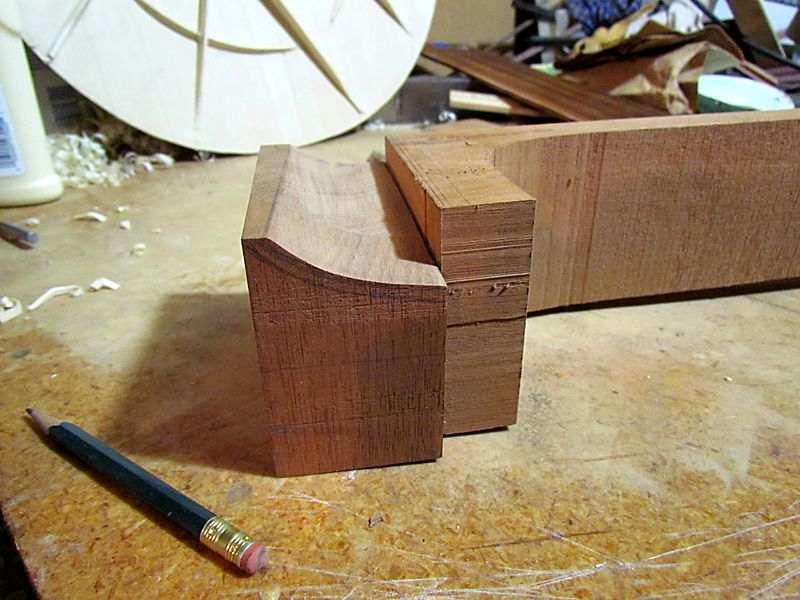
These guitars have a compound cutaway with the neck heel tapering a bit from side to side rather than being more square like some do. So, I have to make a bit more complex neck block. I trace the curve on the top and bottom of the block and remove most of the waste on the bandsaw. Then I can work up to the lines on a drum sander. With a robo-sander drum in my drill press, I can do most of the shaping like this..
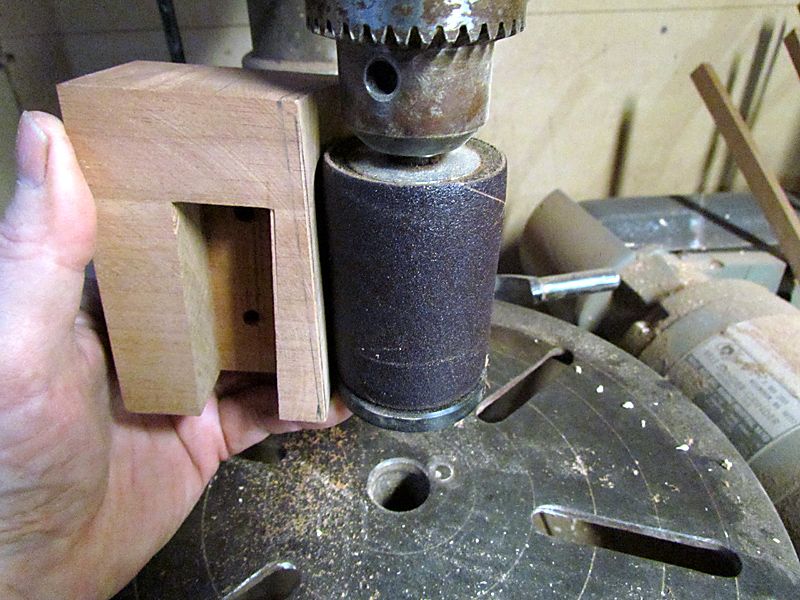
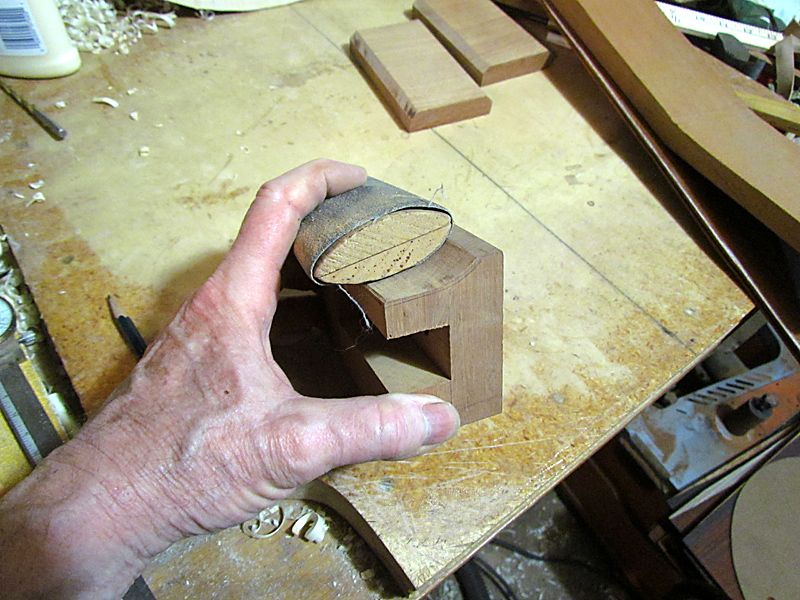
The guide bushing on the robo-sander runs against a finished shape at the end of the block and I can just work my way up until I finish at the correct top shape. Takes a few runs turning end for end, but I don't have to concern myself with sanding too much off
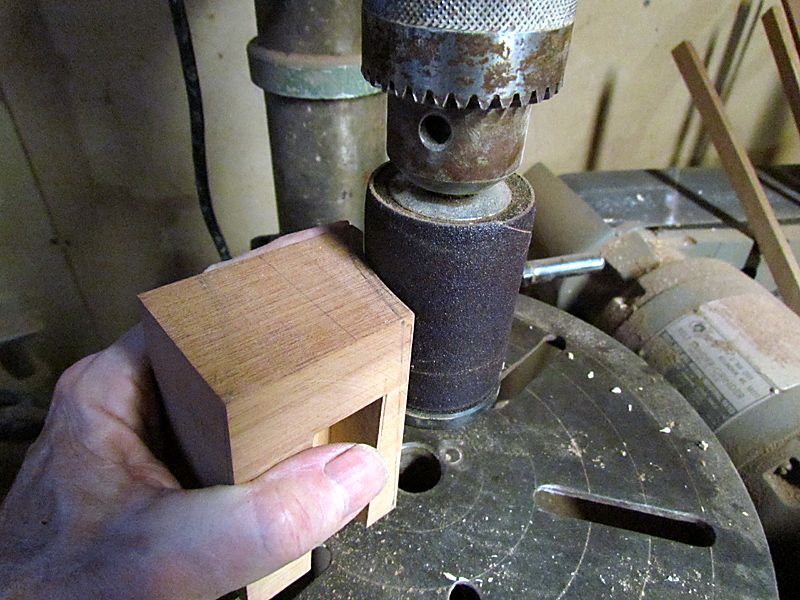
Then I just do a bit of cleanup with a shaped block....
....and here is how it looks
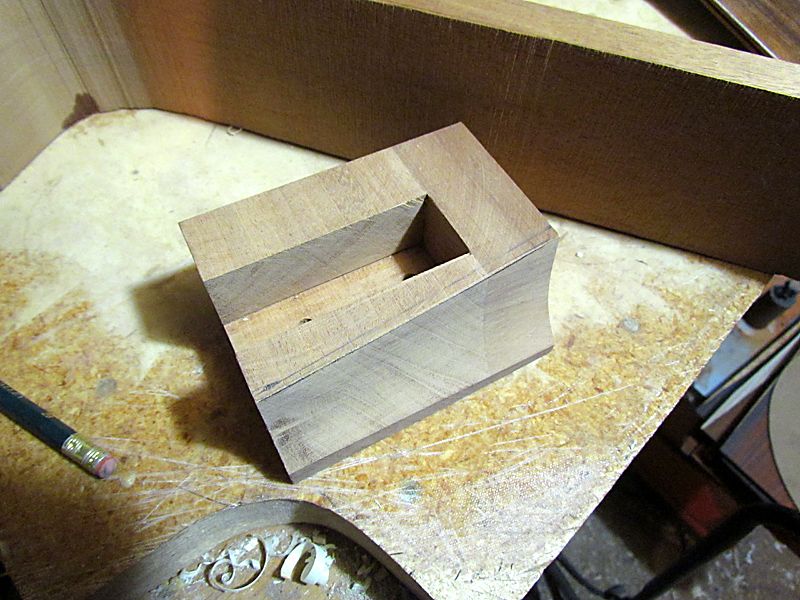
And it took only about 15 minutes
It fits like this
So, I have neck and tail blocks done and the sides profiled and ready to bend for the first guitar
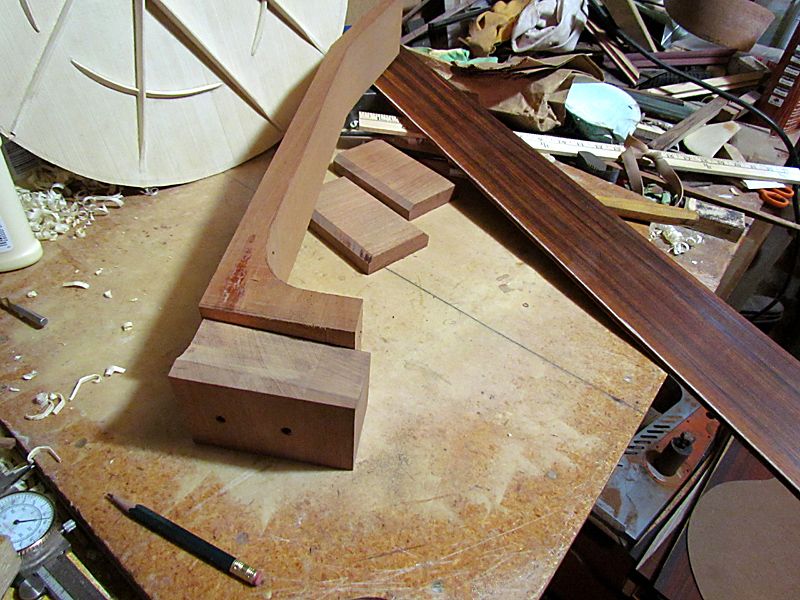
So now, just bend the sides and make the laminated linings (had to fix one of my molds, but did that) and the first one will start looking like a guitar. Feels good to be making progress
G
These guitars have a compound cutaway with the neck heel tapering a bit from side to side rather than being more square like some do. So, I have to make a bit more complex neck block. I trace the curve on the top and bottom of the block and remove most of the waste on the bandsaw. Then I can work up to the lines on a drum sander. With a robo-sander drum in my drill press, I can do most of the shaping like this..
The guide bushing on the robo-sander runs against a finished shape at the end of the block and I can just work my way up until I finish at the correct top shape. Takes a few runs turning end for end, but I don't have to concern myself with sanding too much off
Then I just do a bit of cleanup with a shaped block....
....and here is how it looks
And it took only about 15 minutes
It fits like this
So, I have neck and tail blocks done and the sides profiled and ready to bend for the first guitar
So now, just bend the sides and make the laminated linings (had to fix one of my molds, but did that) and the first one will start looking like a guitar. Feels good to be making progress
G
-
whitespruce
- Site Admin
- Posts: 4367
- Joined: Thu Aug 21, 2008 6:53 am
- Include Off Topic: Yes
- Location: Northern Minnesota, USA
Re: 2 new bar fret guits
Well, I have been sidetracked a bit packing wood and a bit of resawing. Plus a tad of "playing hooky" with the snapper archtop 
I do have the top laminated linings done and hope to bend the sides this weekend, so I will post some progress in a couple of days.
G
I do have the top laminated linings done and hope to bend the sides this weekend, so I will post some progress in a couple of days.
G
-
Dennis Leahy

- Dishwasher
- Posts: 7082
- Joined: Thu Aug 21, 2008 1:59 am
- Include Off Topic: Yes
- Location: looking for a place to live
Re: 2 new bar fret guits
That has to be the most interesting top bracing in the history of lutherie.
Dennis
Dennis
Dennis Leahy
-
whitespruce
- Site Admin
- Posts: 4367
- Joined: Thu Aug 21, 2008 6:53 am
- Include Off Topic: Yes
- Location: Northern Minnesota, USA
Re: 2 new bar fret guits
Well, did not mean to let this slide, but I did get a bit sidetracked with the "snapper". And I been a bit busy with wood.
But I did get this one out today and did some work on the neck and block for the second one. I want to keep both of these going and be able to swap necks on the finished guitars, so that's why I need to do them both at the same time. I did not get the sides bent yet, but will probably do that Friday. I WILL post some photos by Friday or Saturday at the latest. Should be ready to fret the necks by the end of next week.
Stay tuned,
G
-
whitespruce
- Site Admin
- Posts: 4367
- Joined: Thu Aug 21, 2008 6:53 am
- Include Off Topic: Yes
- Location: Northern Minnesota, USA
Re: 2 new bar fret guits
Well, the past couple of days I worked on the necks, tenons and neck blocks. Up until now, every guitar was done individually with no real regard to any standard measurements of the neck to body joint. But now I have realized that there is an advantage to using some standard measurements. For one thing, it increases the likelihood of being able to swap necks from guitar to guitar. So, with this in mind, I made a few quickie templates, mostly for locating neck bolt holes in a consistent manner
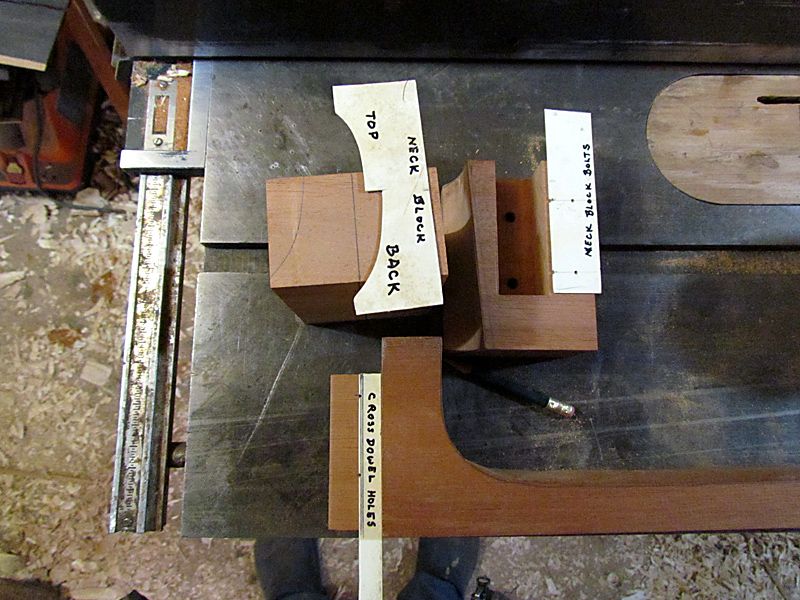
These are just made from heavy weight plastic left over from some vacuum forming material I bought about 30 years ago.
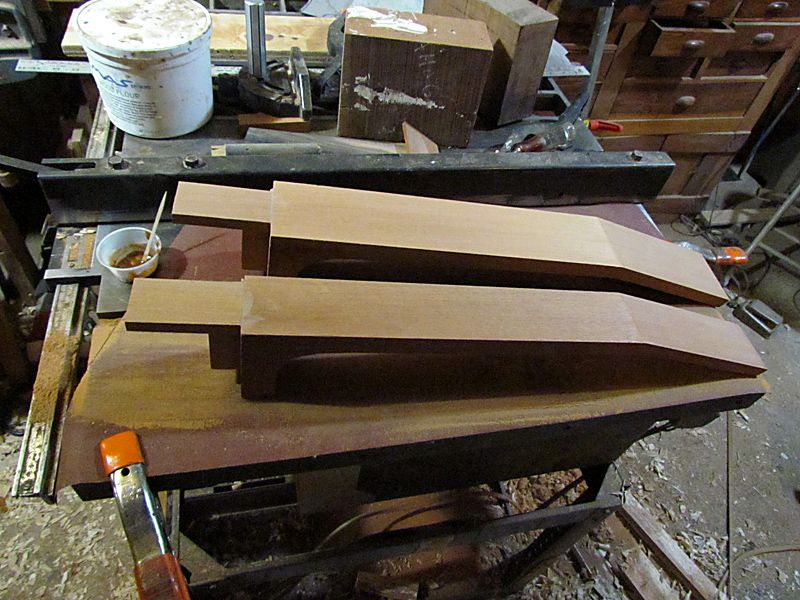
So now I need to get the neck joints ready. First I need a neck extension to support the end of the fingerboard for my adjustable neck joint. I glue this on using marine epoxy thickened with wood flour (fine sanding dust)
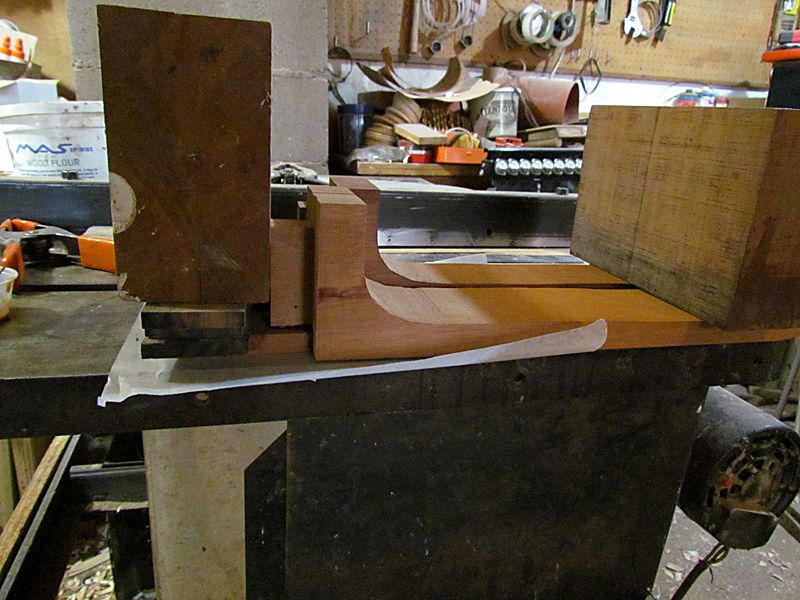
Here they are glued and sanded flush with the neck blank top surface
Then I need to cut a recess in the neck block to accommodate the extension
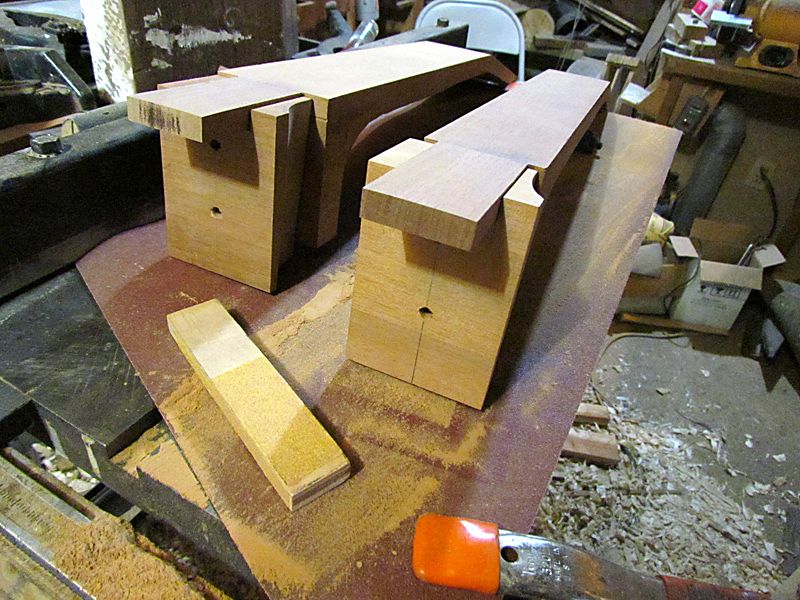
Another view
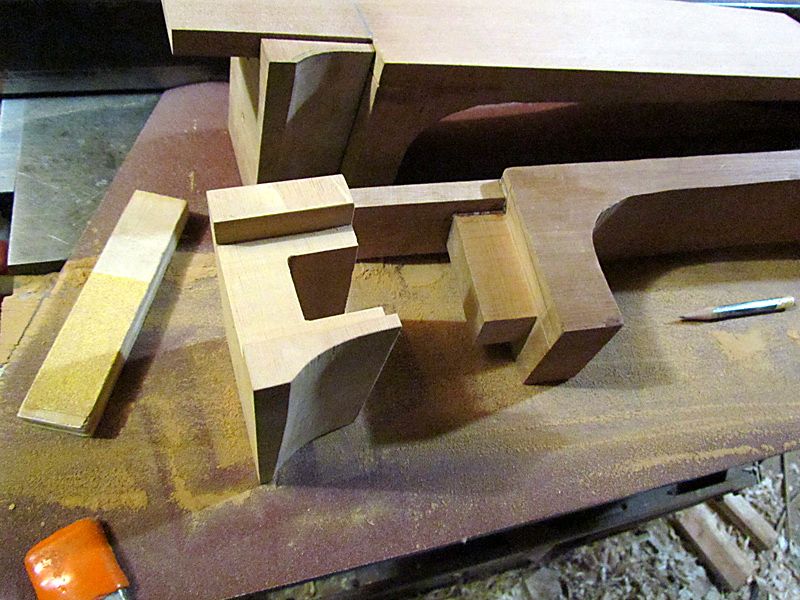
So next I will cut the truss rod slot, glue on the peghead overlay, install the truss rod, and glue on the fingerboard.
Stay tuned,
G
These are just made from heavy weight plastic left over from some vacuum forming material I bought about 30 years ago.
So now I need to get the neck joints ready. First I need a neck extension to support the end of the fingerboard for my adjustable neck joint. I glue this on using marine epoxy thickened with wood flour (fine sanding dust)
Here they are glued and sanded flush with the neck blank top surface
Then I need to cut a recess in the neck block to accommodate the extension
Another view
So next I will cut the truss rod slot, glue on the peghead overlay, install the truss rod, and glue on the fingerboard.
Stay tuned,
G