Page 4 of 11
Re: Organic Soundports
Posted: Fri Dec 14, 2012 5:45 am
by Dave
That rosette looks fantastic Grant

Cheers for posting the build Grant
All the best
Dave
Re: Organic Soundports
Posted: Sun Dec 16, 2012 7:02 pm
by Joe Sustaire
Wow!!!
This is looking great Grant, what's not to like. Built in "mojo".
Joe
Re: Organic Soundports
Posted: Wed Dec 26, 2012 8:57 pm
by whitespruce
Well, I have been gradually doing a few things on this one in between other projects. I have moved this one to the front of the line ahead the other nine in my new builds and will keep it as a separate thread. The snakewood will also be a separate thread, but the other eight will all be handled in one thread, except for when I do the external neck adjustment part on one of them.
So, I braced the top and carved the braces. Just my same old strange bracing pattern that I have shown several times, so no photos of that. Then I made the neck and tail blocks and glued them to the top. Nothing really different there, except that, since the tailblock will show through the ends of the openings in the sides, I faced it with a layer of black veneer.
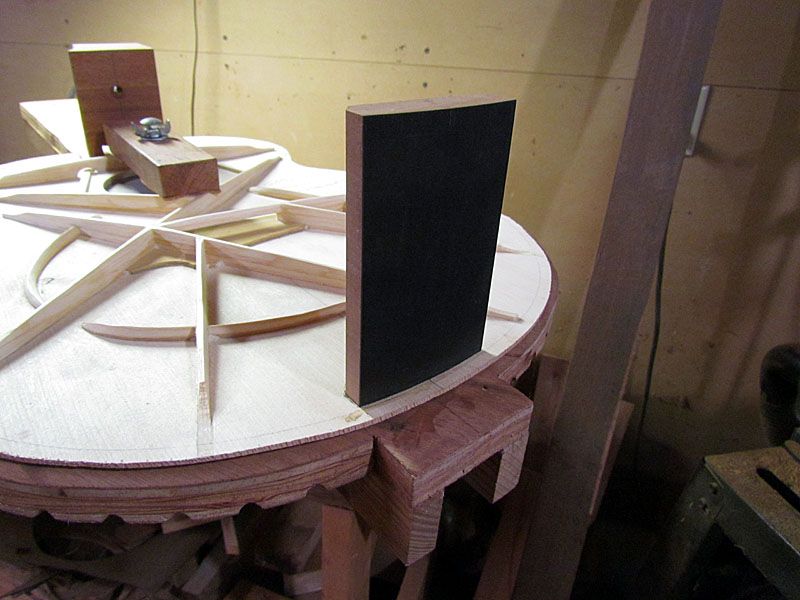
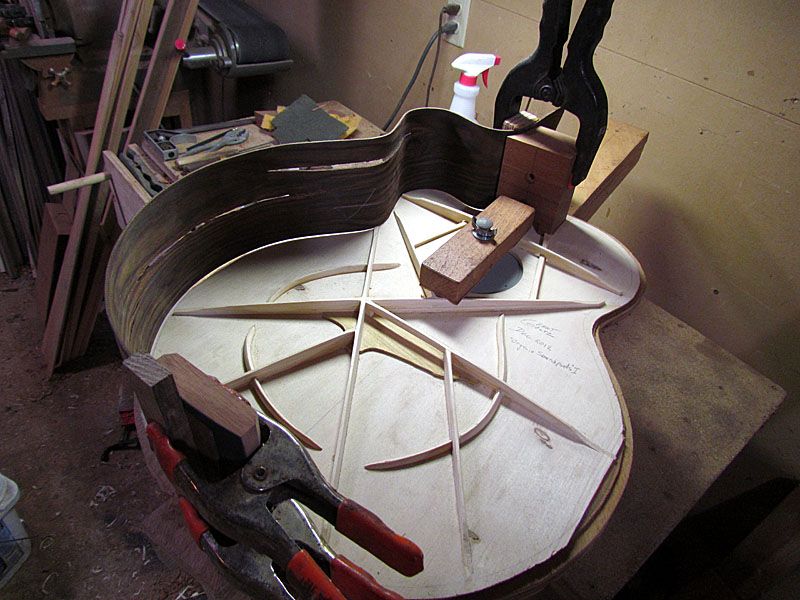
The next step is to dry fit each of the sides and adjust it on the end blocks to where it will best fit the body outline penciled on the inside of the top
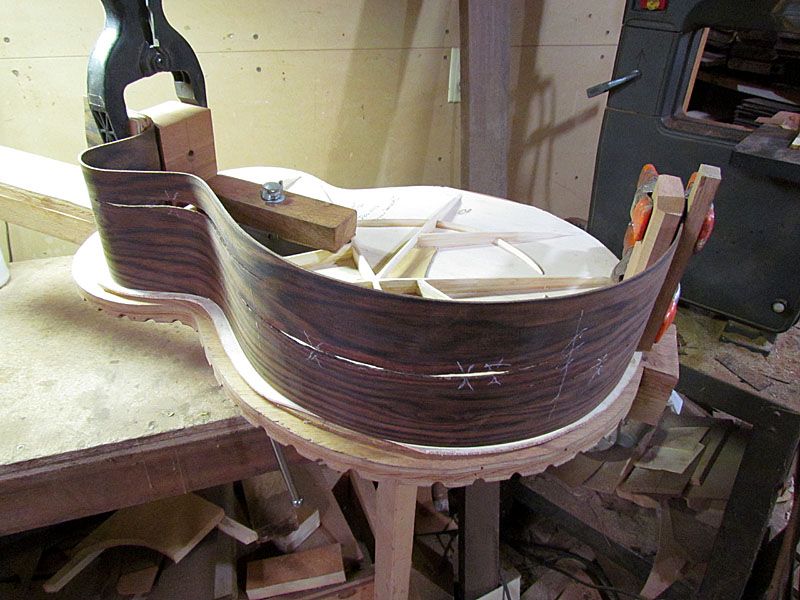
This is the critical step in getting the final size and shape of the body as close as possible to what I have intended
I next mark the final length of the side and mark where the end blocks stop on the inside of the side
This allows me to cut the laminated linings to their proper length. After I cut the top linings to length, I glue them to the sides. That glue-up is drying now and tomorrow I will be ready to finish prepping the sides so that they can be glued to the top. Because of the openings in the sides, I will need to instal the side braces and a few other details before I can glue the sides on. More on that as it happens. I did the same for the other side.
Meanwhile, jumping ahead a bit, I searched my ebony pile for a chunk of the quality that I will need for the fingerboard on this guitar....just any old ebony will not do.
Here is what I selected
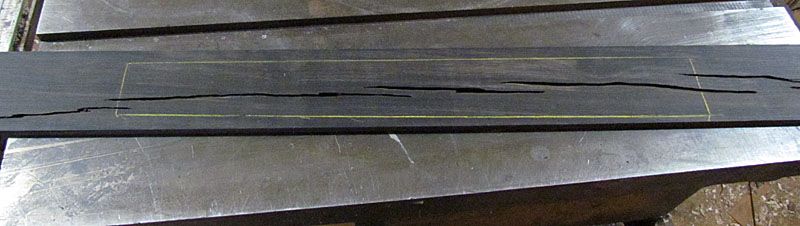
Scarey, eh?

Well, I will let you think on that a bit. I know exactly what I intend to do with this, but will keep it under my hat until the time comes

Stay tuned,
G
Re: Organic Soundports
Posted: Thu Dec 27, 2012 12:39 am
by Dennis Leahy
whitespruce wrote:The next step is to dry fit each of the sides and adjust it on the end blocks to where it will best fit the body outline penciled on the inside of the top
{image}
This is the critical step in getting the final size and shape of the body as close as possible to what I have intended
Check. Double-check. Noted. :~)
whitespruce wrote:Meanwhile, jumping ahead a bit, I searched my ebony pile for a chunk of the quality that I will need for the fingerboard on this guitar....just any old ebony will not do.
Here is what I selected
Scarey, eh?
Well, I will let you think on that a bit. I know exactly what I intend to do with this, but will keep it under my hat until the time comes
G
Well now. Fill it with clear epoxy, and it will look black, and will look like a repair rather than a deliberate act of artistry. You can keep it under your hat, but I'll wager a side bet on a fill with light colored (epoxy+wood dust) material - I'll guess a creamy off white or light tan. I have seen wood turners fill cracks with teeny turquoise chips and epoxy, but I don't think you'll do that. Maybe smashed abalone? Maybe Bloodwood dust? Sumac dust? What's your binding? hahahahaha Don't pay any attention to the pesky kid with all the guesses and questions. Make me wait along with everyone else!
Dennis
Re: Organic Soundports
Posted: Thu Dec 27, 2012 1:45 am
by Garry Hallam
My Guess is that it will be those Nakashima butterfly joint holders that Steve mentioned!
They will also double as position markers

Garry
Re: Organic Soundports
Posted: Fri Dec 28, 2012 2:40 am
by whitespruce
Dennis and Garry, it takes both of you, but together you are on the right track.
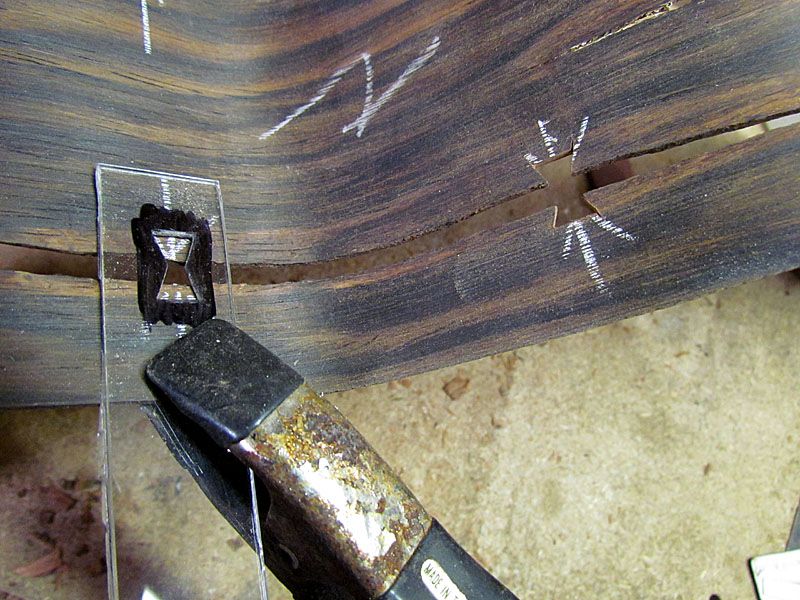
In the meantime, here is how the buterfly keys go in the sides.
I made a template that I clamp on the side and then score with a small X-acto knife to mark where to cut
Then I carefully cut on the score lines with a razor saw and cleaned up the cutouts with a needle file,(no photo because it takes both hands)
Here are a couple of photos of the keys going in
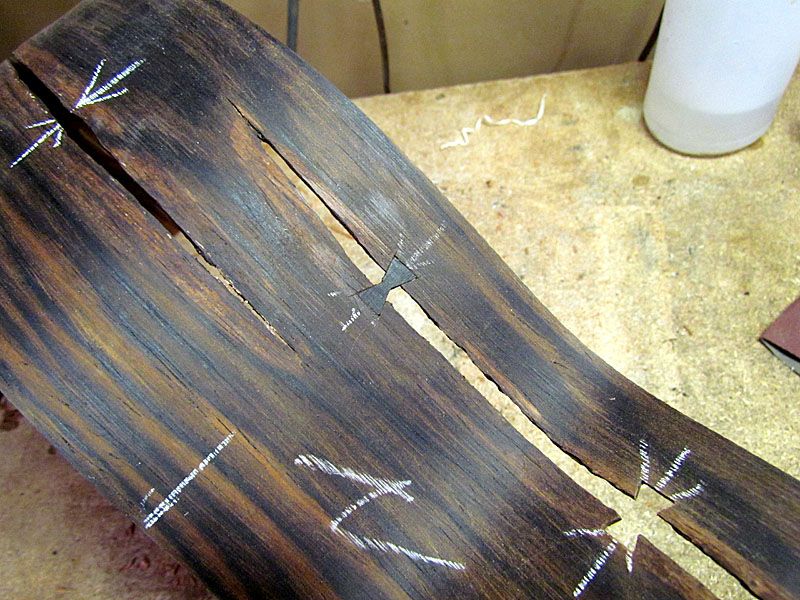
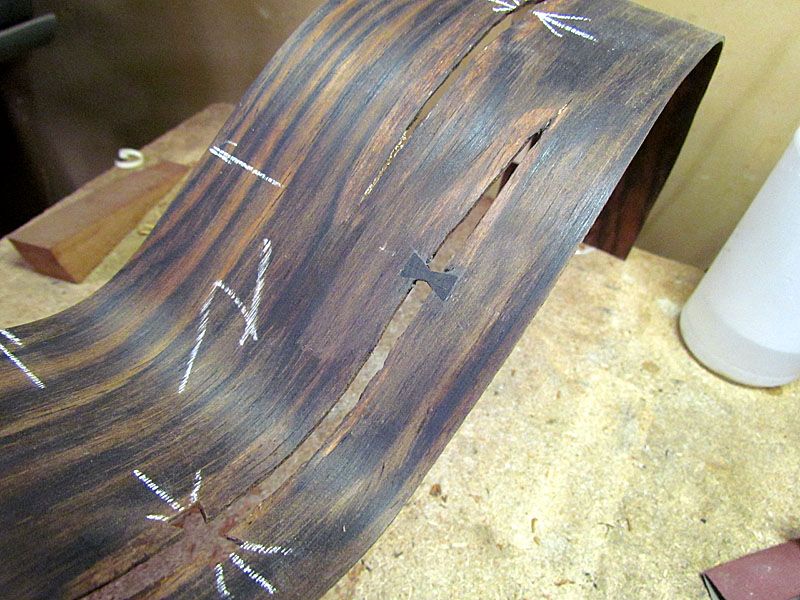
A bit of fidding to get a good fit. I start with a small rectangle of ebony and just file down the keys, then just touch them up with a file until they fit well. Then I CA them in place and sand them flush, inside and out.
Here are all of them on the first side
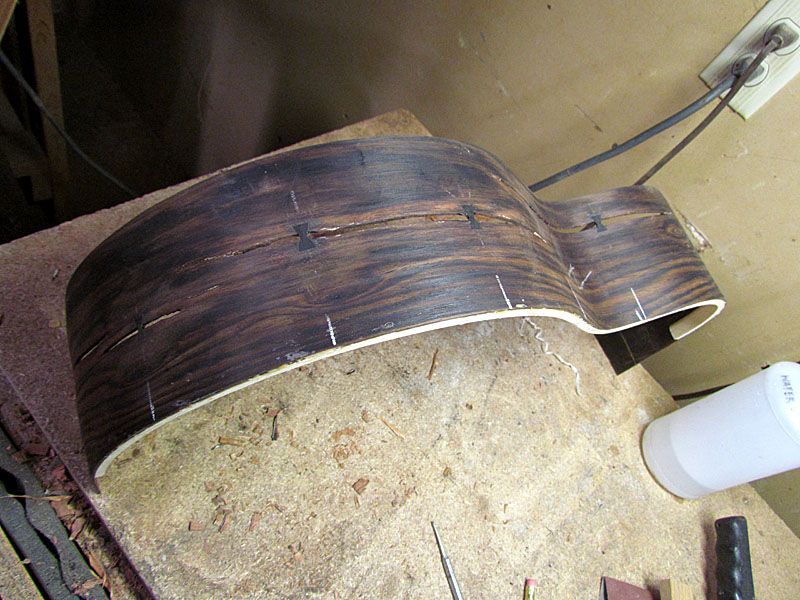
I will back these up with ebony side braces and file those down in the openings to match the butterfly keys. These will look better with the sides finally sanded.
I am thinking ahead to fret wire. Normal fret wire won't go well with this, so I am thinking about making them out of work hardened copper. Any other thoughts?
G
Re: Organic Soundports
Posted: Fri Dec 28, 2012 8:59 am
by mziegler
This is a fantastic build. Love the concept. The suspense on the fretboard is working on my brain. Maybe the fretwire will "reinforce" the defects and no fill will be necessary?
MikeZ
Re: Organic Soundports
Posted: Fri Dec 28, 2012 12:25 pm
by chrisclendenen
Grant,
I just found and read this thread for the first time, and I am staggered already by the beauty I see taking shape here! Amazing! I am a big fan of Nakashima, and other furniture builders who find the beauty of the material in its character, and bring it to life- Hank Gilpin and Toshio Odate come to mind. Pat's bark rosette idea is genius also. I will definitely watching this build!
chris