
Grant, as ever a joy to watch your guitars come together, and a real learning process for the rest of us. No one could ever accuse you of building Martin clones!
Colin
Documenting my 1st thermally modified build, videos added, SOLD
Re: Documenting my first total thermally modified build
There's the Socratic acceptance of the limits of one's own knowledge, then there's ignorance.
Re: Documenting my first total thermally modified build
I'm with Jim in that I really like the flame look on the headstock! Also, Grant you have a pm with a couple questions I sent a few days ago.
Bobby Masten
Sometimes I even crack myself up...
Sometimes I even crack myself up...
-
coopman

- Posts: 843
- Joined: Mon Aug 25, 2008 8:47 am
- Include Off Topic: Yes
- Location: The Fingerlakes NY
- Contact:
Re: Documenting my first total thermally modified build
really nice Grant. Thanks!
John Cooper
"Hard pressed on the right. Center is falling. No possibility to maneuver. Situation excellent. I am attacking." - Gen. Ferdinand
"Hard pressed on the right. Center is falling. No possibility to maneuver. Situation excellent. I am attacking." - Gen. Ferdinand
-
charangohabsburg
- Posts: 354
- Joined: Tue Oct 19, 2010 6:16 pm
- Include Off Topic: Yes
- Location: Switzerland
Re: Documenting my first total thermally modified build
Grant, I love your idea to make a "viewing port"  . You also could mount a camera inside and inlay a monitor in the headstock if that space would not yet be occupied by the logo. Well not really, but at least we have your build thread here.
Good to see that you have more of these stunningly beautiful ebony headstock overlays for your next few guitars!
Good to see that you have more of these stunningly beautiful ebony headstock overlays for your next few guitars!
Markus


-
whitespruce

- Site Admin
- Posts: 4367
- Joined: Thu Aug 21, 2008 6:53 am
- Include Off Topic: Yes
- Location: Northern Minnesota, USA
Re: Documenting my first total thermally modified build
Have not been slacking. but have been busy with people visiting and other chores. Several visitors during the week last week, some overnight, my Son and Shel up over the weekend, Molly here Saturday and Sunday finishing up her kayak, and Sally here Monday working on building a uke.
Finally got some shop time.
Working on the fingerboard and fretting. As I mentioned in another thread, I have the fingerboard radiused. No photos of the process, but here it is done
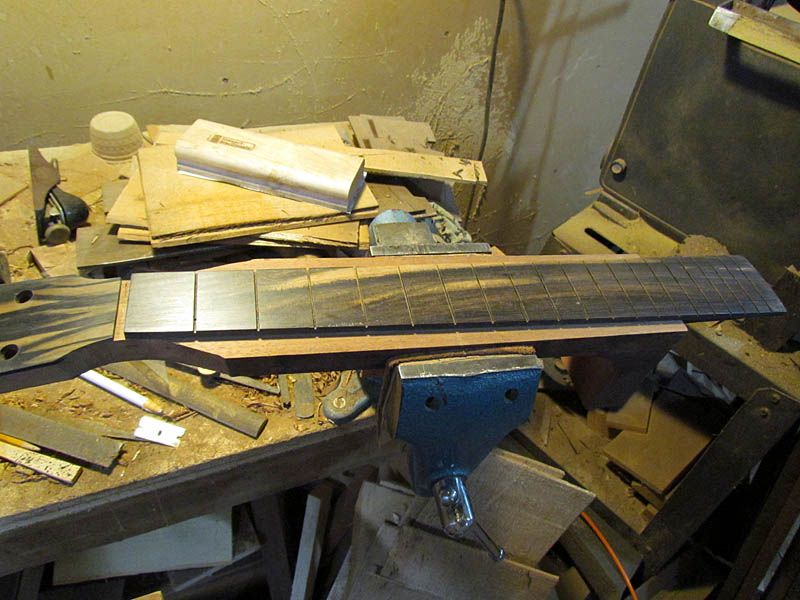
Just need to install the position markers and it is ready for frets.
This one will have spring tempered phosphor bronze bar frets, so need to make them. I band sawed the blanks last week, so now need to radius the top to 16" radius. This also brings them to the correct height, +/- a few thousands. Here, again is my fret radiusing fixture.
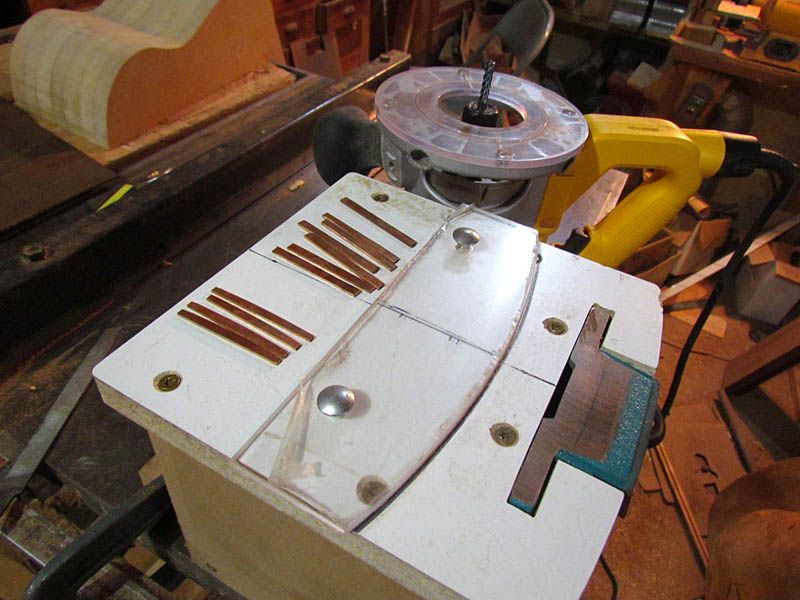
The router has a milling bit installed.
Here I a fret blank clamped for radiusing
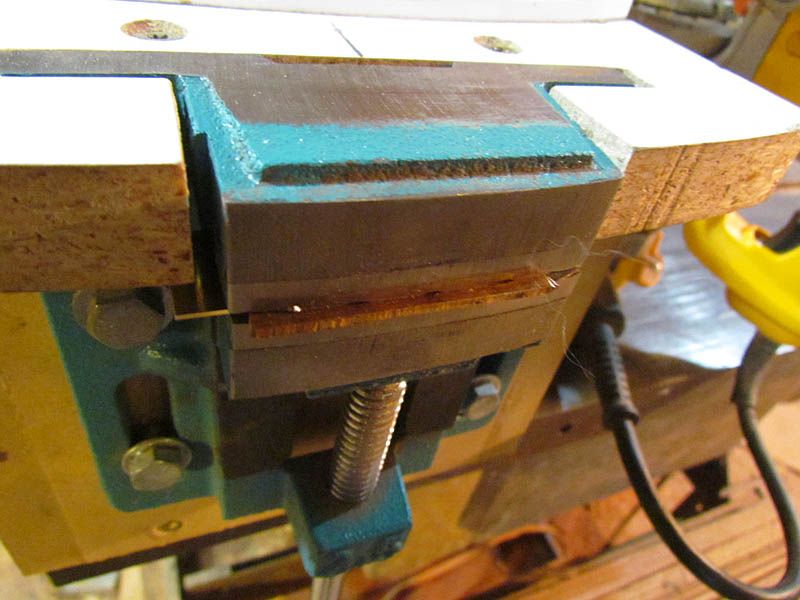
Here it is done

Here are radiused frets on the left and blanks on the right
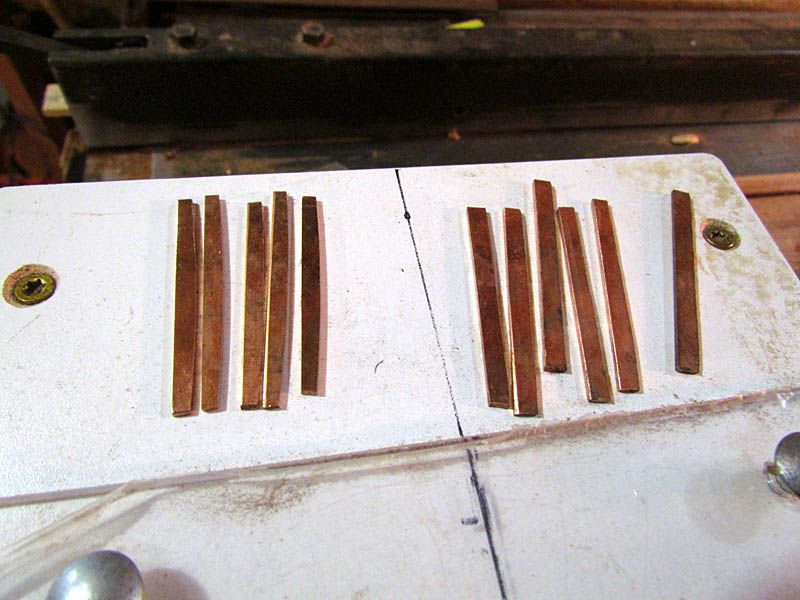
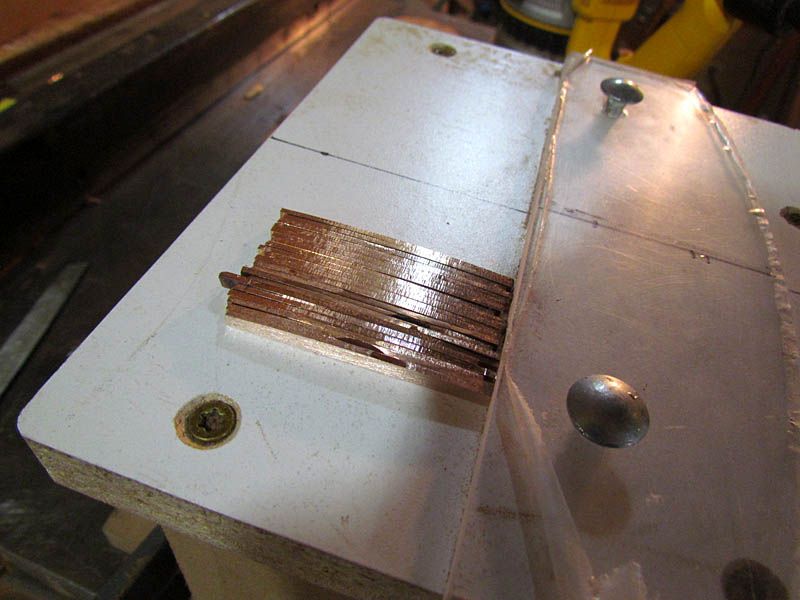
And here are all of the shaped frets
The ones with marks on top are left over from the last guitar. These will need a light touch-up leveling after they are installed, but that should only take a few minutes.
Questions and comments welcome.
G
Finally got some shop time.
Working on the fingerboard and fretting. As I mentioned in another thread, I have the fingerboard radiused. No photos of the process, but here it is done
Just need to install the position markers and it is ready for frets.
This one will have spring tempered phosphor bronze bar frets, so need to make them. I band sawed the blanks last week, so now need to radius the top to 16" radius. This also brings them to the correct height, +/- a few thousands. Here, again is my fret radiusing fixture.
The router has a milling bit installed.
Here I a fret blank clamped for radiusing
Here it is done
Here are radiused frets on the left and blanks on the right
And here are all of the shaped frets
The ones with marks on top are left over from the last guitar. These will need a light touch-up leveling after they are installed, but that should only take a few minutes.
Questions and comments welcome.
G
-
coopman
- Posts: 843
- Joined: Mon Aug 25, 2008 8:47 am
- Include Off Topic: Yes
- Location: The Fingerlakes NY
- Contact:
Re: Documenting my first total thermally modified build
Very clever jig, Grant, It took me a minute, but I see how it works. The curved plexi is the edge guide for your routers round base, right? Do you have some sort of stop in the vise jaw to set a consistent height for each of the frets?
So, at this point (sorry if I missed it) ... will these be glued in somehow? DO you use conventional fret filing tools after they are installed on the finger board?
So, at this point (sorry if I missed it) ... will these be glued in somehow? DO you use conventional fret filing tools after they are installed on the finger board?
John Cooper
"Hard pressed on the right. Center is falling. No possibility to maneuver. Situation excellent. I am attacking." - Gen. Ferdinand
"Hard pressed on the right. Center is falling. No possibility to maneuver. Situation excellent. I am attacking." - Gen. Ferdinand
-
whitespruce
- Site Admin
- Posts: 4367
- Joined: Thu Aug 21, 2008 6:53 am
- Include Off Topic: Yes
- Location: Northern Minnesota, USA
Re: Documenting my first total thermally modified build
Yes, There is a spacer in the vice jaw to set the height of the finished fret. The frets are a very snug fit in the slots, they need to be tapped in for final seating. I do put a bit of glue in the slot, also. The fit is quite critical...a bit too tight and they can back bow the neck. I think the really tight fit and the stiffness it imparts to the neck is what influences the tone and sustain that I am seeing in these guitars. Makes for a very coherent "power train". This is becoming my default fretting. A bit more work, but IMO well worth it.
G
G
-
whitespruce
- Site Admin
- Posts: 4367
- Joined: Thu Aug 21, 2008 6:53 am
- Include Off Topic: Yes
- Location: Northern Minnesota, USA
Re: Documenting my first total thermally modified build
OK, moving on with the fretting. BTW, I know my bench area is a total mess, but what I have been doing is a messy process. That done, my next task will be to clean up, so please excuse.
First, I needed to install the position markers
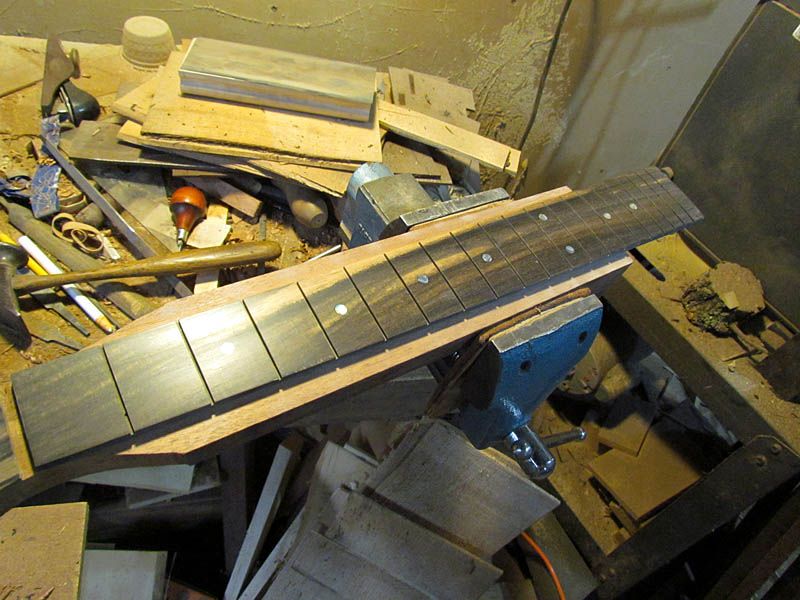
Done, just pau dots
And here are the frets, ready to go

I have polished these to just tiny hair under 0.060" on a flat 150 grit sanding block
Checking and adjusting the fret slots
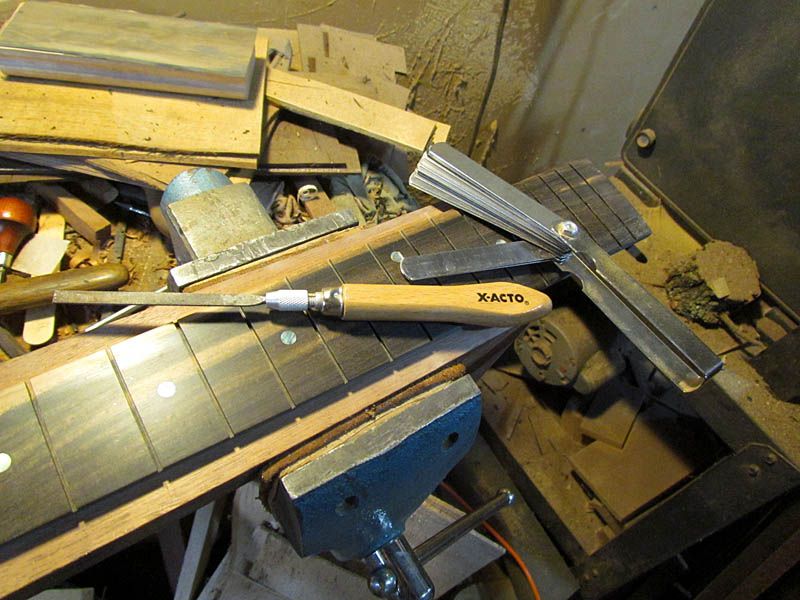
Aiming for an easy 0.060 fit. A few strokes of the slot edges with the file takes care of any tight slots, about a 5 minute process
First 6 frets installed
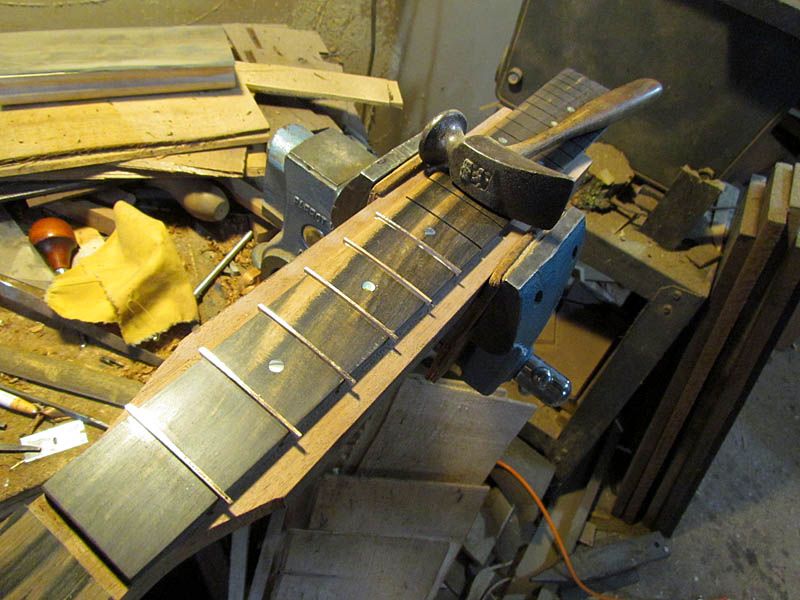
Light bead of glue on fret, push part way in by hand, and tap down tight with my cobbler's hammer
All frets installed
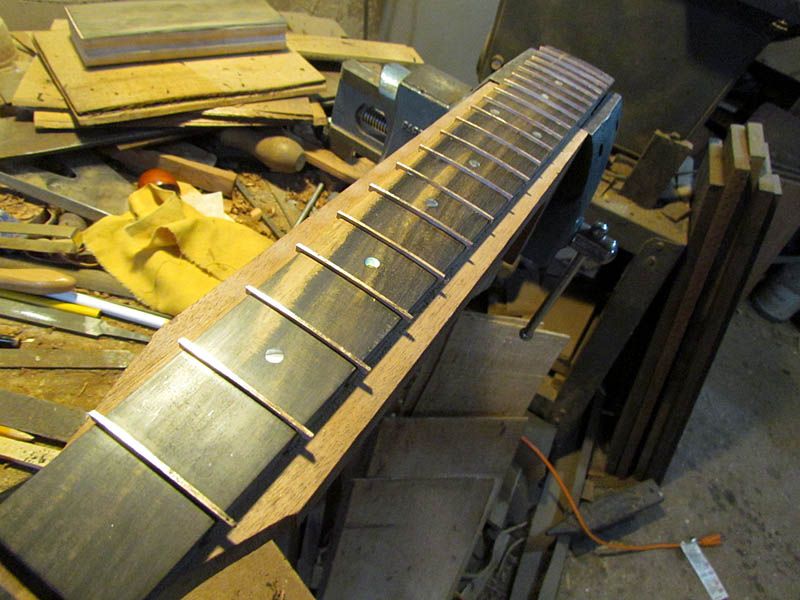
This took about 20 minutes
Then leveled the frets
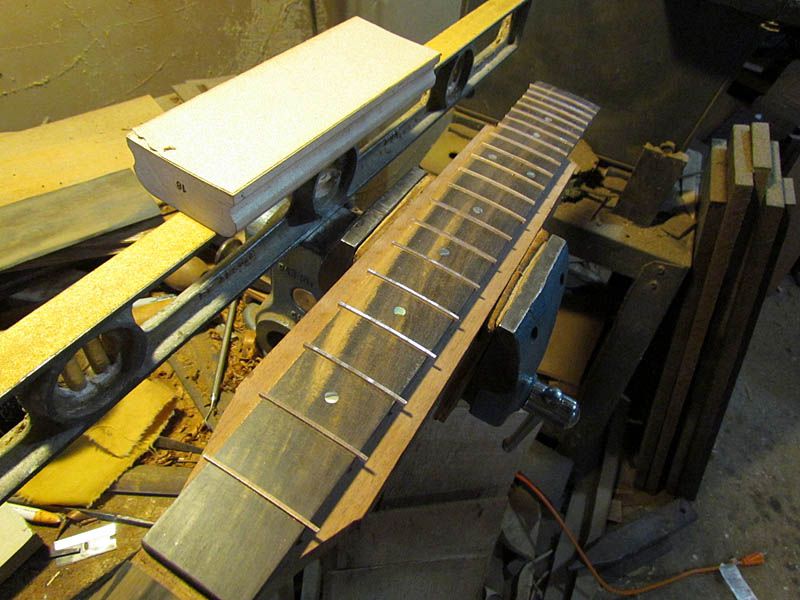
First, I put black marker on fret tops. Then used 80 grit on the edge of a 2 foot level, alternating with the Stew-Mac block to maintain the radius. After a few strokes, I checked for any unusually high frets and gave them a few taps to seat them better. Finished down to 400 grit. Whole leveling took 10 minutes.
I did a rough crowning to knock the sharp edges off
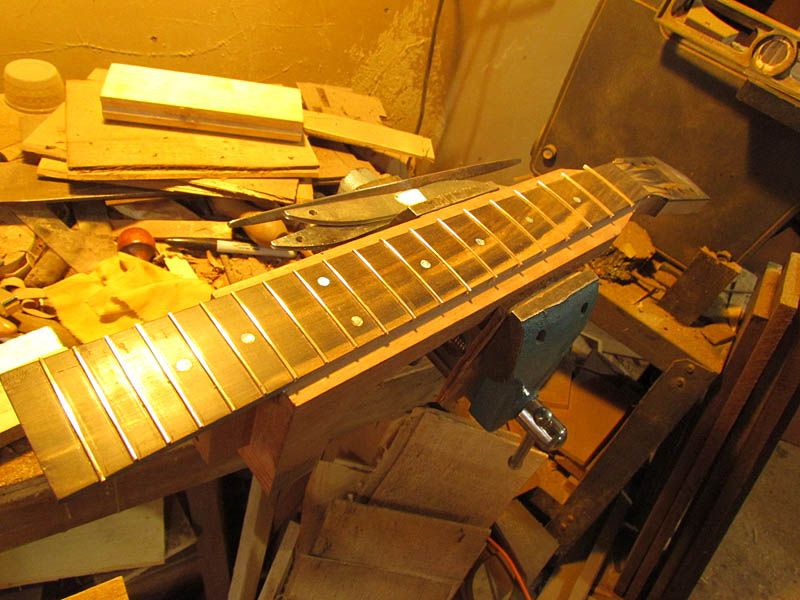
After I clip the fret ends, I will finish the crowning, polish the frets, and clean up the board.
This is the third board that I have done like this, and the process has become routine. Once I have the frets ready, it really doesn't take any longer than regular frets. Takes a bit of good attention to details with the slots and such. I am comfortable, at this point, to relegate standard frets to an option on my guitars. Just ordered up a bigger chunk of 0.062" spring tempered phosphor bronze.
I am willing to help anybody try this. I can supply shaped frets, ready to go....takes me about an hour of shop time and $5 worth of metal. You will need a different fret slotting blade, but it is cheap. Just ask, and I will post up all the details. The improvement in tone is very real.
G
First, I needed to install the position markers
Done, just pau dots
And here are the frets, ready to go
I have polished these to just tiny hair under 0.060" on a flat 150 grit sanding block
Checking and adjusting the fret slots
Aiming for an easy 0.060 fit. A few strokes of the slot edges with the file takes care of any tight slots, about a 5 minute process
First 6 frets installed
Light bead of glue on fret, push part way in by hand, and tap down tight with my cobbler's hammer
All frets installed
This took about 20 minutes
Then leveled the frets
First, I put black marker on fret tops. Then used 80 grit on the edge of a 2 foot level, alternating with the Stew-Mac block to maintain the radius. After a few strokes, I checked for any unusually high frets and gave them a few taps to seat them better. Finished down to 400 grit. Whole leveling took 10 minutes.
I did a rough crowning to knock the sharp edges off
After I clip the fret ends, I will finish the crowning, polish the frets, and clean up the board.
This is the third board that I have done like this, and the process has become routine. Once I have the frets ready, it really doesn't take any longer than regular frets. Takes a bit of good attention to details with the slots and such. I am comfortable, at this point, to relegate standard frets to an option on my guitars. Just ordered up a bigger chunk of 0.062" spring tempered phosphor bronze.
I am willing to help anybody try this. I can supply shaped frets, ready to go....takes me about an hour of shop time and $5 worth of metal. You will need a different fret slotting blade, but it is cheap. Just ask, and I will post up all the details. The improvement in tone is very real.
G