
Well, I have been a bit busy the past couple of days and this weekend, Molly is coming over to work on her kayak, so things will be sitting for a bit.
I next need to make the laminated linings, and do the neck heel and the end blocks. Then I can start assembling the box, probably by middle of this next week.
Check back in a few days.
G
Documenting my 1st thermally modified build, videos added, SOLD
-
whitespruce

- Site Admin
- Posts: 4367
- Joined: Thu Aug 21, 2008 6:53 am
- Include Off Topic: Yes
- Location: Northern Minnesota, USA
-
Pat Foster

- Moderator
- Posts: 1724
- Joined: Sun Nov 30, 2008 12:19 pm
- Include Off Topic: Yes
- Location: Spokane, Eastern Washington
- Contact:
Re: Documenting my first total thermally modified build
Grant,
I'd love to do some Chladni voodoo on one of your braced tops. Might be real interesting!
Pat
I'd love to do some Chladni voodoo on one of your braced tops. Might be real interesting!
Pat
"The large print giveth, and the small print taketh away." — Tom Waits
__________________________________
http://www.patfosterguitars.com
__________________________________
http://www.patfosterguitars.com
-
printer2

- Posts: 430
- Joined: Sat Jun 15, 2013 3:18 pm
- Include Off Topic: Yes
- Location: Fred in Winnipeg
Re: Documenting my first total thermally modified build
Sprinkle the top with some black ebony dust, woooo.... ...scary.Pat Foster wrote:Grant,
I'd love to do some Chladni voodoo on one of your braced tops. Might be real interesting!
Pat
-
whitespruce
- Site Admin
- Posts: 4367
- Joined: Thu Aug 21, 2008 6:53 am
- Include Off Topic: Yes
- Location: Northern Minnesota, USA
Re: Documenting my first total thermally modified build
Dave Livermore tried it last year at Stringfest. Stuff was bouncing on almost the whole top, more or less in closely spaced concentric rings. But there did not seem to be any "dead' spots. Go figure.Pat Foster wrote:Grant,
I'd love to do some Chladni voodoo on one of your braced tops. Might be real interesting!
Pat
G
-
whitespruce
- Site Admin
- Posts: 4367
- Joined: Thu Aug 21, 2008 6:53 am
- Include Off Topic: Yes
- Location: Northern Minnesota, USA
Re: Documenting my first total thermally modified build
About ready to start putting the box together, but first had to make a few parts....end blocks and linings and do the neck joint.
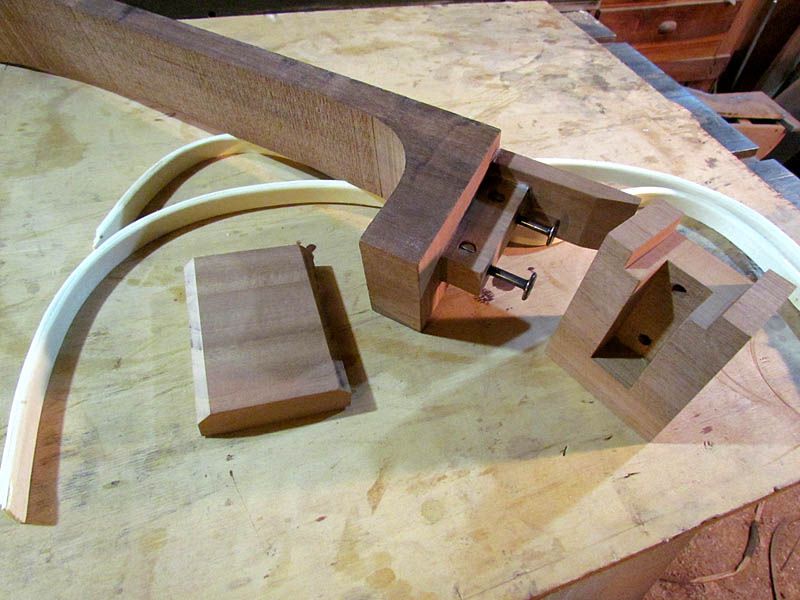
The linings are just regular 1/16 poplar veneer, 4 layers thick (thanks, Colin). The end blocks and, of course, the neck are of thermally modified HOG.
The thermally modified wood is a bit different to work with. Sands easier, carves good, and is maybe a bit more "brittle" (maybe not the right word" in the same sense that hide glue is a bit more brittle than Titebond. This is probably one factor that gives it better tone.
The other thing is that the thermal treatment make HOG look more like walnut
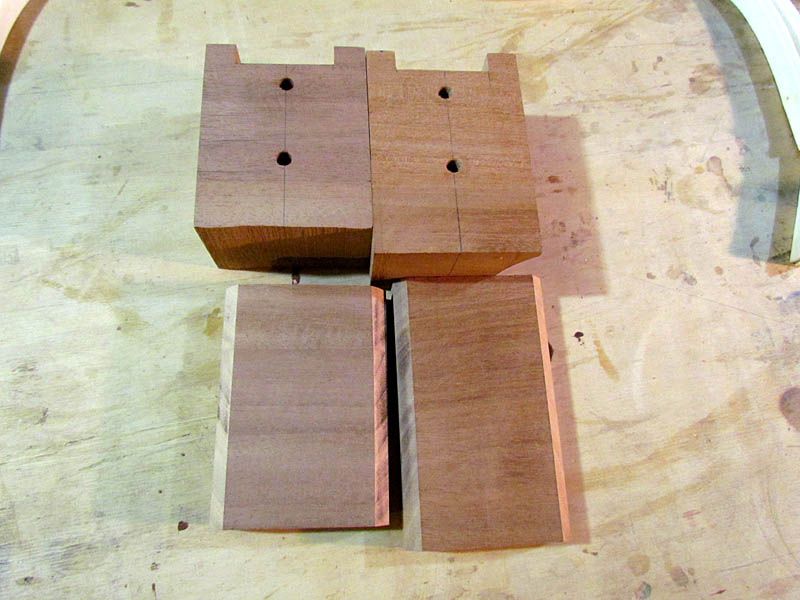
Thermally treated on left, untreated on right.
On to the next step.
G
The linings are just regular 1/16 poplar veneer, 4 layers thick (thanks, Colin). The end blocks and, of course, the neck are of thermally modified HOG.
The thermally modified wood is a bit different to work with. Sands easier, carves good, and is maybe a bit more "brittle" (maybe not the right word" in the same sense that hide glue is a bit more brittle than Titebond. This is probably one factor that gives it better tone.
The other thing is that the thermal treatment make HOG look more like walnut
Thermally treated on left, untreated on right.
On to the next step.
G
-
Pat Foster
- Moderator
- Posts: 1724
- Joined: Sun Nov 30, 2008 12:19 pm
- Include Off Topic: Yes
- Location: Spokane, Eastern Washington
- Contact:
Re: Documenting my first total thermally modified build
Cool! So can you thermally modify walnut to make it look like mahogany? 
Pat
Pat
"The large print giveth, and the small print taketh away." — Tom Waits
__________________________________
http://www.patfosterguitars.com
__________________________________
http://www.patfosterguitars.com
-
whitespruce
- Site Admin
- Posts: 4367
- Joined: Thu Aug 21, 2008 6:53 am
- Include Off Topic: Yes
- Location: Northern Minnesota, USA
Re: Documenting my first total thermally modified build
I will tell you after I take the next batch to ThermowoodPat Foster wrote:Cool! So can you thermally modify walnut to make it look like mahogany?
Pat
G
-
whitespruce
- Site Admin
- Posts: 4367
- Joined: Thu Aug 21, 2008 6:53 am
- Include Off Topic: Yes
- Location: Northern Minnesota, USA
Re: Documenting my first total thermally modified build
Well, I have not been slacking on the building....just the documentation. I will attempt to catch up a bit.
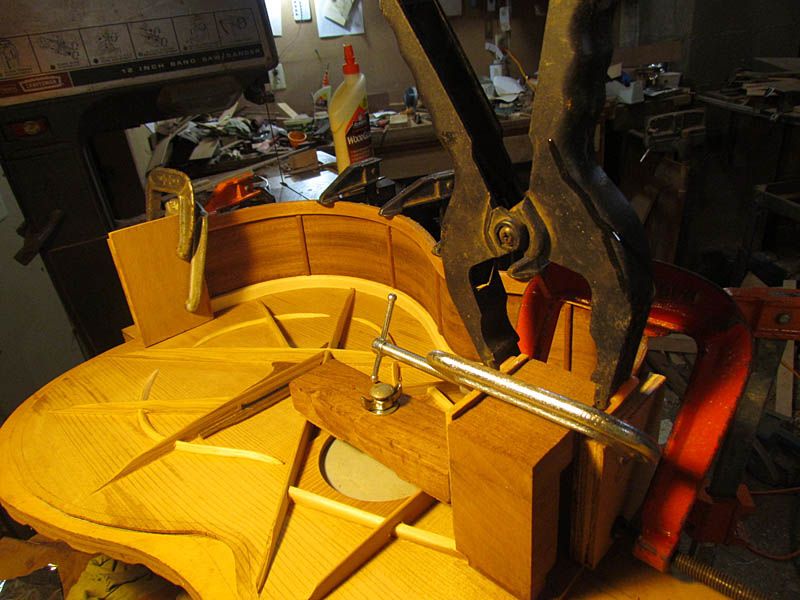
Since I build on a work board without a mold, my first step in putting the box together is to glue the end blocks to the top
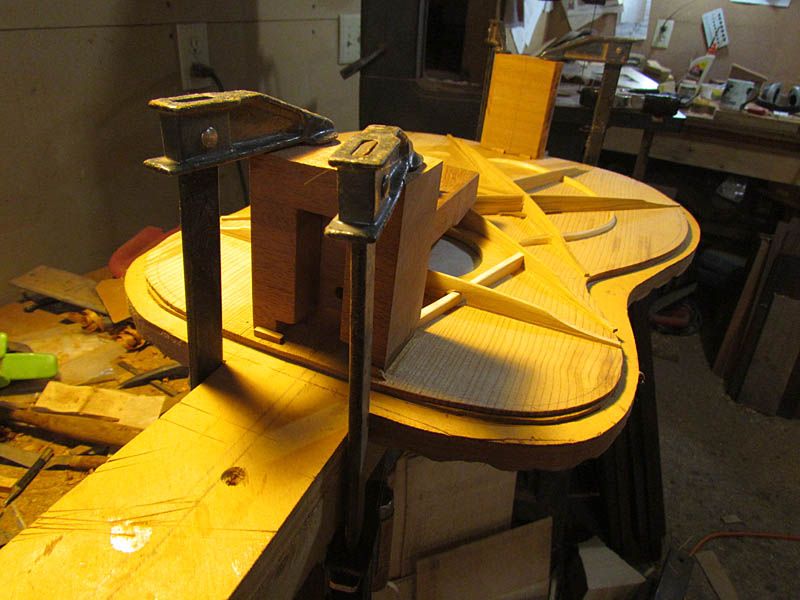
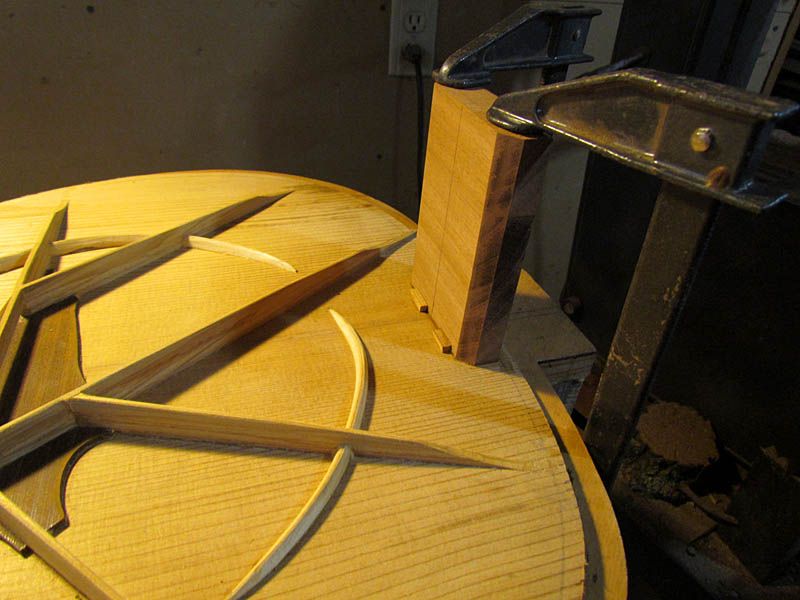

Notice the small alignment blocks glued to the top. These keep the blocks square with the guitar body during clamping. They are carved off after the glue is dry.
Next, I test fit the sides and mark the exact length and the end points of the linings (no photo)
After trimming the sides to length, I test fit the linings to the sides and trim them to length
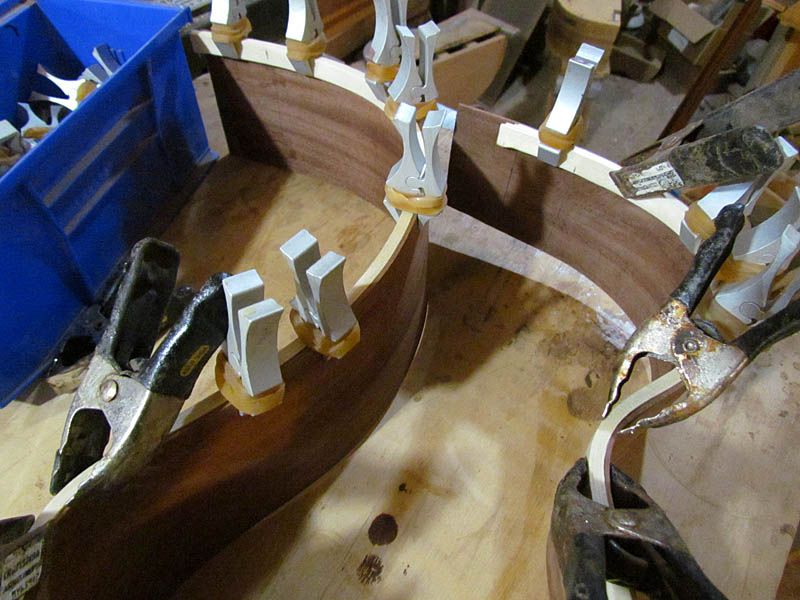
Then I glue the linings to the sides
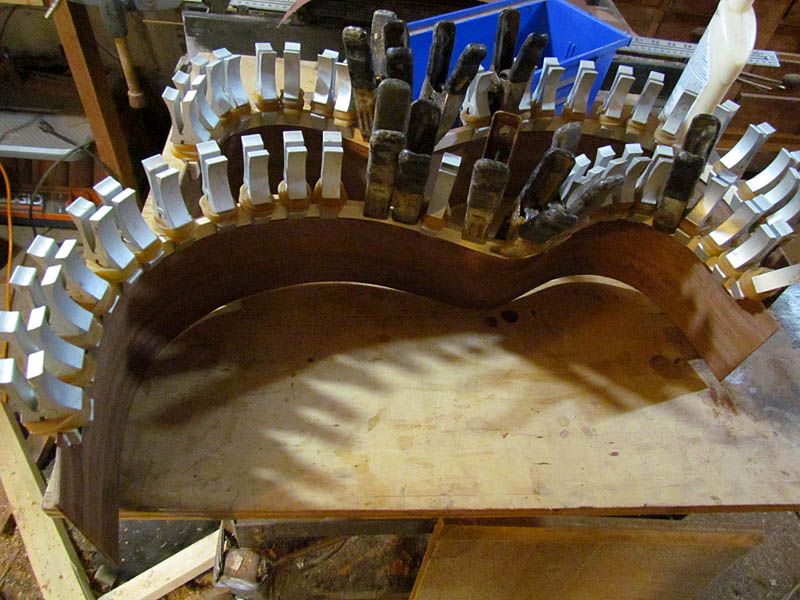
This is the top lining. I did the same with the back linings. In the past, I have done the back linings after the sides were glued to the top. With the stiffer thermally modified sides, I found it worked better to do both linings up front.
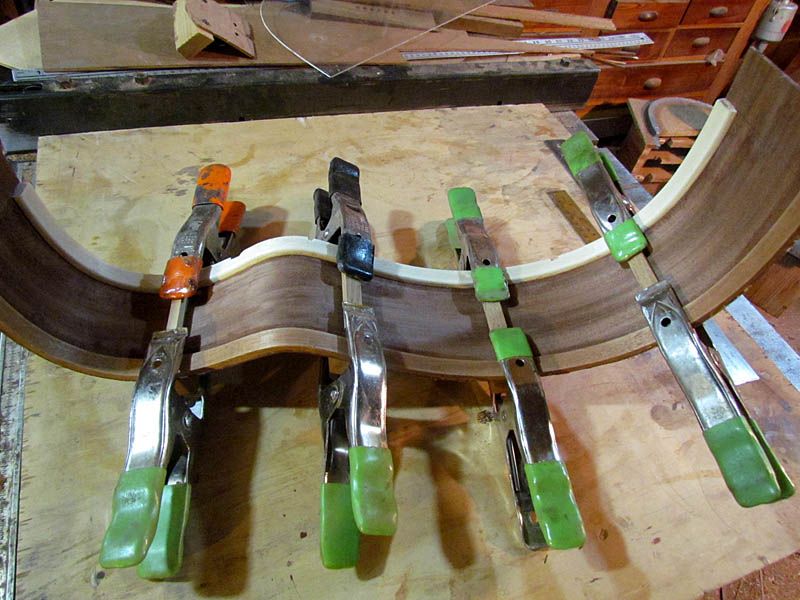
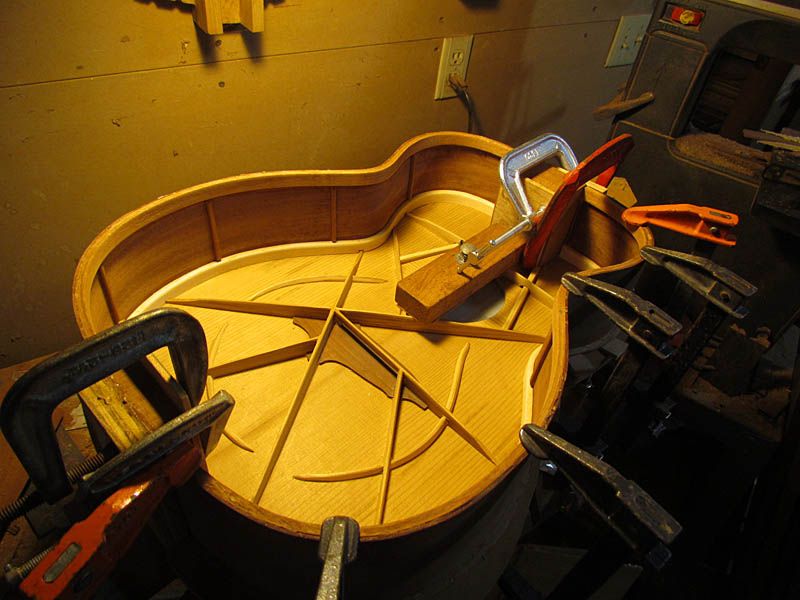
I also glued the side braces before gluing the sides to the top
With everything glued on the sides, they are extremely ridgid, so it is quite easy to glue on one at a time. Here is the first side being glued on
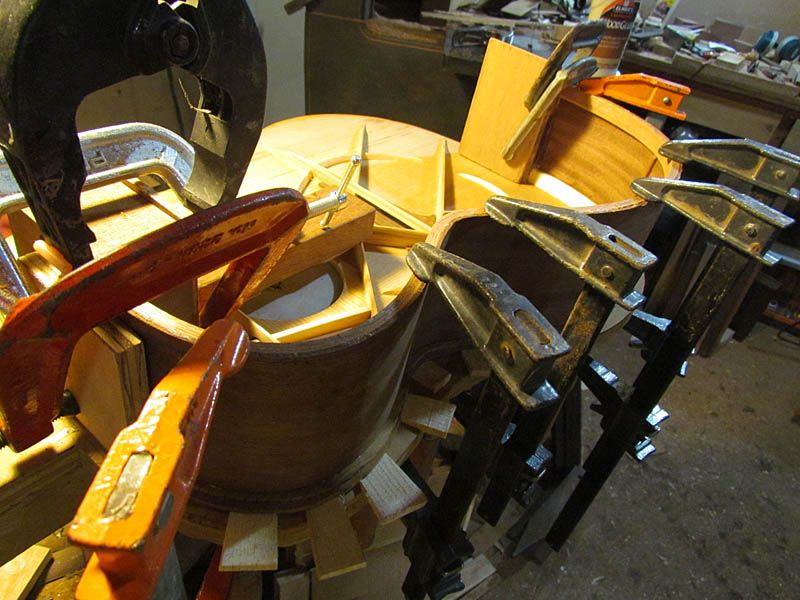
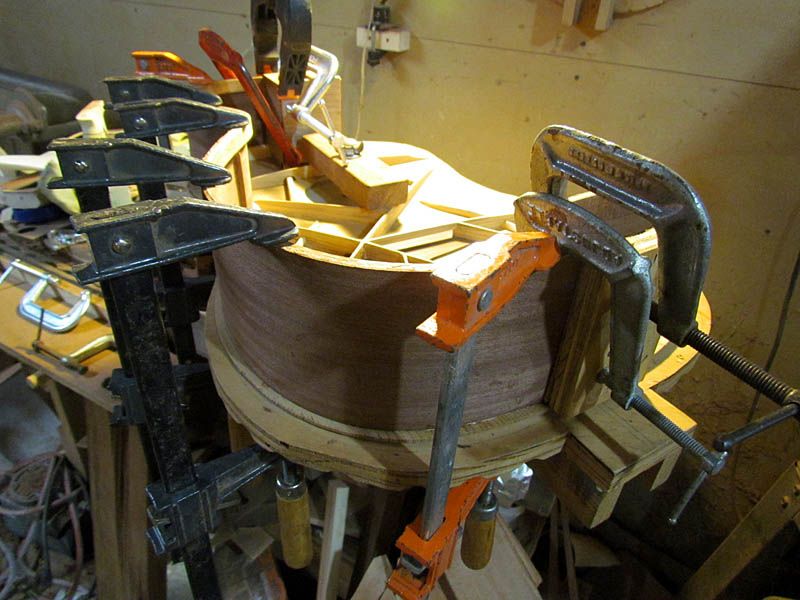
And the second side

The next step is to join and brace the back. I will be using my regular laminated double X, and I want to do it with thermally modified brace wood. So, I just wrapped a bundle of my regular mahogany bracing strips in aluminum foil and baked them at 380F for 45 minutes. They did get up to a bit over 400F for about 10 minutes.
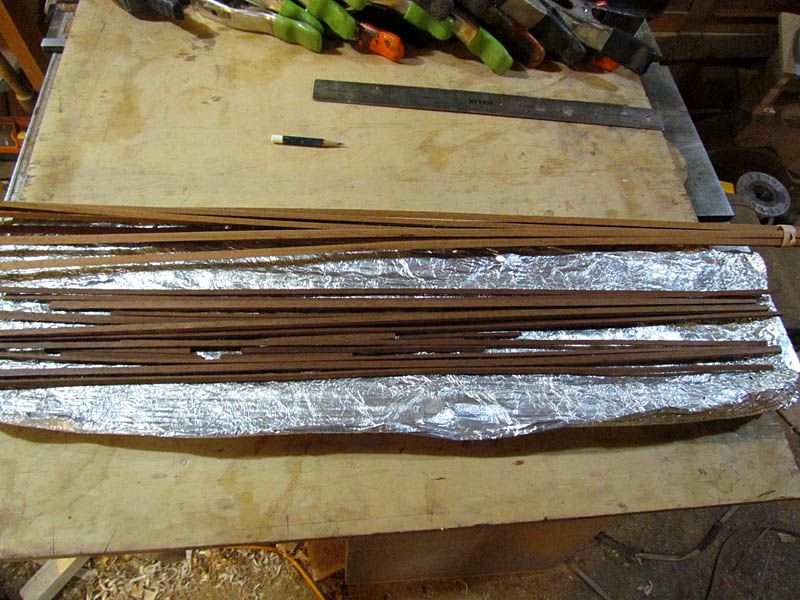
They came out fine, with a nice musical tone. Note the uncooked strips in the back for comparison.
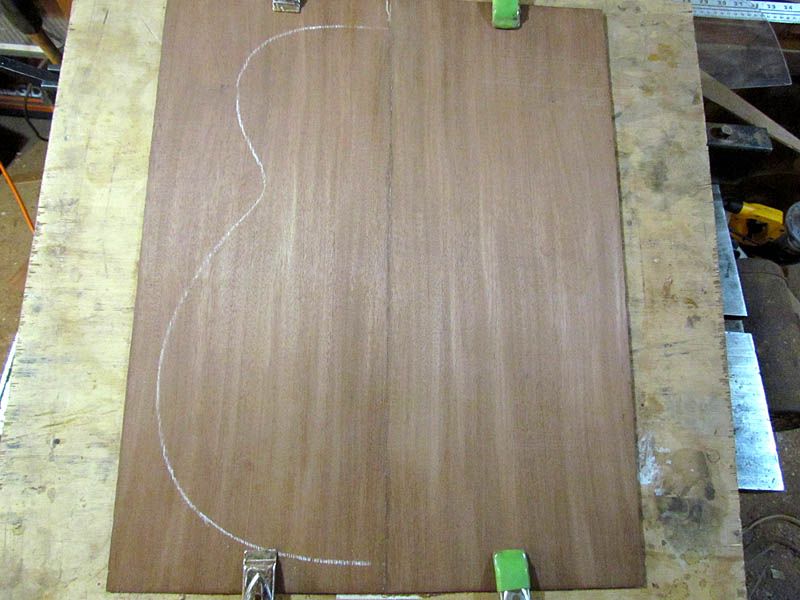
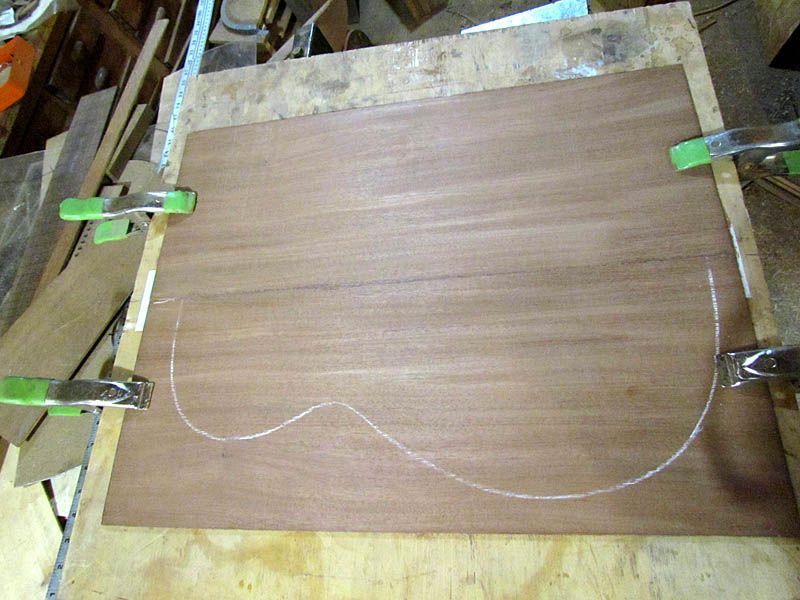
And here is the joined and thicknessed back
Next, I will show the back bracing.
G
Since I build on a work board without a mold, my first step in putting the box together is to glue the end blocks to the top
Notice the small alignment blocks glued to the top. These keep the blocks square with the guitar body during clamping. They are carved off after the glue is dry.
Next, I test fit the sides and mark the exact length and the end points of the linings (no photo)
After trimming the sides to length, I test fit the linings to the sides and trim them to length
Then I glue the linings to the sides
This is the top lining. I did the same with the back linings. In the past, I have done the back linings after the sides were glued to the top. With the stiffer thermally modified sides, I found it worked better to do both linings up front.
I also glued the side braces before gluing the sides to the top
With everything glued on the sides, they are extremely ridgid, so it is quite easy to glue on one at a time. Here is the first side being glued on
And the second side
The next step is to join and brace the back. I will be using my regular laminated double X, and I want to do it with thermally modified brace wood. So, I just wrapped a bundle of my regular mahogany bracing strips in aluminum foil and baked them at 380F for 45 minutes. They did get up to a bit over 400F for about 10 minutes.
They came out fine, with a nice musical tone. Note the uncooked strips in the back for comparison.
And here is the joined and thicknessed back
Next, I will show the back bracing.
G