Another Bass Build

Yes, it's true, not all guitars are acoustics; some have single coils and some have buckers, and all of those have some serious electrons. Build 'em, work on 'em, mods, questions, Put 'em here!
Tedward
Posts: 67
Joined: Sat Dec 25, 2010 11:11 am
Include Off Topic: Yes
Location: Moreno Valley,Califoria

Another Bass Build

Post by Tedward » Sun Aug 25, 2013 1:05 am

This one is a neck through P-bass stile. Spalt maple top and ribbon mahogany body. Five piece flame maple and mahogany neck. Two dual coil home brew pickups and preamp.
Image
Thickness sanding
Image
Neck blank and wings
Image
Now it is ready to cut
Image

More to come
Tedward

User avatar
Fred Blom
Posts: 555
Joined: Tue Jan 20, 2009 12:07 pm
Include Off Topic: Yes
Location: Montevideo, MN

Re: Another Bass Build

Post by Fred Blom » Sun Aug 25, 2013 8:56 am

I imagine this will produce some fine sustain. Keep it comin'
Fred Blom
Remember the joy of the journey

Tedward
Posts: 67
Joined: Sat Dec 25, 2010 11:11 am
Include Off Topic: Yes
Location: Moreno Valley,Califoria

Re: Another Bass Build

Post by Tedward » Sun Aug 25, 2013 9:58 am

Now it is ready to hog out the body. I use a 1 3/8" Forstner bit and a drill press for the main part and then a 1/2" straight bit in a router to clean things up. I did rember to measure the cutting depth of the tip of the Forstner bit so that when I routed with the 1/2" bit I could clean out the little craters and still have enough thickness to the back, which is .330".
Image
All cleaned up
Image
To the band saw and rough cut the wings. I leave 1/8" to 1/4" outside the final shape to be removed latter.
Image
The neck needs to be cut next. Head stock angle and thickness
Image
With the wings glued to the neck. I used the cut off pieces from the wings to give the clamps a flat surface. Sorry no pic at the time so I did a mock up after the fact.
Image
Image

Tedward

User avatar
DaveAnderson
Posts: 1123
Joined: Fri Nov 21, 2008 10:18 am
Include Off Topic: Yes
Location: Clearwater,Fl.

Re: Another Bass Build

Post by DaveAnderson » Mon Aug 26, 2013 7:44 am

Interesting..and looking good!
Anderson Guitars
Clearwater,Fl.

Tedward
Posts: 67
Joined: Sat Dec 25, 2010 11:11 am
Include Off Topic: Yes
Location: Moreno Valley,Califoria

Re: Another Bass Build

Post by Tedward » Mon Aug 26, 2013 6:45 pm

Thanks Dave.
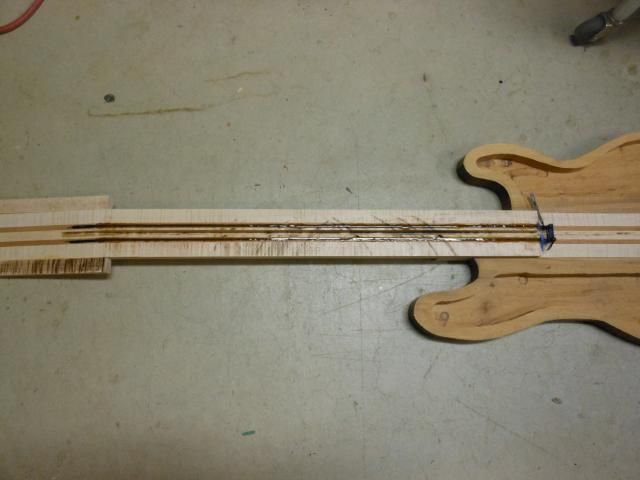
Time for the truss rod and carbon fiber. On this build I went with a dual action rod and carbon fiber Tow. The Tow is like a ribbon with carbon fiber strands that are a continual length. Where as the rods are short strands running parallel to each other. The Tow is supposed to be stiffer than the rod once it is epoxied. It comes in various amount of strands from 1000 to 80,000. I'm using 6000 strands.
Image
When I ordered the Tow the tech told me to put it under tension while the epoxy cures. I had to think about how to do this for a couple days and came up with this idea. I drove a screw at the end of each slot at the body end and a 1/2" brad at the head stock end. All the holes will
be covered so I wont have to worry about holes. I tied the Tow to the screw and ran it up the slot and around the brad and back down to the screw and pulled it tight. Crossed over to the other screw and up and back like the first one pulled it tight and tied it off. I now have 12,000 strands per channel. Filled the slots with slow cure epoxy and let it cure over night. Scrapped off the excess to level it off and ready for the fret board.
Image
Image
Image
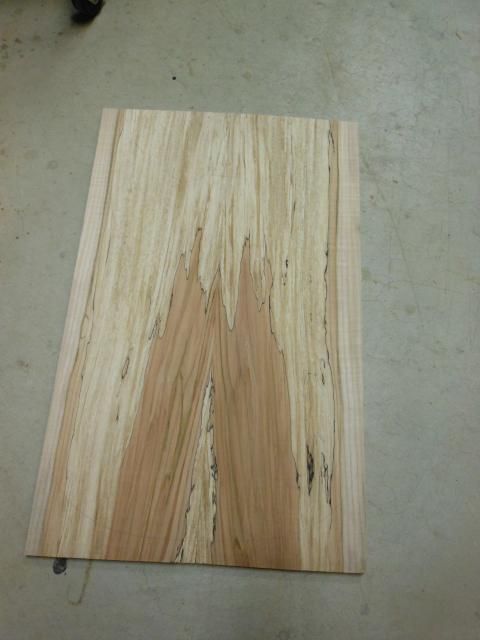
The top pieces were glued together and thickness sander.
Image
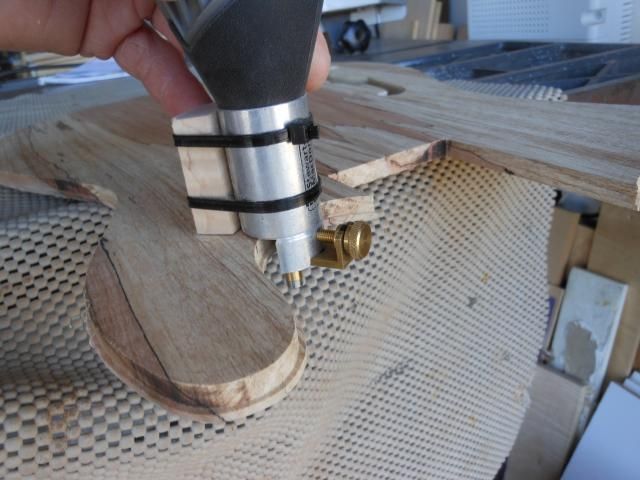
The "F" hole was cut and binding channel routed. I routed for the binding before the top was glued to the body because I wouldn't be able to rout up to the neck once it was glued. The block of wood strapped the dremel is to stabilize it. It would tend to rock with such a small platform.
Image
Glued and taped the binding with super glue and let it dry for a few hours.
Image
Image
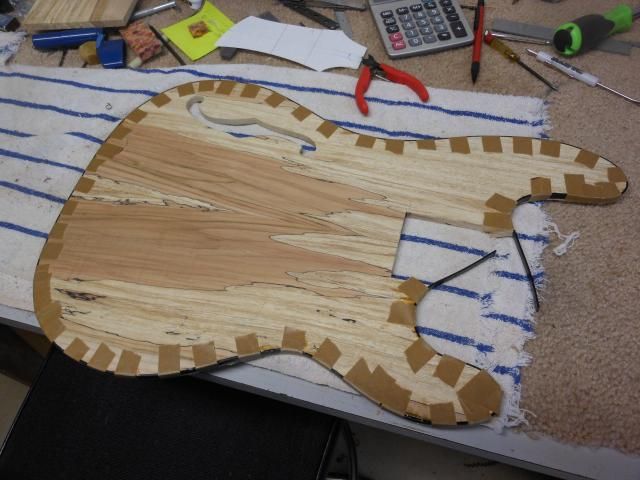
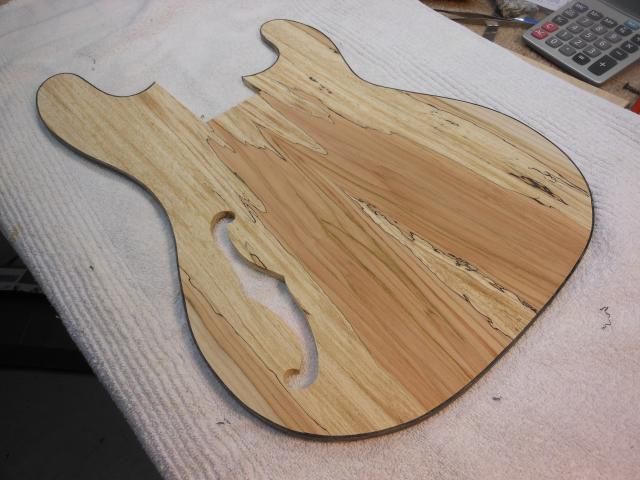
Now the top is ready to glue to the body. The fret board is next on the agenda.

Tedward

User avatar
Eben
Chairman Emeritus
Posts: 6149
Joined: Thu Aug 21, 2008 9:58 am
Include Off Topic: Yes
Location: Lummi Bay, WA
Contact:

Re: Another Bass Build

Post by Eben » Mon Aug 26, 2013 7:47 pm

Coolness, really enjoying this one!

E
‘I love America - I just dont know how to get there anymore.’

John Prine

UrbanMonique Food Blog

Tedward
Posts: 67
Joined: Sat Dec 25, 2010 11:11 am
Include Off Topic: Yes
Location: Moreno Valley,Califoria

Re: Another Bass Build

Post by Tedward » Wed Aug 28, 2013 10:09 pm

Thanks Eben.
The fret board is next. I cut the slots on a Stew Mac fret jig before I radius the board.
Image
In order to keep the fret board from sliding I use 1/2" brads dressed into the neck about 1/8" and cut off 1/16" above the surface. The brad is pulled out and the cut end is pressed into the hole with the pointed end up. The fret board is lined up and pressed onto the neck to mark the underside. The board is removed and glue is applied and replaced on the neck locating the holes and clamped.
Image
Image
Image
Image
Forgot to mention that the head stock plate was glued on, too. Epoxy with black powder was used to fill the voids in the knot.
Image
I got carried away with the build and forgot to take pics of shaping the neck to the board, radiusing the fret board (16" radius), and setting the frets.
Image
Image
Image

Tedward

User avatar
Andyjr1515
Posts: 52
Joined: Wed Jul 31, 2013 12:34 pm

Re: Another Bass Build

Post by Andyjr1515 » Wed Aug 28, 2013 11:56 pm

There are some great technique tips here - great :)

The build is looking very good

Andy
Andy - Derby, UK
Plays Guitar, Tenor Sax, Alto Sax, Bass & Bongos in an old man's band (I'm the youngest - this is not a good look! But GREAT fun!!). Makes & mods Electric 6 strings, Acoustic 6-strings and basses
http://www.AJRGuitarmods.co.uk" onclick="window.open(this.href);return false;

Post Reply