Another Bark Rosette

Guitars by Grant Goltz of Hackensack, MN
Post Reply
User avatar
whitespruce
Site Admin
Posts: 4367
Joined: Thu Aug 21, 2008 6:53 am
Include Off Topic: Yes
Location: Northern Minnesota, USA

Another Bark Rosette

Post by whitespruce » Thu Jan 31, 2013 8:41 pm

Well, I liked the first one so much that I thought I would try another

Image
Image

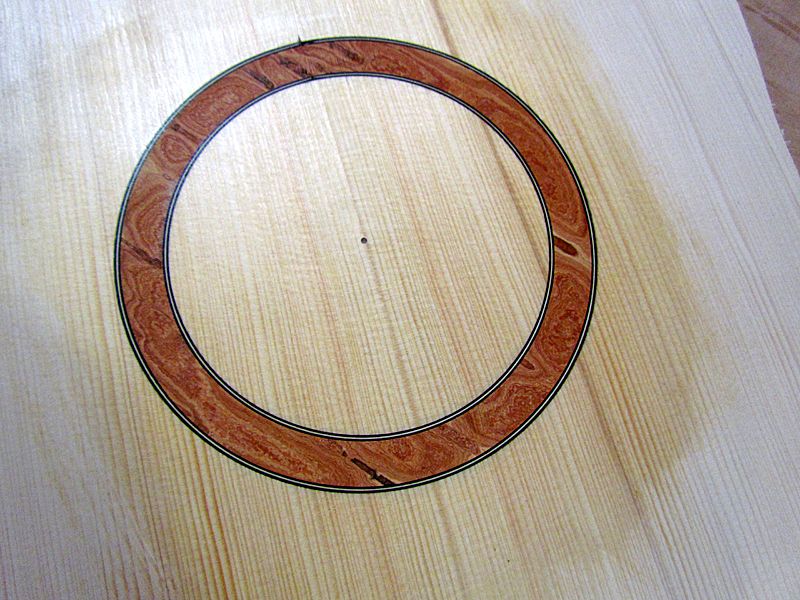
So, guess what this one is..........


...........Yah, birch bark. It has really thin layers, so when it is sanded down it gets really intricate patterns
Image
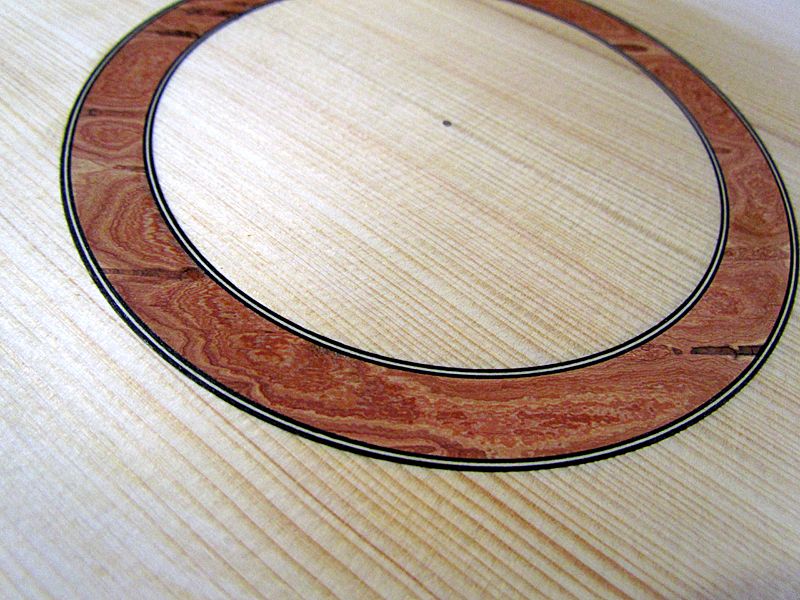
The white outside layer is sanded off, so this is the colors from inside the center of the bark.

Thanks again to Pat Foster for the original suggestion. I will be trying other species of bark :D

G

User avatar
Pat Foster
Moderator
Posts: 1724
Joined: Sun Nov 30, 2008 12:19 pm
Include Off Topic: Yes
Location: Spokane, Eastern Washington
Contact:

Re: Another Bark Rosette

Post by Pat Foster » Thu Jan 31, 2013 10:20 pm

Looks great, Grant! I might have to try that myself!

Pat
"The large print giveth, and the small print taketh away." — Tom Waits
__________________________________

http://www.patfosterguitars.com

User avatar
Dennis Leahy
Dishwasher
Posts: 7082
Joined: Thu Aug 21, 2008 1:59 am
Include Off Topic: Yes
Location: looking for a place to live

Re: Another Bark Rosette

Post by Dennis Leahy » Thu Jan 31, 2013 11:35 pm

Beautiful!

Will it turn gray? Or, is that just the outermost, and outside layer? (I think this is inside out, right? Or, at least you have sanded through the gray outer layer.)

Dennis
Dennis Leahy

User avatar
whitespruce
Site Admin
Posts: 4367
Joined: Thu Aug 21, 2008 6:53 am
Include Off Topic: Yes
Location: Northern Minnesota, USA

Re: Another Bark Rosette

Post by whitespruce » Fri Feb 01, 2013 3:19 am

Dennis Leahy wrote:Beautiful!

Will it turn gray? Or, is that just the outermost, and outside layer? (I think this is inside out, right? Or, at least you have sanded through the gray outer layer.)

Dennis
It will stay the color that it is. I have sanded off the outside layers so this surface is about 1/3 of the way into the bark. I just took a square of bark and ran it through my thickness sander until I got past any irregularities and had a smooth surface. Then I sanded a bit off the inner surface until I had a useable thickness. Before I cut out the ring with a router, I give it a coat of shellac to make sure it does not chip out. The process is just as easy as using thin wood or veneer.

G

User avatar
BaldEagle55
Posts: 473
Joined: Sat Aug 23, 2008 6:56 pm
Include Off Topic: Yes
Location: Thunder Bay, Ontario, Canada

Re: Another Bark Rosette

Post by BaldEagle55 » Fri Feb 01, 2013 10:03 pm

Looks very cool Grant... I love your creativity.

Tom
:D :D :D

JasonMoe
Posts: 102
Joined: Sun Jul 17, 2011 1:02 am
Include Off Topic: Yes
Location: LaCrosse Wisconsin, USA
Contact:

Re: Another Bark Rosette

Post by JasonMoe » Sat Feb 02, 2013 1:17 am

When I use birch bark for a rosette, I glue it to another substrate. I glue the under-layer so the grain goes 90 degrees from the bark. That way the grain of the bark can follow the lines of the top, and it keeps the bark from splitting. I have a build thread on my webpage if you want to follow along. I'm using the reverse side of the bark. It matches the cedar top really nice. http://www.moonlightguitars.com/Buildalong2.html" onclick="window.open(this.href);return false; ImageImageImage
visit my website at http://www.MoonlightGuitars.com" onclick="window.open(this.href);return false;

User avatar
whitespruce
Site Admin
Posts: 4367
Joined: Thu Aug 21, 2008 6:53 am
Include Off Topic: Yes
Location: Northern Minnesota, USA

Re: Another Bark Rosette

Post by whitespruce » Sat Feb 02, 2013 2:15 am

Looks good Jason. Nice to see another adventursome soul :D

G

Post Reply