Size 2 Martin build coming late October

Guitars by Grant Goltz of Hackensack, MN
Post Reply
User avatar
whitespruce
Site Admin
Posts: 4367
Joined: Thu Aug 21, 2008 6:53 am
Include Off Topic: Yes
Location: Northern Minnesota, USA

Re: Size 2 Martin build coming late October

Post by whitespruce » Thu Feb 10, 2011 6:22 pm

Lefty wrote:Nice work Grant. I have a couple questions...

Back when you were carving the back braces after they had been glued on there was a small metal tool on the bench. Was that to just shave and kinda round over the edges of the braces? Looked like a bottle opener on steroids. :(

Do you bend one side or two sides at a time?

Thanks,

Lefty
Lefty, that metal thingey is a tool for rounding over the edges. One end does a 1/4" radius and the other a 3/16" radius. Got a set of these (another one for smaller radii) from Brookstone eons ago. I think Lee Valley sells the same thing. I still needed to go back over with the small plane because it didn't get deep enough.

And I bend one side at a time just like normal folks. Just stacked them both on the form to store them till I glued them on to the top.

I will try to post some more updates later tonight. BTW, I did get the box closed last night and cleaned it up today :D

Thanks for looking and asking,

G

User avatar
Lefty
Moderator
Posts: 1632
Joined: Sat Aug 23, 2008 9:09 pm
Include Off Topic: Yes
Location: Riverside,ca

Re: Size 2 Martin build coming late October

Post by Lefty » Thu Feb 10, 2011 9:54 pm

10-4......Standing by. :)

Lefty
No money Nathan. No money Marty. Just a roof over my head and a rockin chair by the fire.
(Mose Harper)

Steve "Lefty" Leff

User avatar
BaldEagle55
Posts: 473
Joined: Sat Aug 23, 2008 6:56 pm
Include Off Topic: Yes
Location: Thunder Bay, Ontario, Canada

Re: Size 2 Martin build coming late October

Post by BaldEagle55 » Fri Feb 11, 2011 7:26 am

Grant,

Thank you for the detail you do in posting your "methods". I learned a whole bunch just reading this thread.

Great build and I am looking forward to more lessons.

Tom
:D :D :D

User avatar
Dennis Leahy
Dishwasher
Posts: 7082
Joined: Thu Aug 21, 2008 1:59 am
Include Off Topic: Yes
Location: looking for a place to live

Re: Size 2 Martin build coming late October

Post by Dennis Leahy » Sun Feb 13, 2011 7:05 am

Grant,

When you get done with this one, make another like it, but use your own top bracing. :D I'd love to hear the difference.

It really does seem strange to see a traditionally braced guitar coming off your bench.

Dennis
Dennis Leahy

User avatar
whitespruce
Site Admin
Posts: 4367
Joined: Thu Aug 21, 2008 6:53 am
Include Off Topic: Yes
Location: Northern Minnesota, USA

Re: Size 2 Martin build coming late October

Post by whitespruce » Sun Feb 13, 2011 9:23 pm

Well, a couple of days late, but here is another episode in this series.

First off, thanks for the comments. And Dennis, that would be an interesting experiment, but I will do it as a 2-19 instead of a 2-27.......Way less detail to make the appointments, but otherwise it is the same guitar.

So, OK, got to put on the sides. First step is to re-level the top edge of the sides. Nothing fancy, just clamp a sandpaper strip to the table saw top and rub them over it
Image

Then I dry fit the sides one by one and align them to the outline that was traced onto the top. Then I mark the length at the centerlines of the end blocks and cut the sides to length on the bandsaw
Image
I just showed doing one side. Look at this in a mirror and you will have the other one ;)

So, now I position the sides in place and clamp them securely to the top. A bit of fiddling around to get everything lined up. Then I can hold the ends of the sides out from the blocks, spread in glue, and clamp them down. I got too busy to take photos until I had the sides clamped, with glue, to the neck and tail blocks
Image
Image
Notice that there are no linings. This is because the top will be attached with the individual blocks, tentelones/dentelones, or whatever you wish to call them. I figure that if folks are willing to call linings "kerfings", the words don't make no nevermind :D

So anyhow, here are the little blocks being glued in
Image
Image

And here they are about done
Image
Image

Now, I cut these out of mahogany scrap and they ended up looking a bit irregular. So I made a little curved sanding block and cleaned them up a bit
Image
Image

I had profiled the sides just a tad oversized before I bent them. So I just put my radius dish on and traced around it with a yellow pencil
Image
Image
Image
So I planed down to these lines, went back and rechecked and repenciled it a few times, and finally put a big chunk of sandpaper between the dish and the sides and cleaned everything up. In the process, I also shaped the end blocks to the back curve.

So then I cut a bunch of the little blocks to attach the back with. I made these a bit neater, since they will show through the sound hole :oops:

Then I glued them on using my fancy-schmancy clamps like Joe Sustaire has
Image
Image
Ain't that pretty :D I left them a bit proud of the sides so I can resand with the radius dish and get the back fitting real nice

That's all for today. The next episode will be closing the box. Then it will be on to making the top purfling :?

G

User avatar
Fred Blom
Posts: 555
Joined: Tue Jan 20, 2009 12:07 pm
Include Off Topic: Yes
Location: Montevideo, MN

Re: Size 2 Martin build coming late October

Post by Fred Blom » Sun Feb 13, 2011 10:12 pm

It's fun to watch this one come together, Grant. Indeed, those are impressive lining clamps. You'd be the talk of the neighborhood if you hung laundry to dry using those.
Fred Blom
Remember the joy of the journey

User avatar
whitespruce
Site Admin
Posts: 4367
Joined: Thu Aug 21, 2008 6:53 am
Include Off Topic: Yes
Location: Northern Minnesota, USA

Re: Size 2 Martin build coming late October

Post by whitespruce » Mon Feb 14, 2011 9:49 pm

Well, onward to closing the box

Hope this is not getting too boring. If it is let me know.

So, here it is after the clamps came off
Image

Time to add the side braces. These are just strips from the side offcuts
Image

Glue dried and clamps off
Image

The back was a bit close on width, so I cut a couple small slices from the back offcuts and glued 'em on, just in case
Image
These will mostly be removed with routing the binding channels, but nice to have the solid foundation to work from

Back brace ends carved
Image

And the top signed
Image

So then I put the dish mold back on and sanded down the lining blocks, so that's all ready to go
Image

And I cut the brace pockets
Image
Used my little rotary tool. Had to be careful not to go through the sides, cuz this axe only has 1/8" tall bindings :o
Notice I did remember to reverse the bolt in the clamping fixture so the wingnut will be on the outside

OK, the brace ends are trimmed and a test fit went well, so ready for the glue
Image

So, spread the glue, put on the back, clamped the ends, and roped her up
Image
Image
And ya, inner tubes just like the Padma, 'cept these are 16" farm implement tubes :lol:

And here it is un-roped with the plates trimmed and all rough sanded
Image
Image
Image

Next, the top purflings

Thanks for looking

G

User avatar
whitespruce
Site Admin
Posts: 4367
Joined: Thu Aug 21, 2008 6:53 am
Include Off Topic: Yes
Location: Northern Minnesota, USA

Re: Size 2 Martin build coming late October

Post by whitespruce » Mon Feb 14, 2011 10:34 pm

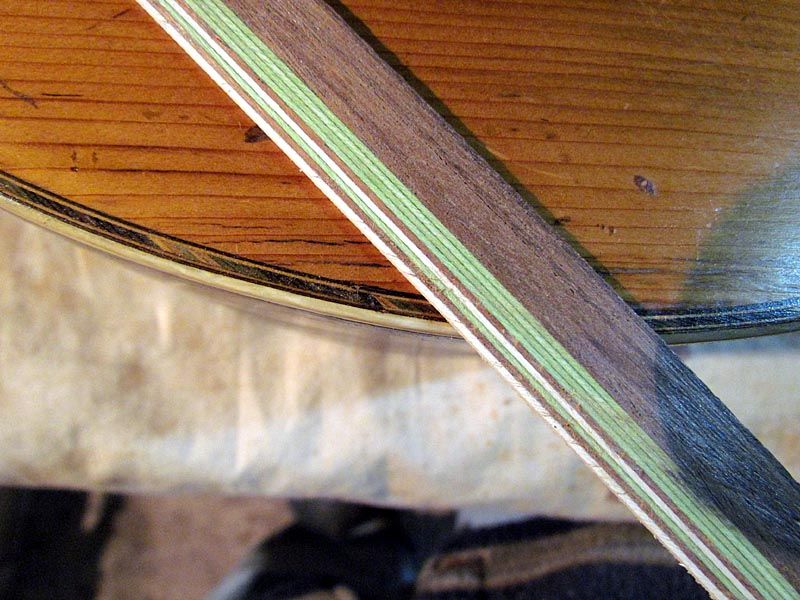
Well now, this guitar has kinda complex top purfling. Probably a bit more of a PITA than abalone

Same colors as in the backstrip, white, green, and brown, but a different arrangement
Image
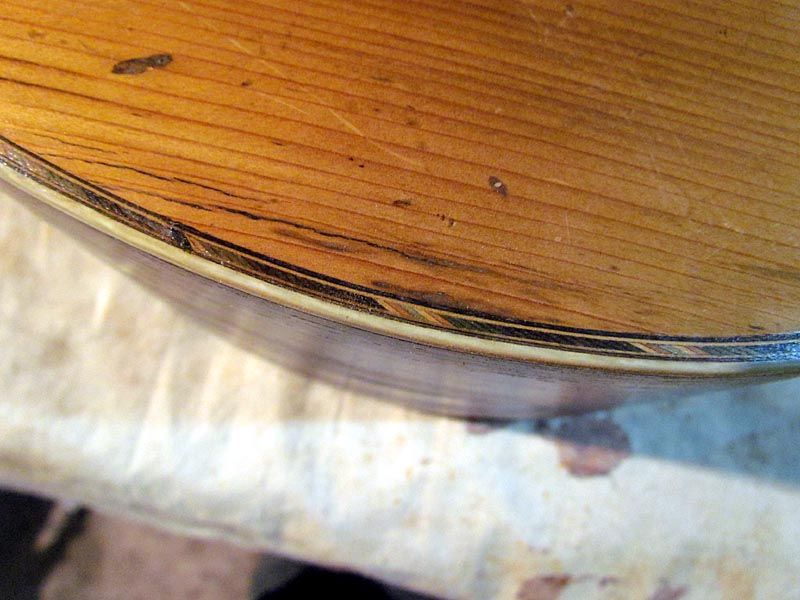
Sorta hard to see the colors real good under the finish, but you will see as we move on

So, like the back strip, I started out by gluing up a stack of veneer and cutting a slice off the side
Image
Just more layers on this slice

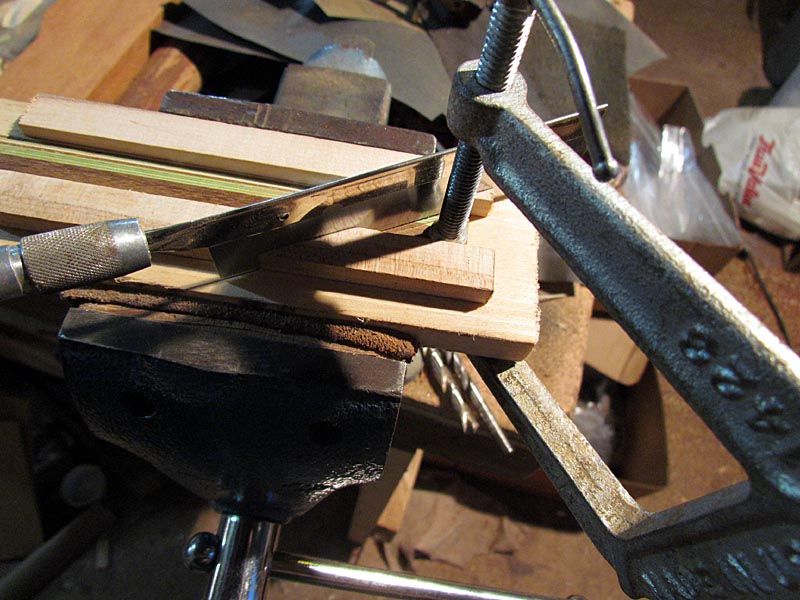
So I then cut slices off at a 30 degree angle
Image
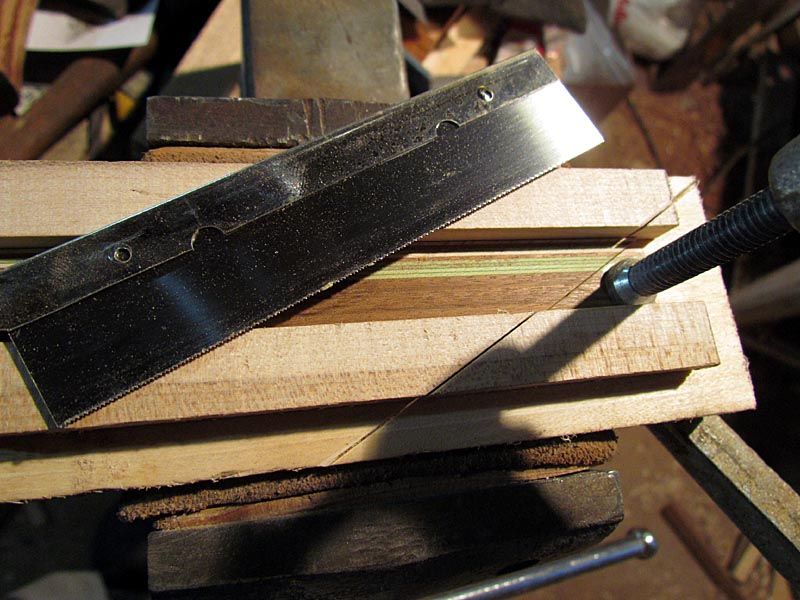
Made a little miter box and clamped in the end offcut as a length gauge

Then I cut slices
Image
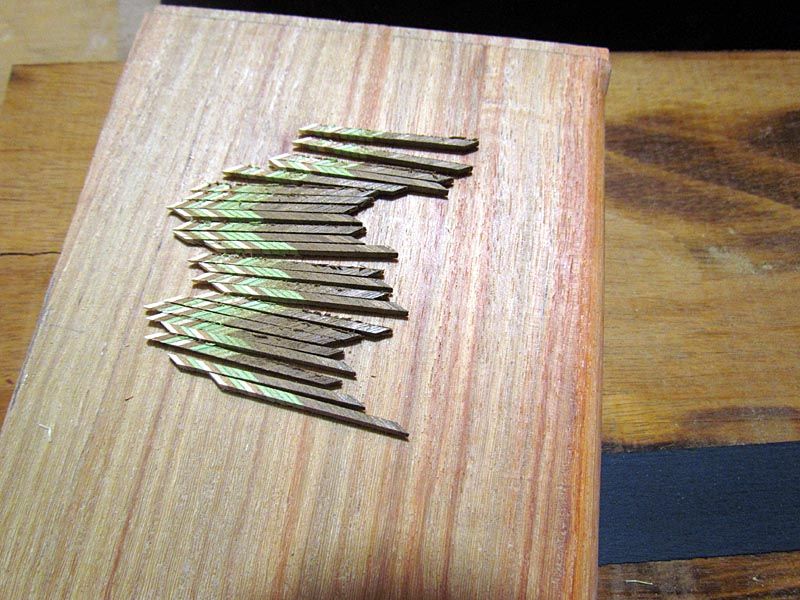
Needed about 22 slices for one half of the guitar

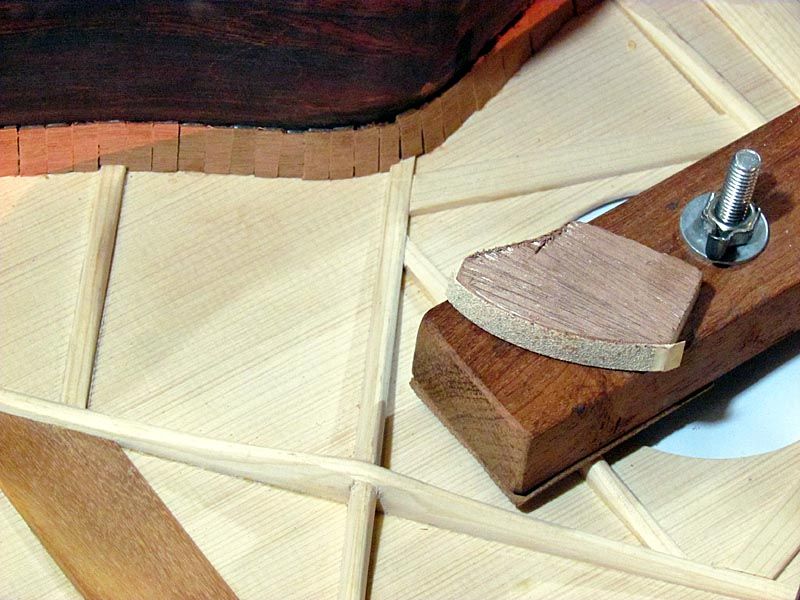
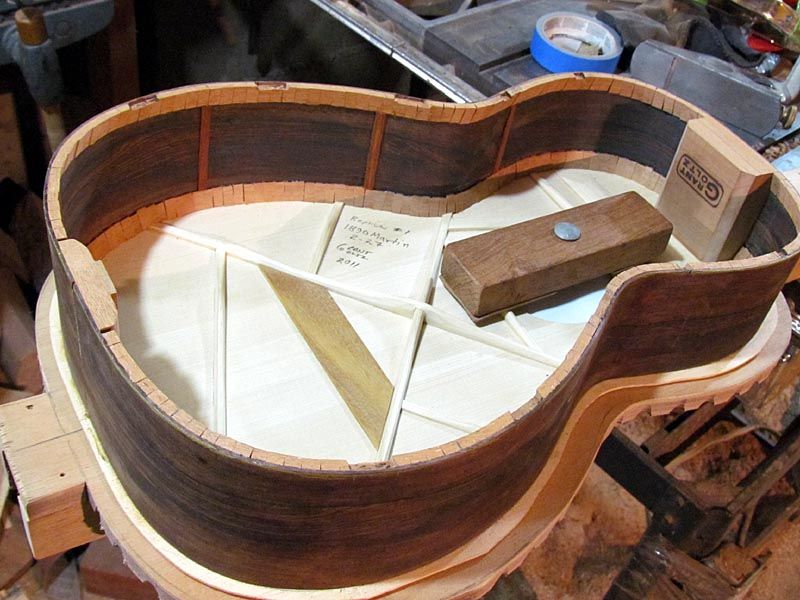
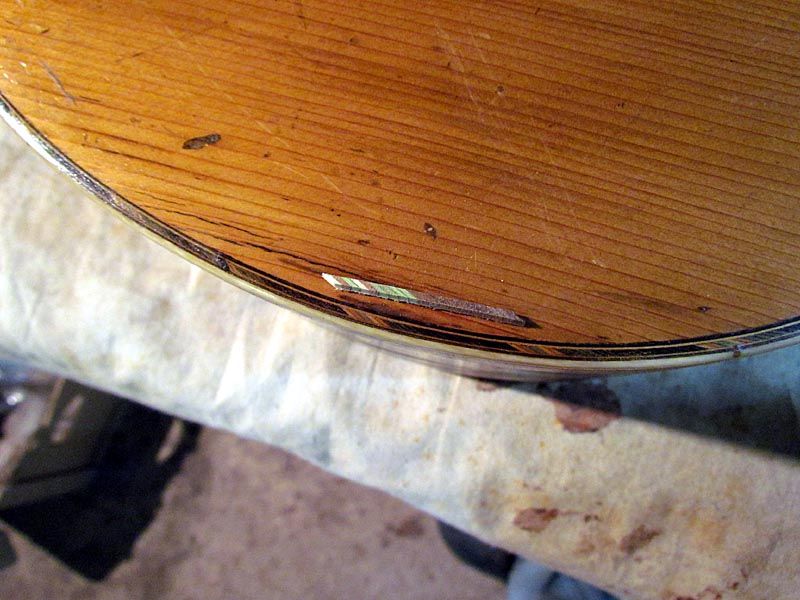
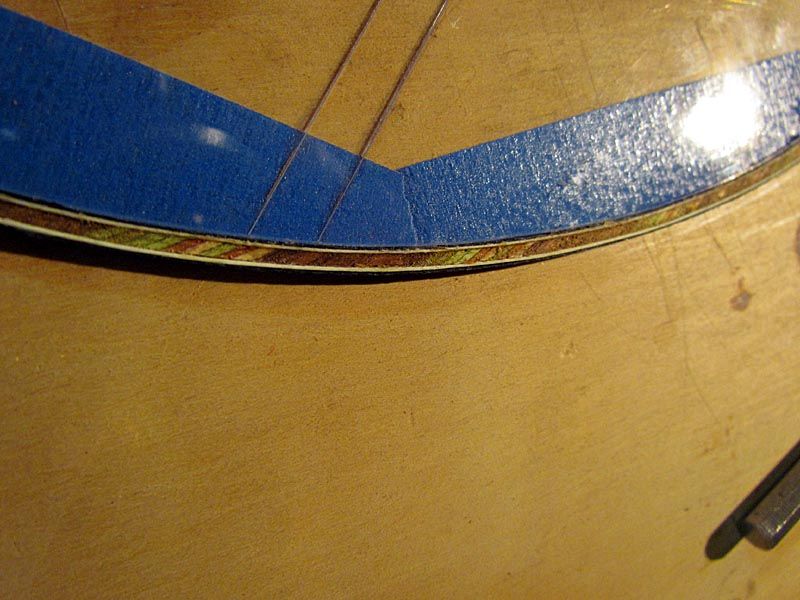
Here is how a slice matches the guitar
Image

And here is a bunch of slices for one half of the purfling
Image

So, then I needed the black and white veneer lines for each side of the purflings. Only problem is that regular veneer is almost twice as thick as it needs to be. So I took a couple of pieces and sanded then down, by hand, until they were the right thickness
Image

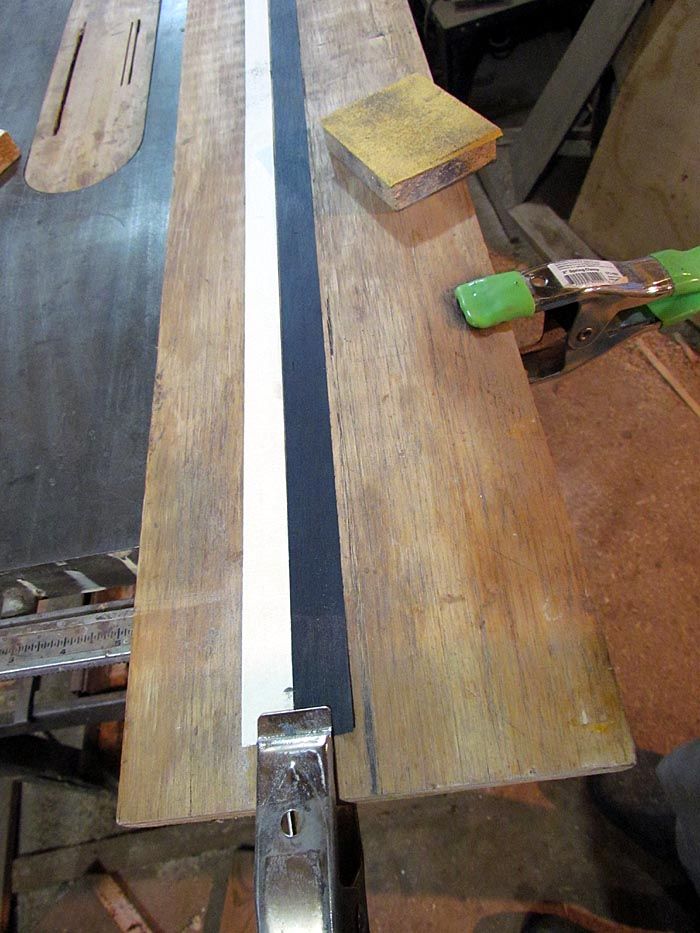
Then I sliced off enough strips to do the job
Image
Not enough to make it worth the effort to drag out the pasta machine, just did 'em by hand

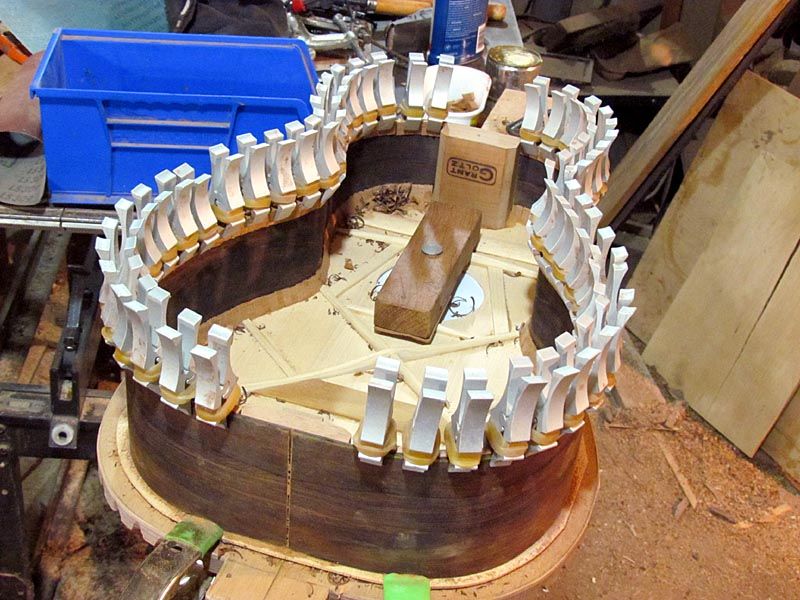
Now, I know that once these get all glued up they will be a bear to bend. Sorta like bending an I-beam. So....

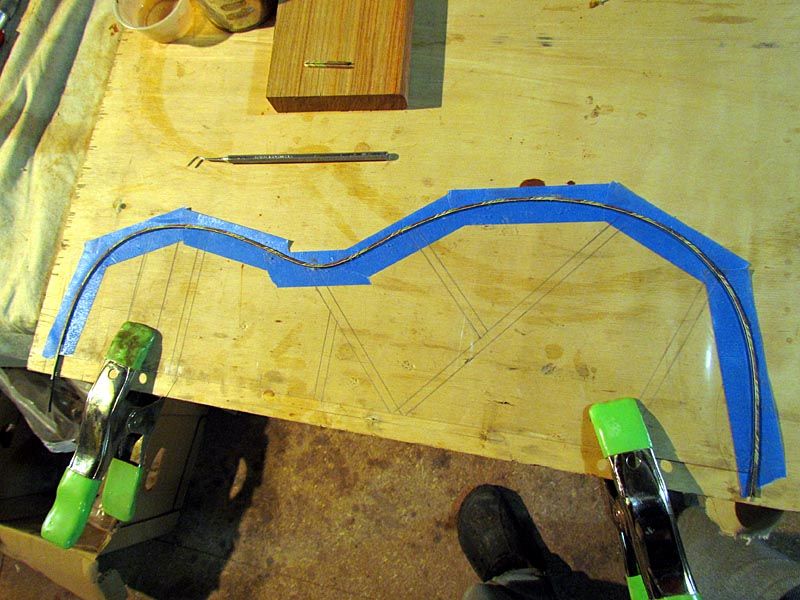
....I decided to glue 'em up to shape...or close thereto.
So I used my acrylic guitar pattern. Just put blue tape on it from the back side to hold things in place like I did along the ruler with the back strip.
Here is the first black line going on
Image
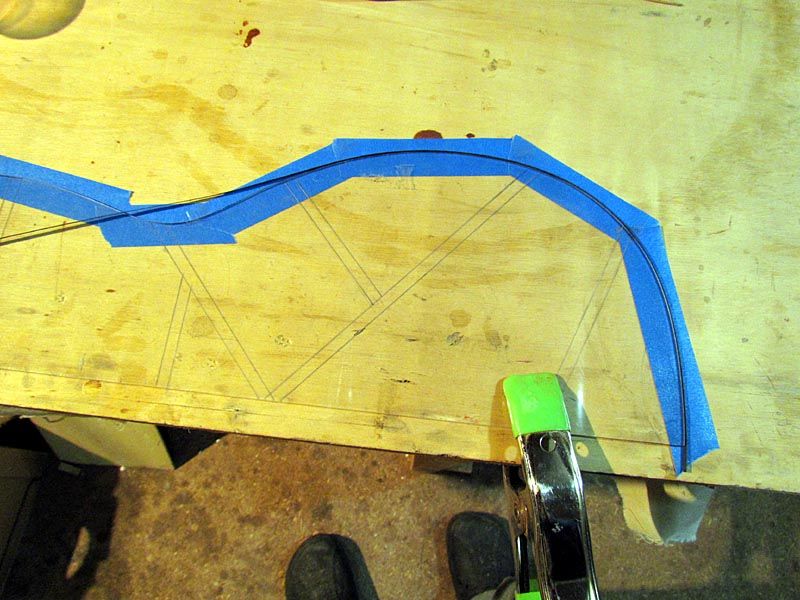
No glue on this one, the tape holds it in place

Then put glue on a white strip and added that
Image
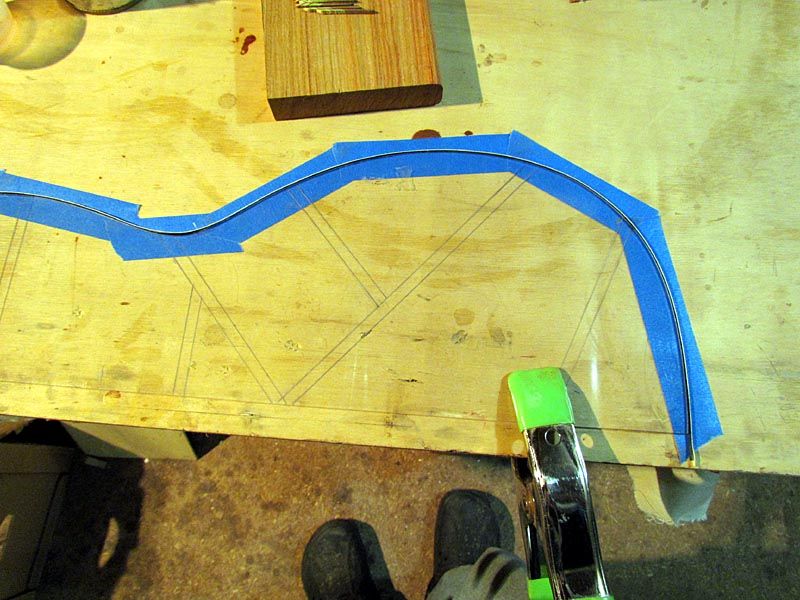
Kinda hard to see, but look close and you will see it

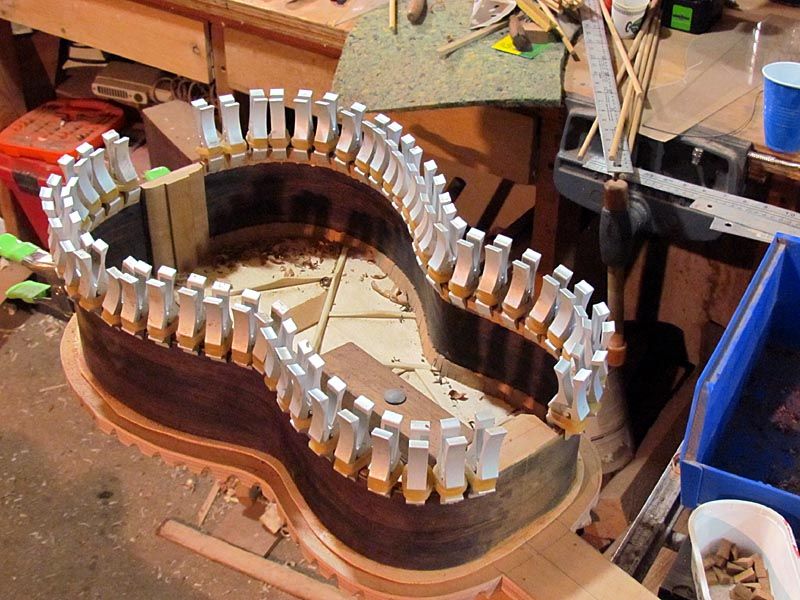
So then I added the first center piece
Image

And just kept gluing them on 'til I got to the other end
Image
Now this took a bit more effort than shows here, cuz there was a tendency for them to want to break apart on the curves. So I had to use the little dental spatula to smash them up tight, and then hold each one til the glue grabbed. And go back now and then to push something back into place

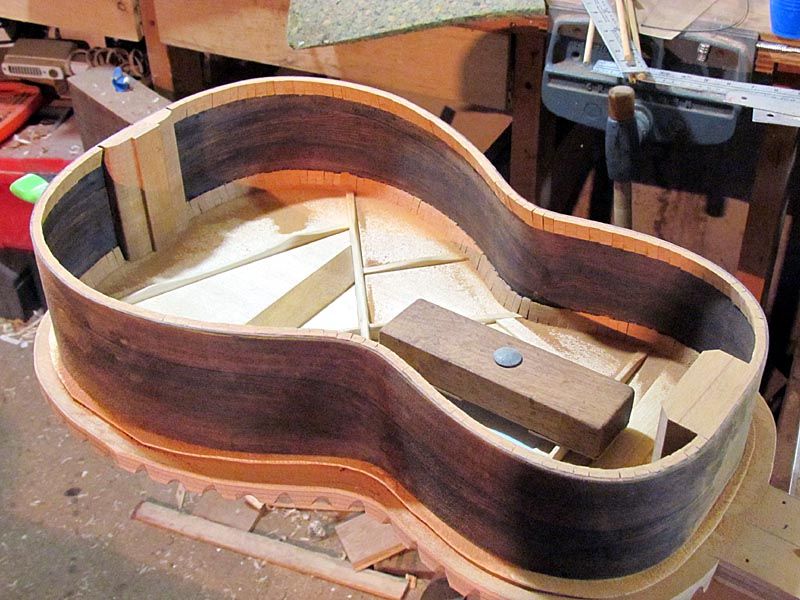
But I got her done and then added another white and black strip
Image

Here is a closer look
Image

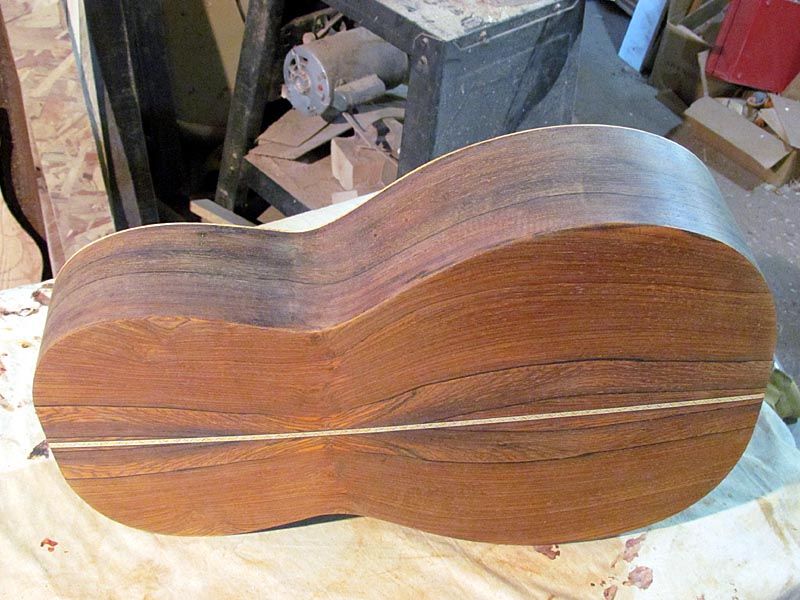
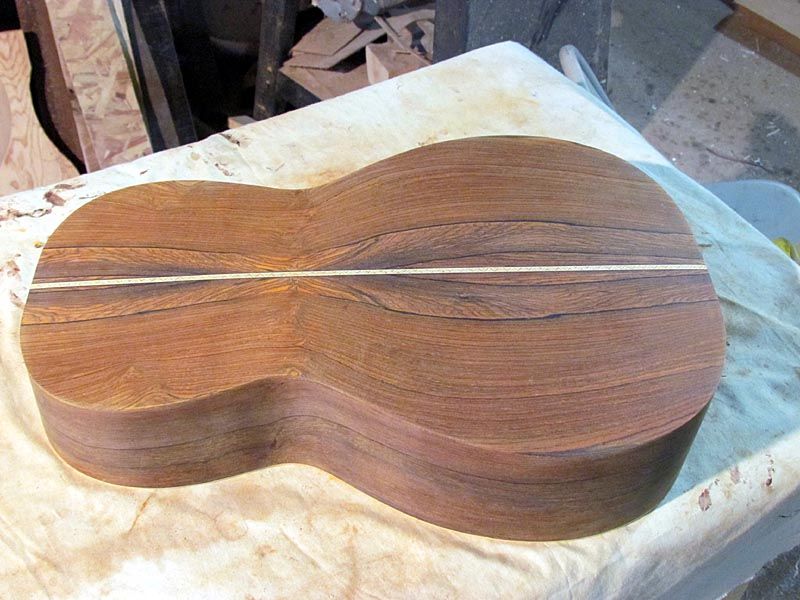
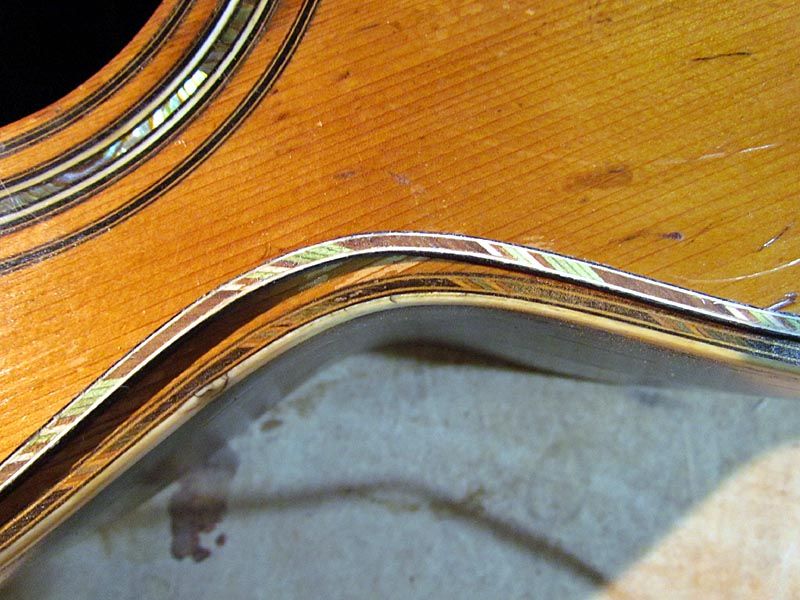
Cleaned up a bit and laid on the original guitar
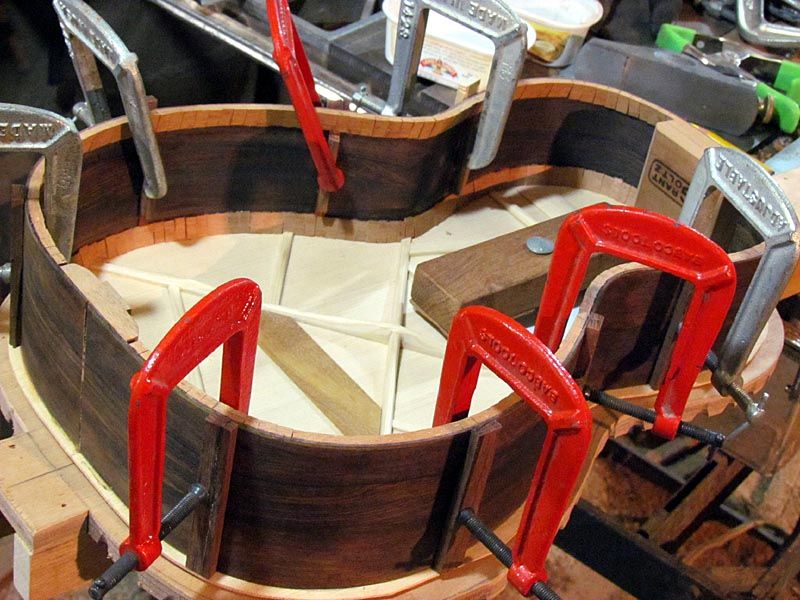
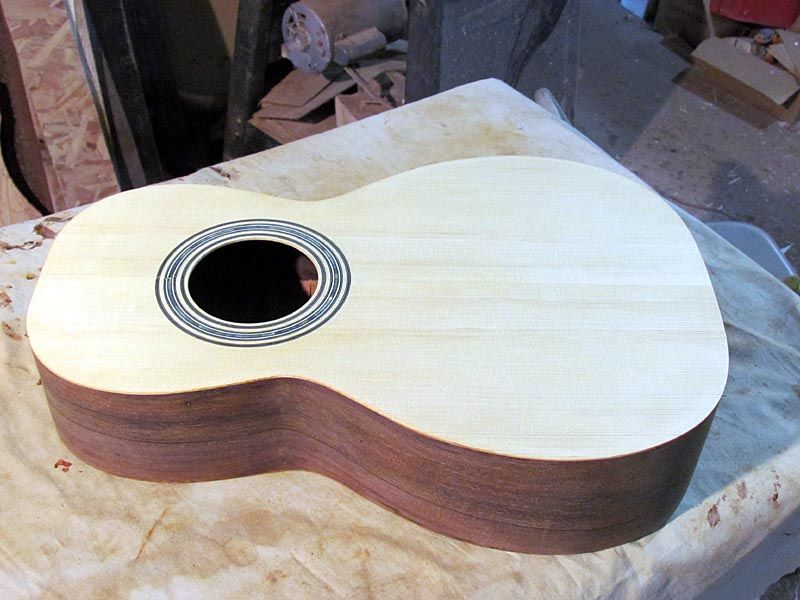
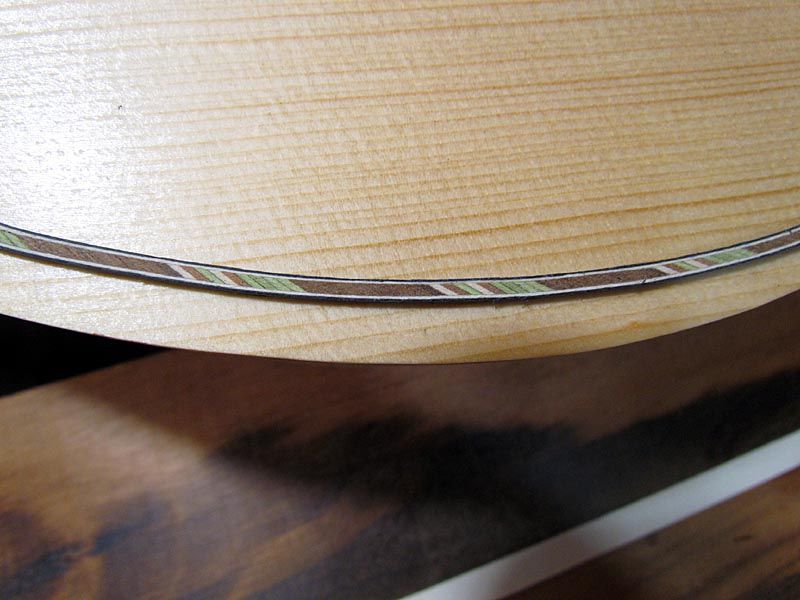
Image

And on the new one
Image

So that about catches up to where I am now. Looks like I gotta do some more work before I can post the next installment :mrgreen:

Thanks for looking. Questions and comments are always welcome.

G

Post Reply