My revised XX back bracing

Guitars by Grant Goltz of Hackensack, MN
User avatar
whitespruce
Site Admin
Posts: 4367
Joined: Thu Aug 21, 2008 6:53 am
Include Off Topic: Yes
Location: Northern Minnesota, USA

My revised XX back bracing

Post by whitespruce » Sun Jan 20, 2013 10:09 pm

Those here who have looked at my build threads from the past several years are probably familiar with my double X back bracing pattern. I have done this by laminating layers to interlock the X's and I carve and shape the braces after they are glued up.

Here is what this has looked like
Image
This particular back needs a bit more carving, shaping and sanding, but you can get the idea

I like this bracing because it really does a good job of stiffening the back and holding the nice arch. It also eliminates any straight across grain bracing which can contribute to back cracking if humidity gets too low. However, my thoughts have been leaning in the direction that it is perhaps a bit more than needed.

This bracing was laminated from 5 layers of 1/4" wide strips that produced a brace height of about 3/4" before carving. My thoughts were that I can decrease the width and still have plenty of stiffness. A litle more thinking and looking at steel girders and some wooden truss beams made me decide to try leaving openings in parts of the braces.

So....

I decided to make the width 5/32". And I would use 4 layers, the first, third, and fourth would be 1/8" thick, with the second being 3/8" thick The 1/8 " layers would be continuous, forming a top and bottom chord to the brace, while the 3/8" layer would have spaces in the taller parts of the braces.

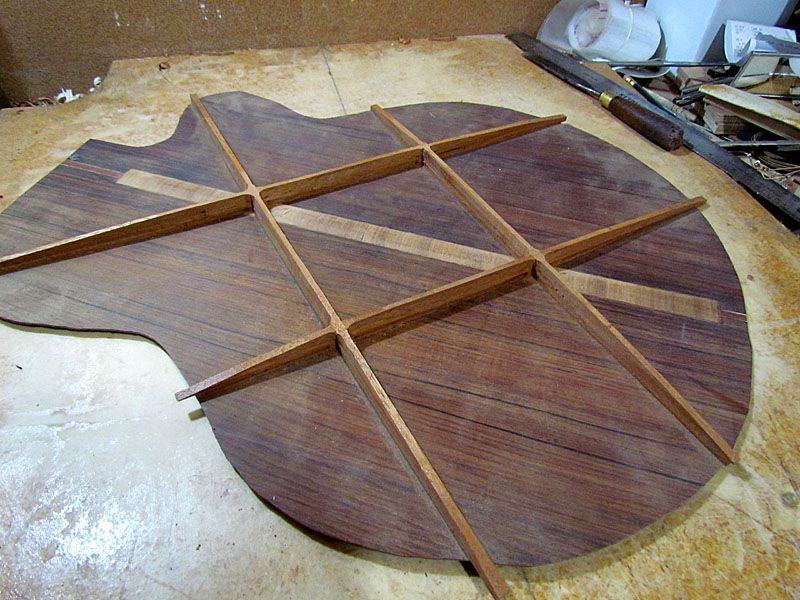
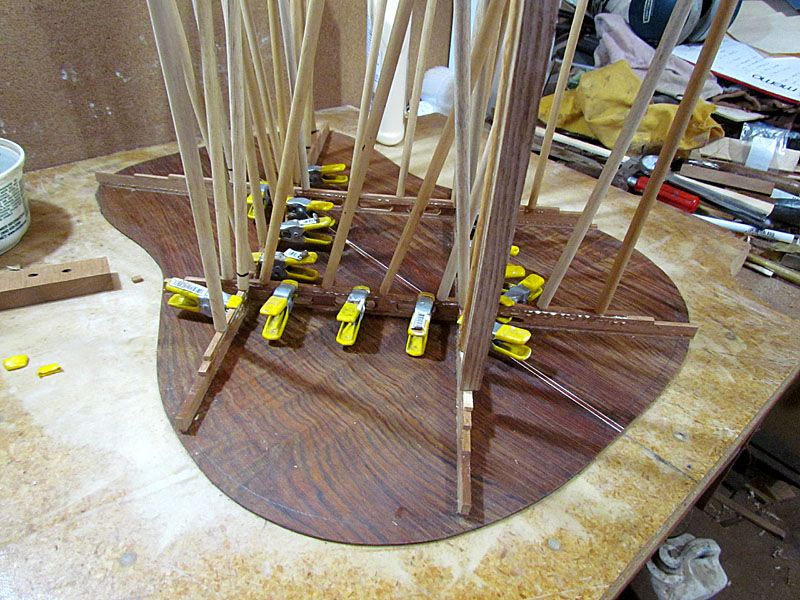
So here is the initial glue-up with the bottom layer and parts of the second layer
Image
Image

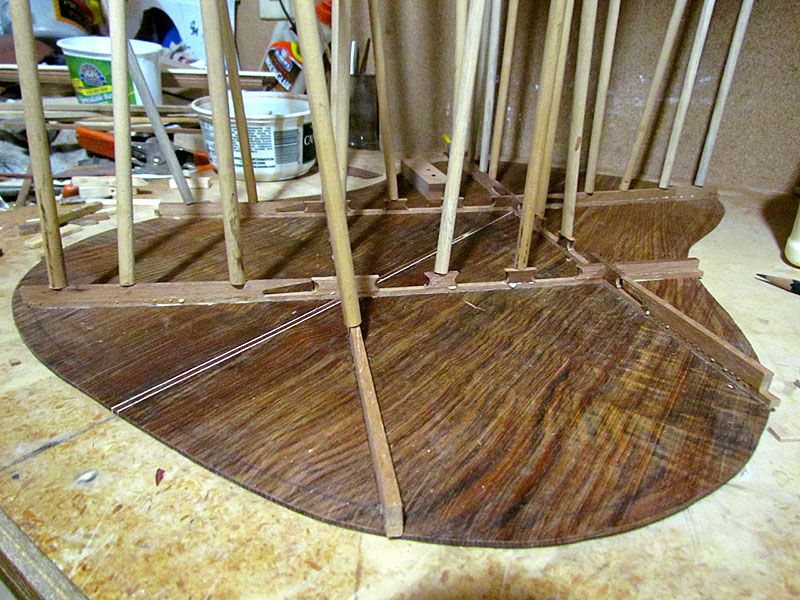
Here are the top two layers being glued on. Note that the small spring clamps hold the two layers together at the openings where go bars can't be used
Image

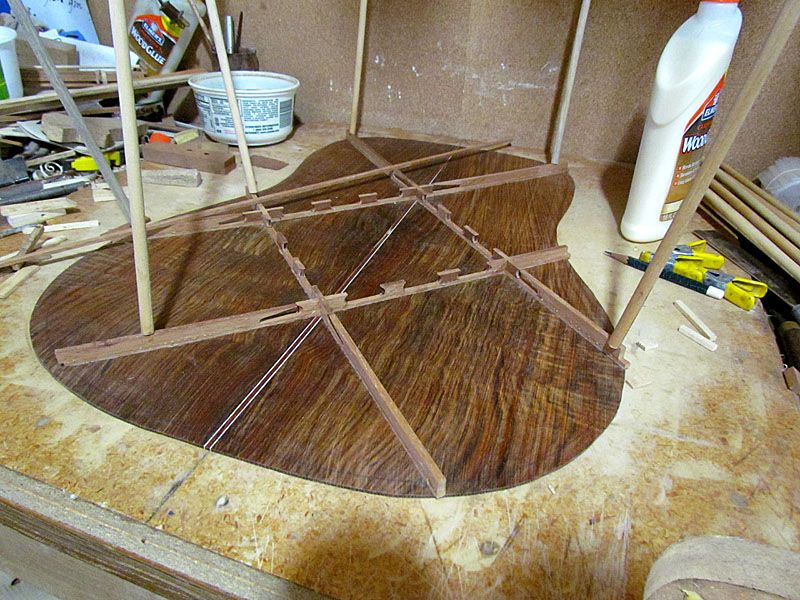
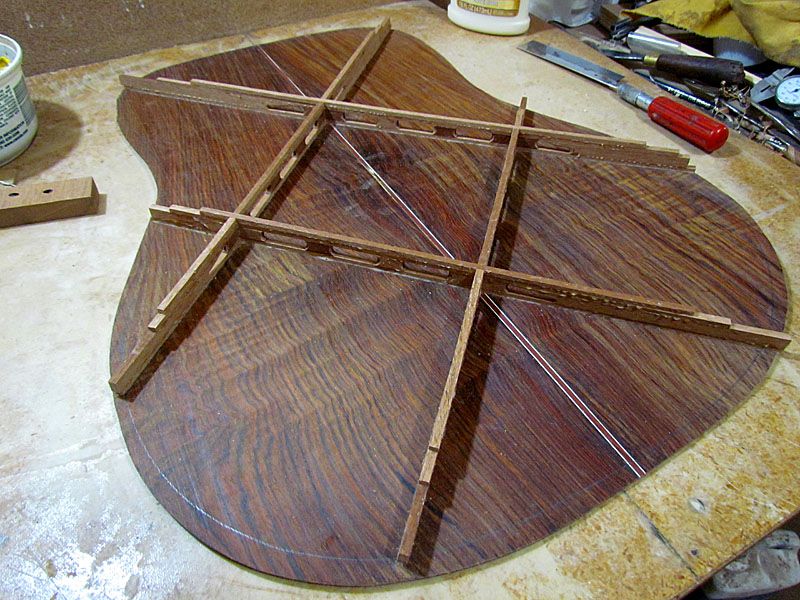
Here is the completed glue-up
Image

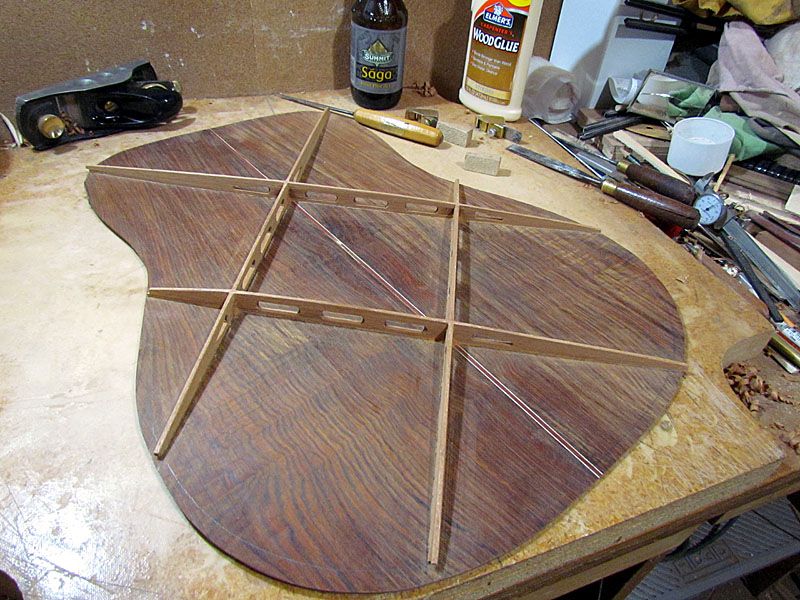
Braces partially carved
Image

The completed braced back
Image
Image

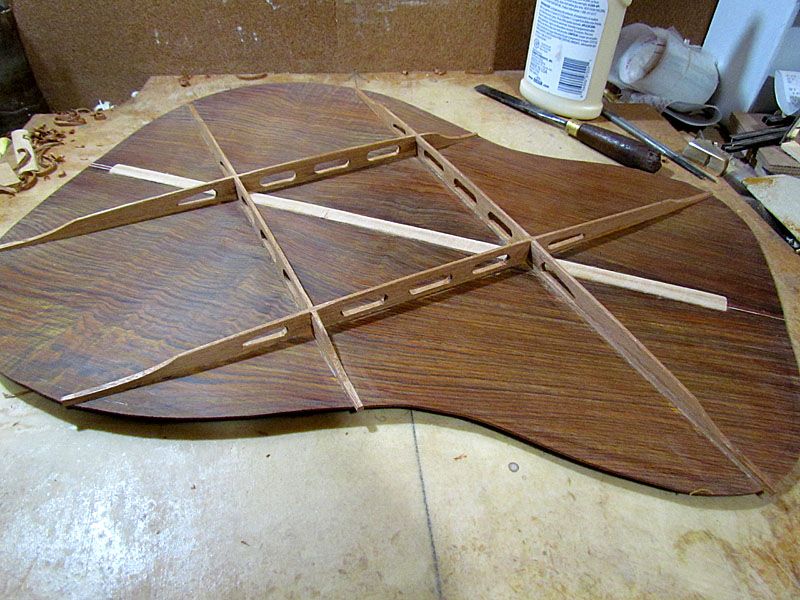
So far I have used this on two guitar bodies. It is just as stiff and strong as my original version, but has at least 1/3 less mass. I think it looks better, too. I like it :D

G

User avatar
Dennis Leahy
Dishwasher
Posts: 7082
Joined: Thu Aug 21, 2008 1:59 am
Include Off Topic: Yes
Location: looking for a place to live

Re: My revised XX back bracing

Post by Dennis Leahy » Sun Jan 20, 2013 10:27 pm

Whoever wrote the line, "You can't teach an old dog new tricks." didn't know you.

Or maybe this is just another sign of your nimble, youthful mind - nowhere near the "old dog" stage yet.

I sure do like the look you've achieved!

(The one I'm working on now uses your quadruple-X pattern. I did: 3 pieces high, just under 3/16" square, making braces about 5/32" wide by a total just under 9/16" high after sanding. They hold the dome and seem pretty lightweight, especially when mass was removed by the router bit. :~)

Dennis
Dennis Leahy

Dave Livermore
Posts: 656
Joined: Mon Dec 08, 2008 6:08 pm
Include Off Topic: Yes
Contact:

Re: My revised XX back bracing

Post by Dave Livermore » Mon Jan 21, 2013 8:16 am

Grant,
That looks fantastic.

One concern from the peanut gallery;
When building I try to couple the resonant frequencies of the top and back. I've found that the stiffer I make the back, the tougher it is to get the frequencies in line with each other.

This quadriple X thing you have going appears as though it would be stiff enough to support a tank driving over it.
How does the bracing affect the resonance of the back?

Hope you're keeping warm up there.
I took the liberty to do my annual check on temperatures over in Hell, Michican.
It's 17 over there and -9 here. Confirming my assumptions once again that it is colder than hell in MN.


Dave
there's no such thing as a ten minute project

User avatar
whitespruce
Site Admin
Posts: 4367
Joined: Thu Aug 21, 2008 6:53 am
Include Off Topic: Yes
Location: Northern Minnesota, USA

Re: My revised XX back bracing

Post by whitespruce » Mon Jan 21, 2013 8:24 am

Thanks Dennis and Dave for the kind words.

Dave, ditto here on the temps. Just checked outside and it is -24, but so far the wind has not kicked up.

How and when do you measure the frequencies? I have not done that, but seems like they would change after I glue up the box because I often sand the top and/or the back down more after that.

G

User avatar
BRuddy
Posts: 1104
Joined: Mon Aug 25, 2008 6:31 pm
Include Off Topic: Yes
Location: Keweenaw Bay, MI (the Upper Peninsula, eh?)

Re: My revised XX back bracing

Post by BRuddy » Mon Jan 21, 2013 10:12 am

Great braces Grant! I harbor a deep aversion to perpendicular glued wood joints going back 40 years to my furniture shop days as well as looking at my share of blown glue joints or cracks. Also, the further from perpendicular and the closer to parallel grain you get the stronger the glue joint becomes. carrying laminations through the x of the X brace joint is a great if not only way to carry the load there. The wood removed from the braces looks really nice and when you think about roof trusses or manufactured joists in construction these days there is a lot less wood used to carry the loads solid beams used to.

I finally got my gobar deck finished today and am slowly advancing toward my first guitar build to hopefully start soon. While "tooling up" for guitars over the last 2 years I've probably built 100 guitars in my head, things like bracing, neck joints, etc, eat up a lot of the brain builds. Lots of great info on the LC to filter through. Thanks Grant, and everyone!
Brian R, N8ZED

"Still traveling through the universe at 33.7 million kilometers a day on Starship Earth - and enjoying the ride!."

Dave Livermore
Posts: 656
Joined: Mon Dec 08, 2008 6:08 pm
Include Off Topic: Yes
Contact:

Re: My revised XX back bracing

Post by Dave Livermore » Mon Jan 21, 2013 12:13 pm

Grant,
I do the chladni voodoo on my tops. But even before I learned that, I would check the Hz and compare the top and back.
After glue up, the frequencies do change, but they seem to do so equally.
Once the top braces are carved to my satisfaction, I'll shave on the back braces until the two plates ring at about the same pitch.

But you don't want the two to be the same pitch when all is said and done. You want them to be about a half step apart. The top will drop about that much once you glue the bridge on.

Todd L. has built a rim press that holds the plate firmly at the edge all the way around so he can do the carving and tuning to a standard equal to the way the top/back will behave when glued up. Seems like a really cool idea, but I haven't made one up yet.
FYI

Dave
there's no such thing as a ten minute project

User avatar
whitespruce
Site Admin
Posts: 4367
Joined: Thu Aug 21, 2008 6:53 am
Include Off Topic: Yes
Location: Northern Minnesota, USA

Re: My revised XX back bracing

Post by whitespruce » Mon Jan 21, 2013 1:39 pm

Dave Livermore wrote:But you don't want the two to be the same pitch when all is said and done. You want them to be about a half step apart. The top will drop about that much once you glue the bridge on.
Dave
Thanks for the info, Dave. And I respect every persons approach to building. That said, I guess some folks want the pitches to be such, but I am not one of them. Probably thousands of damn fine sounding guitars that don't meet those specs.

Guess that just shows that there are many ways to get there, and most of them work quite well :D ;)

G

Seabury
Posts: 256
Joined: Sun Aug 24, 2008 7:44 pm
Include Off Topic: Yes
Location: Hadley, Ma.

Re: My revised XX back bracing

Post by Seabury » Mon Jan 21, 2013 7:27 pm

Wow,.. Grant- that is just elegant!
Even if it affects the "frequencies" involved, -- just a beautiful look. I'm digging this approach. Fresh-

Steve Klein's builds in the late 70's used crazy curved/laminated flying buttress back/side brace combo's, and curved bracing-- and you are the one (that I know of-) approaching what totally blew me away about his build techniques-... with a whole new Grant-nessness-
Love it- and thanks for sharing all of your mojo-
Thomas
Thomas Brown

Post Reply