Documenting my 1st thermally modified build, videos added, SOLD

Guitars by Grant Goltz of Hackensack, MN
User avatar
whitespruce
Site Admin
Posts: 4367
Joined: Thu Aug 21, 2008 6:53 am
Include Off Topic: Yes
Location: Northern Minnesota, USA

Re: Documenting my first total thermally modified build

Post by whitespruce » Sun Nov 29, 2015 10:39 am

Well, The finish is where it will be for now...5 coats of Liberon and rubbed down. This is my "vintage" finish. The pores are only about half filled, so a bit of real wood texture shows through, and it is not shined up so it looks like plastic. If I end up not liking it, I can give a couple more coats later. I could even fill the pores the rest of the way, if need be. But for now, I just want to get this strung up, which I hope to do today.

So here is what it looks like now

Back
Image

Top
Image

Rosette
Image

Bark purfling
Image

End graft
Image
BTW, the binding is koa with a light figure.

Next, I will show putting on the bridge.

G

User avatar
whitespruce
Site Admin
Posts: 4367
Joined: Thu Aug 21, 2008 6:53 am
Include Off Topic: Yes
Location: Northern Minnesota, USA

Re: Documenting my first total thermally modified build

Post by whitespruce » Sun Nov 29, 2015 10:55 am

Now for the bridge

I have a fixture that I use for the bridge location. One end hooks in the nut slot and the other end snaps into the saddle slot
Image
I just need to make sure everything is centered and tape off the top where the bridge goes and all is ready

Then I drill and ream the outer bridge pin holes and put in the pins to lock the bridge in position
Image

Look in the sound hole and you can see the bridge pins in the mirror
Image
This is exactly where I want them in relation to the bridge plate and bracing

I scribe around the bridge and remove the tape from the bridge location
Image

Then I carefully scrape off the finish and I am ready to glue the bridge
Image

I did not take photos of the bridge gluing, but I used 3 clamps and cauls with the outer bridge pins inserted to make sure the location stayed correct. I left the tape on to make glue cleanup easier. After the squeeze-out gelled up a bit I removed it with a small chisel...just needed to slice and scrape it off the edge of the bridge, the tape kept it off the top.

Now, to string this up after it sat over night.

G

johnparchem
Site Admin
Posts: 967
Joined: Sat Oct 02, 2010 8:26 am
Include Off Topic: Yes
Location: Seattle
Contact:

Re: Documenting my first total thermally modified build

Post by johnparchem » Sun Nov 29, 2015 11:30 am

I like your bridge setting device. I will also pick up your method of taping the bridge area first before setting, scrapping the finish and gluing on the bridge.

RusRob
Posts: 411
Joined: Wed Feb 05, 2014 10:11 pm
Include Off Topic: Yes

Re: Documenting my first total thermally modified build

Post by RusRob » Sun Nov 29, 2015 1:00 pm

That is looking really good Grant. open pores can look really good and it leaves less finish on the guitar which is a good thing. I rebuilt a little Gibson LG-0 a few years ago which is all Mahogany. I wanted that open pore look so I put 2 coats of sealer and 2 coats of lacquer on it and sanded the back and sides down 1000 grit paper and rubbed the top out using 0000 steel wool. The back and sides have a nice satin finish and the top a bit more gloss but it still shows off the wood nicely.

Interesting how you do your bridges... I do mine almost exactly the same. I use to use a piece of wood almost like you do but came from the 12th fret and not the nut, but I now use a Saddle-Matic that Stew Mac sells which works great. And rather than using the 2 pins I just put about 5 layers of tape on after I cut out for the bridge and that makes a little well that the bridge slips right in place. Pretty close to the same process though.

I bet you are just itching to string that baby up...

Cheers,
Bob

User avatar
whitespruce
Site Admin
Posts: 4367
Joined: Thu Aug 21, 2008 6:53 am
Include Off Topic: Yes
Location: Northern Minnesota, USA

Re: Documenting my first total thermally modified build

Post by whitespruce » Sun Nov 29, 2015 8:07 pm

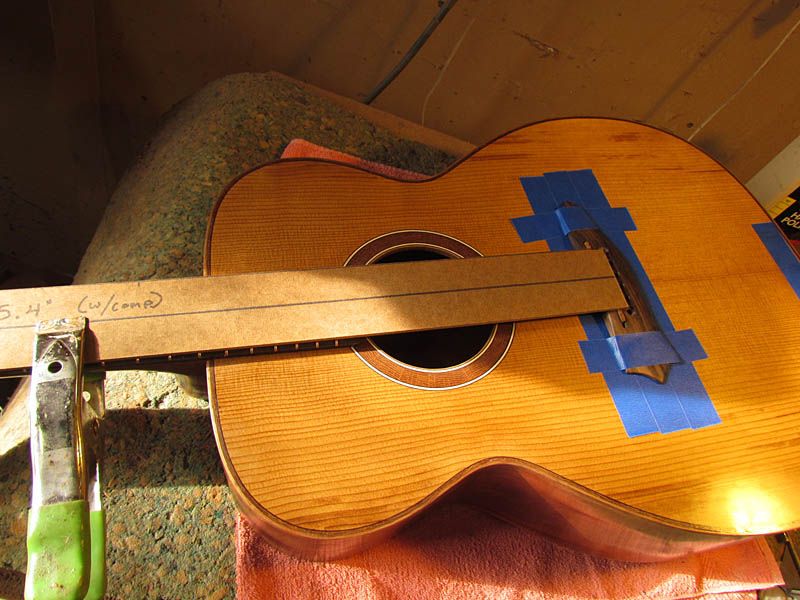
Well, it is playable. More to do, time-wise, than I figured. Had to make the nut and saddle. Those who know me already know that my "from scratch" builds really are "from scratch". For example, my tops always start as logs and my shell inlay starts as whole shells. So this should not be a surprise.

I usually use moose or bison bone for nuts and deer bone for saddles. This is considerably denser than the cow bone you can buy.

So, my saddles, for example
Image
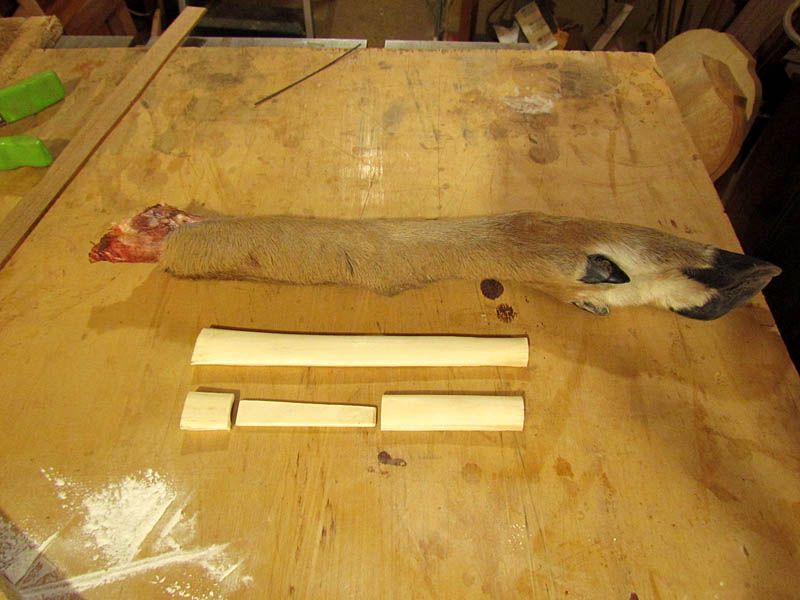
This comes from the hind foot of a buck deer (the new foot is yet to be processed) I should add that there is no problem with grease in the bone. Just clean it up when it is fresh, saw it lengthwise and get the fresh marrow out and cut off any ends with spongy bone. Then scrub it up with dish soap and hot water and you will get the nice clean bone you see here. And DO NOT cook it. That just breaks down the fats and gets them into the bone. Then you do have issues.

So, anyhow, the bison bone for the nut was done the same way.

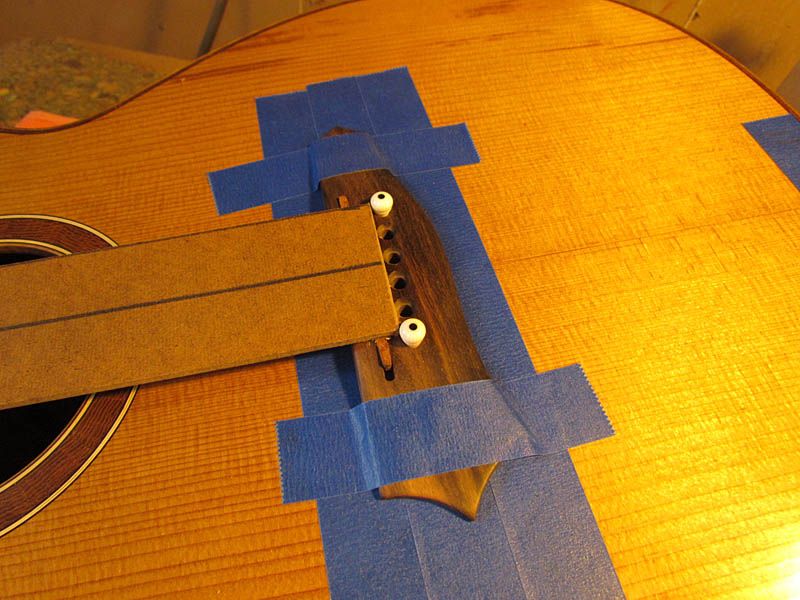
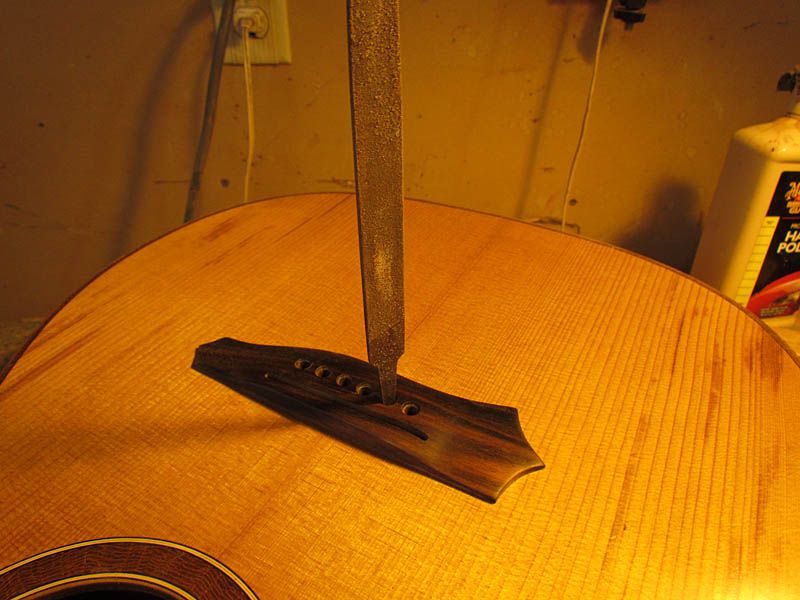
Another cheap tip is that I have never bought a bridge pin reamer. The tang on a 6 inch file reams perfectly for Stew Mac pins
Image

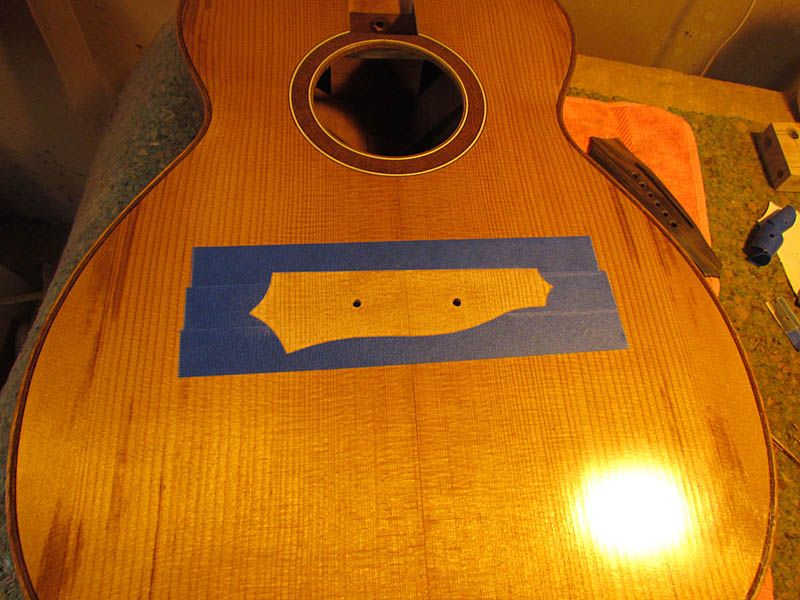
OK, here is the final deal
Image

Image

Image

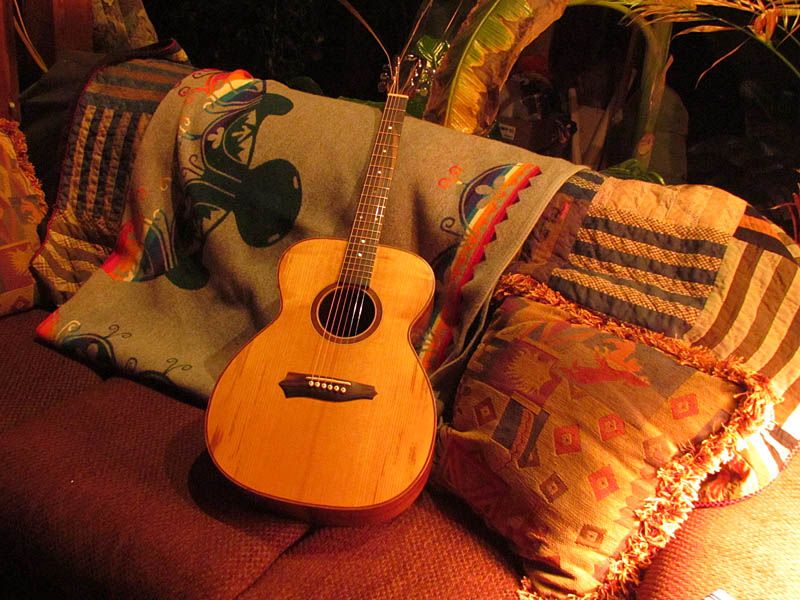
So, how does it sound?

At 5 minutes of strung up, it is way louder than my bar fret jumbo from this past Summer. And it has a brighter sound, probably due largely to the smaller OM body. Tons of overtones and sustain. Now needs to have some playing hours to see what it will really be, but I am very pleased and will follow this route again.

G

User avatar
Dennis Leahy
Dishwasher
Posts: 7082
Joined: Thu Aug 21, 2008 1:59 am
Include Off Topic: Yes
Location: looking for a place to live

Re: Documenting my first total thermally modified build

Post by Dennis Leahy » Sun Nov 29, 2015 10:01 pm

Looks beautiful, and love hearing your initial report about the sound!

I was sorting through the thermally modified tops that I got from you, and (as you probably remember), you gave me a few orphan pieces that were on the outside of the bundles for protection during transport and cooking the bundles of tops. (These were to be sliced-up, and made into laminated top bracing.)

I picked up one orphan piece of thermally modified White Spruce, with a couple of knots in it, and I think it may be the liveliest piece of wood I have ever had in my hands. It doesn't care that there are several knots, it wants to sing. It needs to sing. That piece is destined to be a one-piece top for a uke, or flattop mandolin. I cannot slice it into strips. It spoke to me.

When a few more luthiers get their hands on some of your thermally modified wood, and word gets around, luthiers are going to be beating a path to your door.
Dennis Leahy

User avatar
Dennis Leahy
Dishwasher
Posts: 7082
Joined: Thu Aug 21, 2008 1:59 am
Include Off Topic: Yes
Location: looking for a place to live

Re: Documenting my first total thermally modified build

Post by Dennis Leahy » Mon Nov 30, 2015 12:02 am

I thought I'd try resetting the white balance on a few of the photos, to try to give a good idea of the color of the tops.
GrantTMtop3.jpg
GrantTMtop4.jpg
Are these close to the correct color?
You do not have the required permissions to view the files attached to this post.
Dennis Leahy

User avatar
whitespruce
Site Admin
Posts: 4367
Joined: Thu Aug 21, 2008 6:53 am
Include Off Topic: Yes
Location: Northern Minnesota, USA

Re: Documenting my first total thermally modified build

Post by whitespruce » Mon Nov 30, 2015 3:13 am

Dennis Leahy wrote:I thought I'd try resetting the white balance on a few of the photos, to try to give a good idea of the color of the tops.
GrantTMtop3.jpg
GrantTMtop4.jpg
Are these close to the correct color?
No, these look too gray. About halfway between these and the originals would be close. The bark rosette, especially, is a way richer brown. I will try to get an accurate daylight photo today.

I played this thing (such as my playing is) for about half hour or so last night. Have to get out my old cocobolo OM for comparison. Gonna take this over to John Sumption's tonight. Nobody else around here this time of year to try it out on.

G

Post Reply