
Well, I am still plodding along on this one, but don't have any recent photos so I will just share some observations.
First of all, this wood is very stiff and stable. Parts like top and back plates stay very flat and, like I said elsewhere, sides refuse to bend, thus the workaround of heat treating them after bending, which appears to work well. However, make sure your sides don't have much spring back before cooking them. The wood almost borders on being brittle, but not to the point where it is weak. My binding channels in spruce tops used to have fuzzy edges...the TM tops have much less.
Sanding dust is more like powder with no hint of "stringeyness". And it sands easier, at least on woods like mahogany and spruce. I have the neck carving pretty much roughed out and it carved mush easier than the non-treated wood. I have not checked the before and after, but it appears that there has been about a 5 to 10% weight loss. I will be weighing before and after on some of the next batch I have done.
I had heard comments on gluing problems, but I did not experience any.
So, I realize that this is only one guitar plus preliminary steps on Sally's baritone uke, but I am quite favorably impressed. Obviously, the final test will be after it is strung up.
G
Documenting my 1st thermally modified build, videos added, SOLD
-
whitespruce

- Site Admin
- Posts: 4367
- Joined: Thu Aug 21, 2008 6:53 am
- Include Off Topic: Yes
- Location: Northern Minnesota, USA
-
whitespruce
- Site Admin
- Posts: 4367
- Joined: Thu Aug 21, 2008 6:53 am
- Include Off Topic: Yes
- Location: Northern Minnesota, USA
Re: Documenting my first total thermally modified build
OK, progress is being made.
Got it all sanded down and did a shellac and sanding dust pore fill. Not a totally smooth finish since with the "aged" look of the thermally modified wood, I want to maintain a more "vintage" look, so the pores will show just a bit.
Here is the box with the first coat of Liberon, after a shellac seal coat
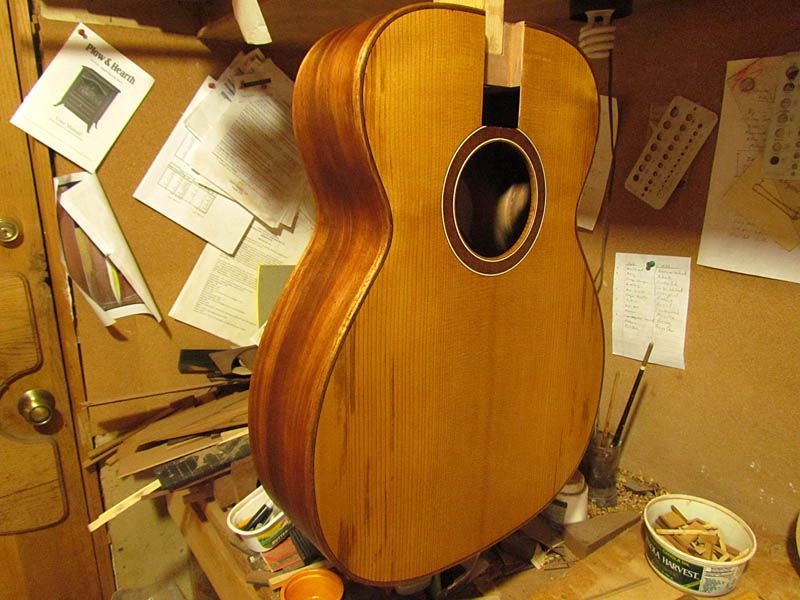
Just glued the heel cap on the neck, so when that is dry, I can catch up with the neck finish. Still need to make the bridge, but not much more before this is strung up
G
Got it all sanded down and did a shellac and sanding dust pore fill. Not a totally smooth finish since with the "aged" look of the thermally modified wood, I want to maintain a more "vintage" look, so the pores will show just a bit.
Here is the box with the first coat of Liberon, after a shellac seal coat
Just glued the heel cap on the neck, so when that is dry, I can catch up with the neck finish. Still need to make the bridge, but not much more before this is strung up
G
-
whitespruce
- Site Admin
- Posts: 4367
- Joined: Thu Aug 21, 2008 6:53 am
- Include Off Topic: Yes
- Location: Northern Minnesota, USA
Re: Documenting my first total thermally modified build
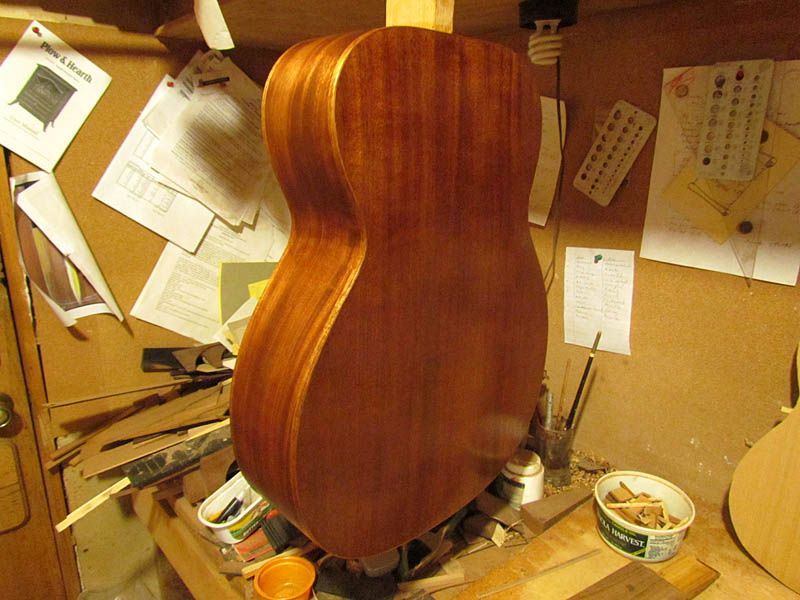
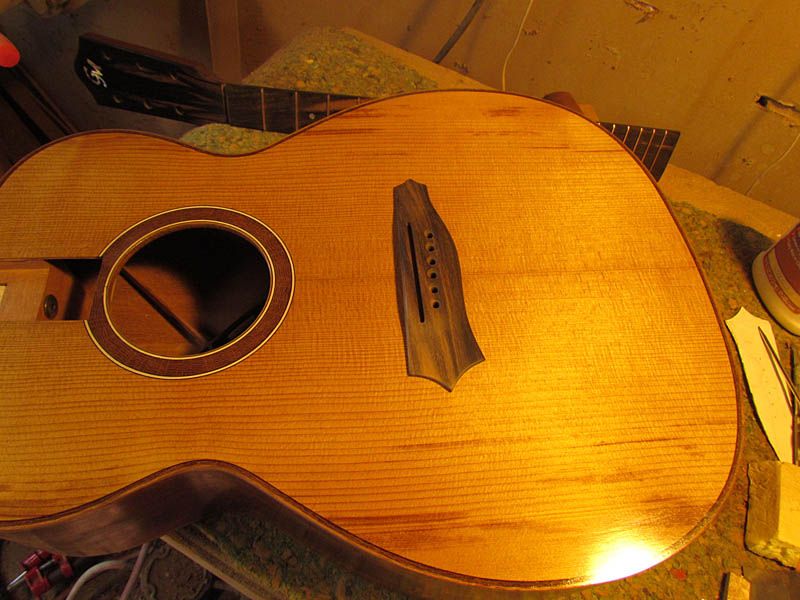
Put on the second coat of Liberon on the body this morning and the first on the neck.
Here are a couple of close-ups of the finish, just applied
I am liking the look of this one.
G
Here are a couple of close-ups of the finish, just applied
I am liking the look of this one.
G
Re: Documenting my first total thermally modified build
That's PURDY.....
Nice Golden glow to it. It will be a knockout when it is finished.
Cheers,
Bob
Nice Golden glow to it. It will be a knockout when it is finished.
Cheers,
Bob
-
Dennis Leahy

- Dishwasher
- Posts: 7082
- Joined: Thu Aug 21, 2008 1:59 am
- Include Off Topic: Yes
- Location: looking for a place to live
Re: Documenting my first total thermally modified build
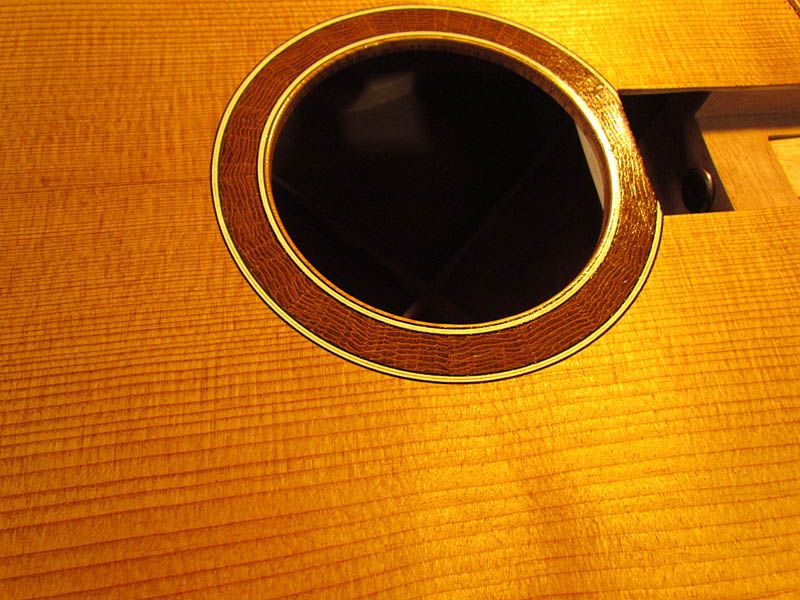
Love the rosette! Looks kinda like tooled leather. The thermal modification sure brings out the sparkle of the medullary "silk."
Oh, and what do you think of the thump/tap/drum of the box, without strings?
Oh, and what do you think of the thump/tap/drum of the box, without strings?
Dennis Leahy
-
Joe Sustaire

- Moderator
- Posts: 2640
- Joined: Sat Aug 23, 2008 6:41 pm
- Include Off Topic: Yes
- Location: Talihina, Oklahoma
Re: Documenting my first total thermally modified build
Yep, that is looking goof. Love the look of that rosette! And that Liberon finish is looking pretty nice.
"I tell you we are here on earth to fart around, and don't let anyone tell you any different!"
Kurt Vonnegut
Kurt Vonnegut
-
whitespruce
- Site Admin
- Posts: 4367
- Joined: Thu Aug 21, 2008 6:53 am
- Include Off Topic: Yes
- Location: Northern Minnesota, USA
Re: Documenting my first total thermally modified build
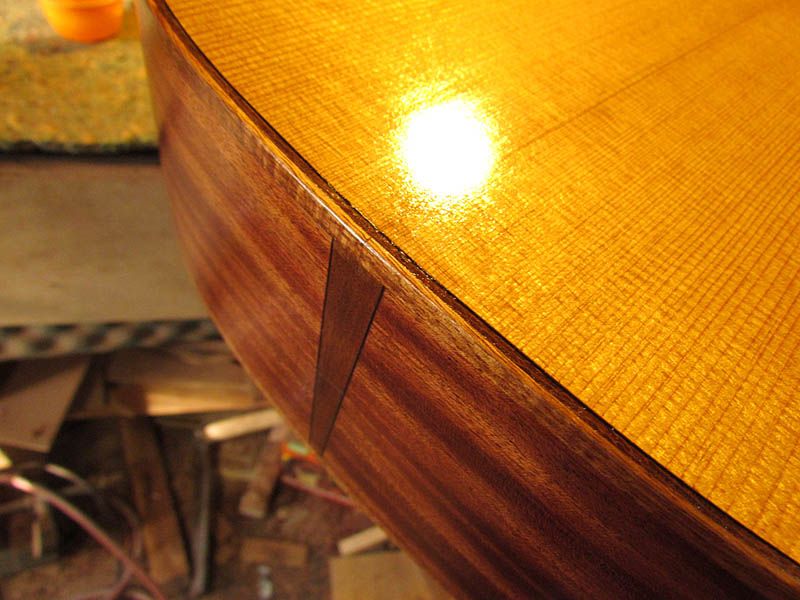
Thanks for the kind words. One thing I have noticed on the thermally modified tops it that the rays (silk) really jumps out, even before a finish is on.
I will probably give this a last coat of finish today (that will make 5 coats of Liberon) and make the bridge, in hopes to string it up by Sunday or Monday.
G
I will probably give this a last coat of finish today (that will make 5 coats of Liberon) and make the bridge, in hopes to string it up by Sunday or Monday.
G
-
whitespruce
- Site Admin
- Posts: 4367
- Joined: Thu Aug 21, 2008 6:53 am
- Include Off Topic: Yes
- Location: Northern Minnesota, USA
Re: Documenting my first total thermally modified build
Finished making the bridge this morning
Not glued on...just sitting

This is actually thermally modified ebony. The look has not changed, but the weight dropped 10%. This bridge weighs 30.4 grams.
I have all of the finish coats on that I am doing for now. If need be, I can always add a couple more later. I may try to polish this out later today. If so, I can glue the bridge on tonight and string up tomorrow. Otherwise, string up Sunday
G
Oh, BTW, these photos are not the right color, but I have no idea how to fix it. I just take the dam pictures and the camera does what it does. I am not a photographer....I just make sawdust.
Not glued on...just sitting
This is actually thermally modified ebony. The look has not changed, but the weight dropped 10%. This bridge weighs 30.4 grams.
I have all of the finish coats on that I am doing for now. If need be, I can always add a couple more later. I may try to polish this out later today. If so, I can glue the bridge on tonight and string up tomorrow. Otherwise, string up Sunday
G
Oh, BTW, these photos are not the right color, but I have no idea how to fix it. I just take the dam pictures and the camera does what it does. I am not a photographer....I just make sawdust.