Documenting my 1st thermally modified build, videos added, SOLD

Guitars by Grant Goltz of Hackensack, MN
User avatar
whitespruce
Site Admin
Posts: 4367
Joined: Thu Aug 21, 2008 6:53 am
Include Off Topic: Yes
Location: Northern Minnesota, USA

Documenting my 1st thermally modified build, videos added, SOLD

Post by whitespruce » Sat Sep 19, 2015 4:11 pm

This thread will fully document my first attempt to build a complete guitar from thermally modified wood. Only a few parts, such as fingerboard, bridge, bindings, linings and other minor appointments will be unmodified wood. I will attempt to show enough detail so that any of you should be able to follow and duplicate the process, and will do my best to answer any and all questions that anybody may have.

Since I have not done this before, it will be somewhat of a learning process for me, too, and there may be times when I will need to backtrack and make another attempt at some things. But that is one of the reasons for this thread...so we can all learn.

This will basically use the same woods as are in the thermally modified package in this month's (September) drawing, with the following exceptions: I am not using a sister side set since I am building a small body (OM) guitar, so picked a narrower, but similar side set. I will be using a one-piece rather than scarfed peghead and stacked heel neck. I will be using my own bracing patterns and my adjustable neck joint.

As I noted, this will be an OM size guitar and will have a ribbon stripe African mahogany back and sides and a white spruce top.

Here is the top I will be using
Image
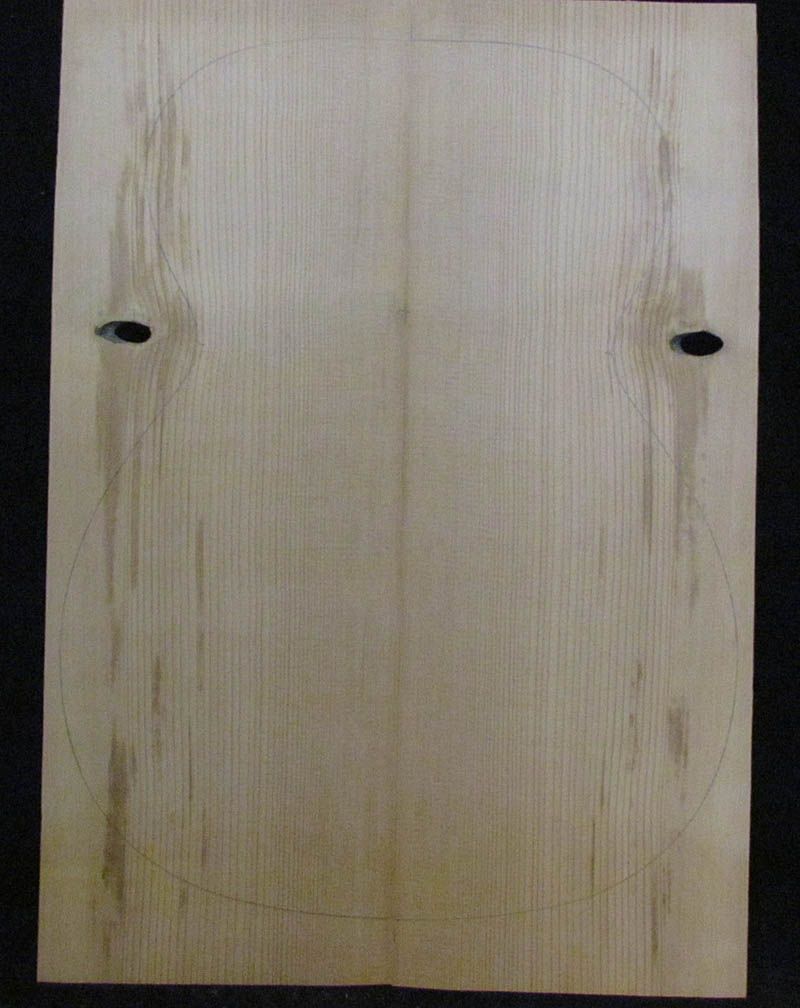
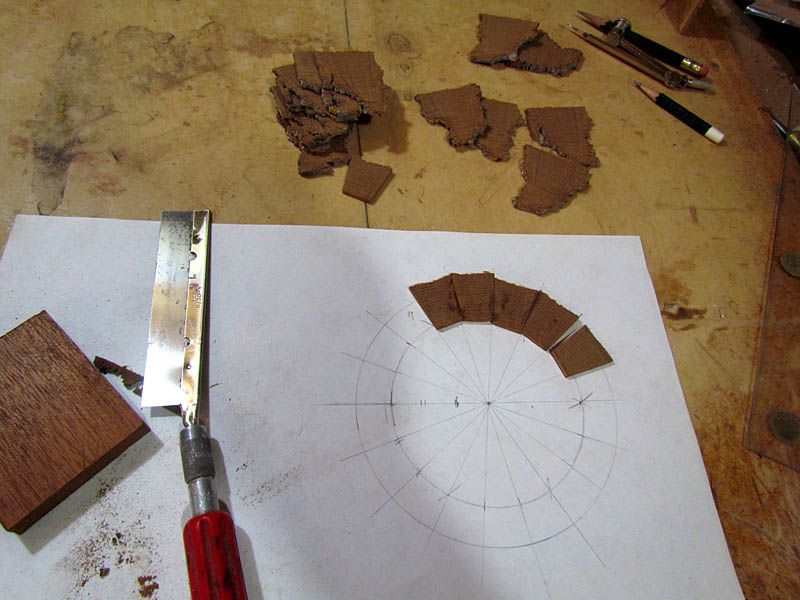
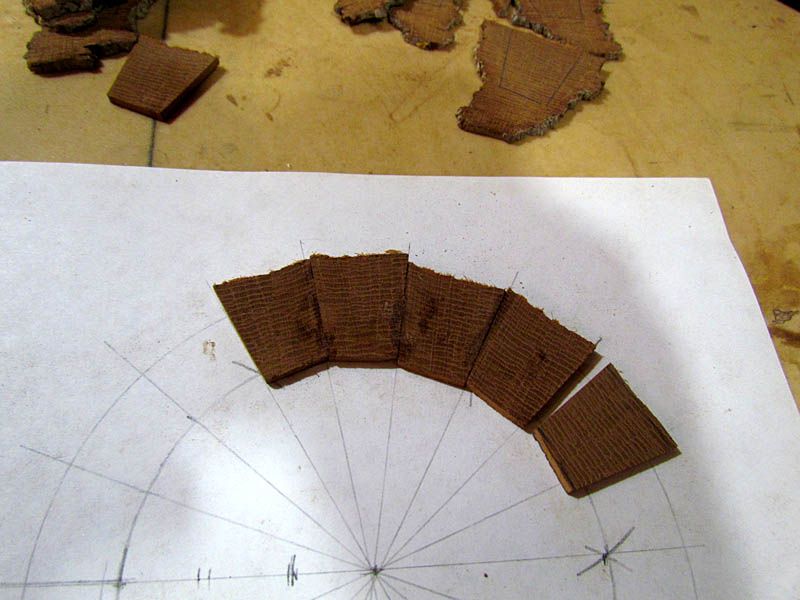
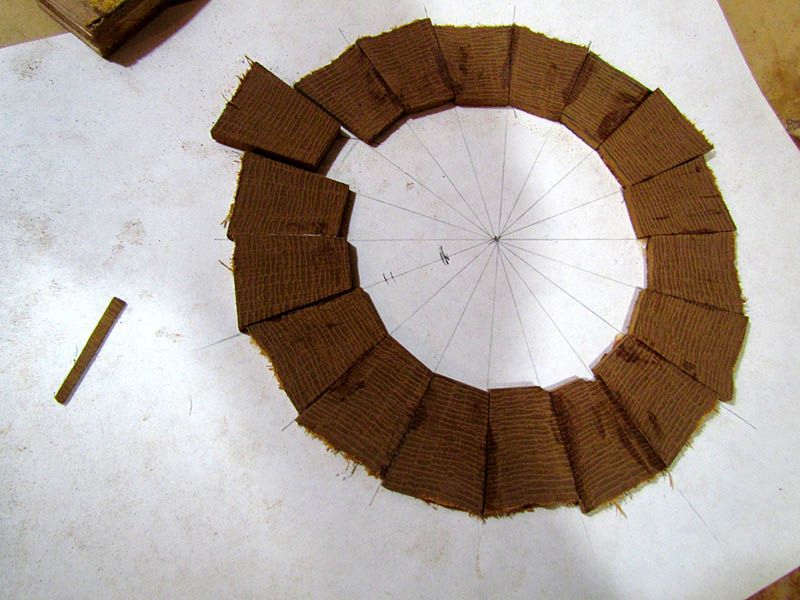
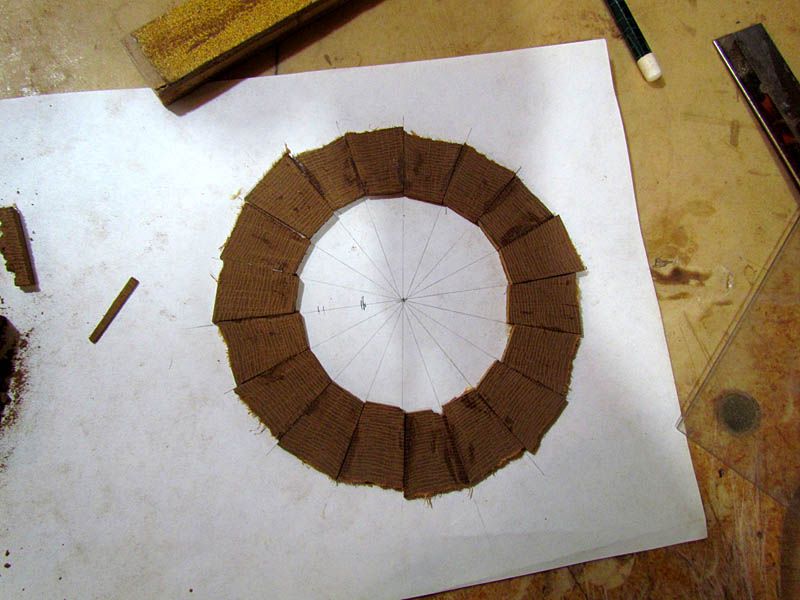
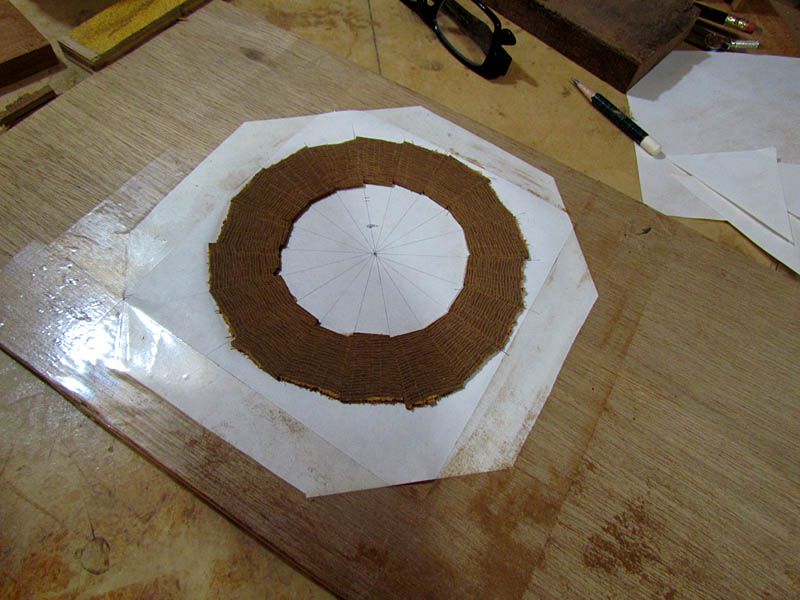
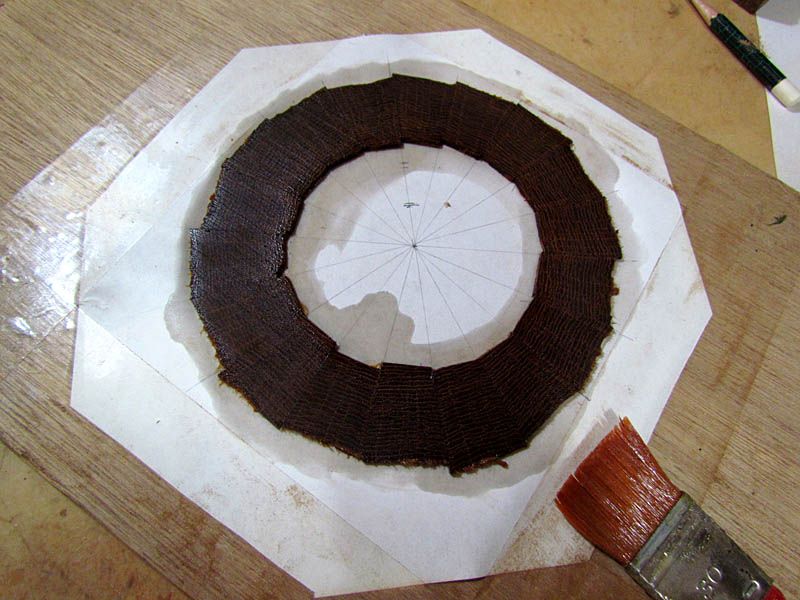
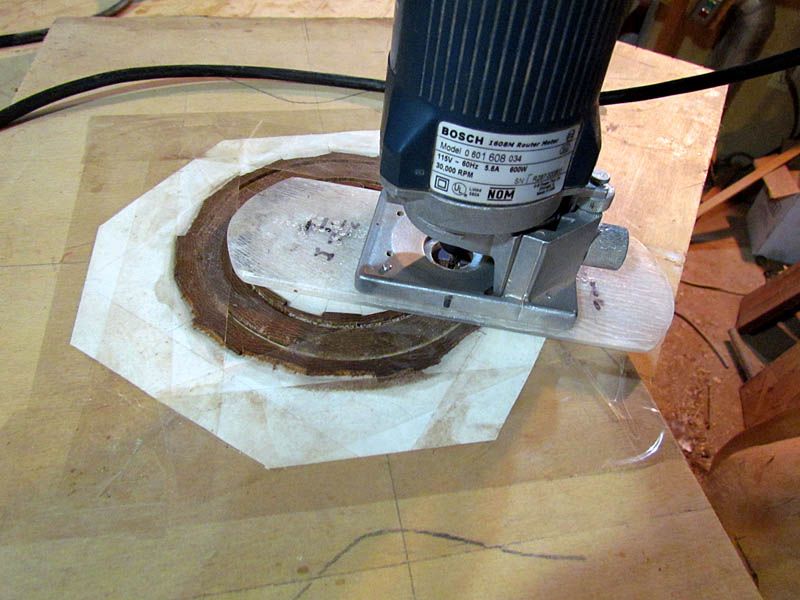
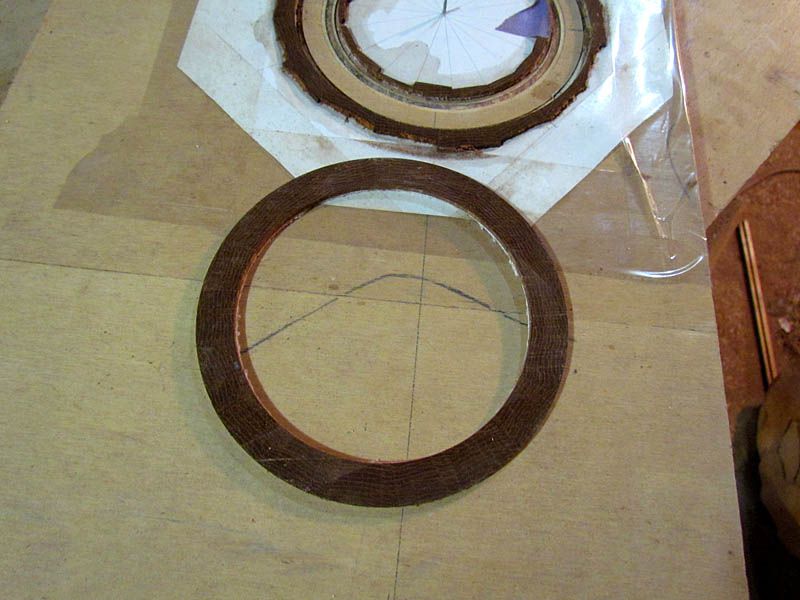
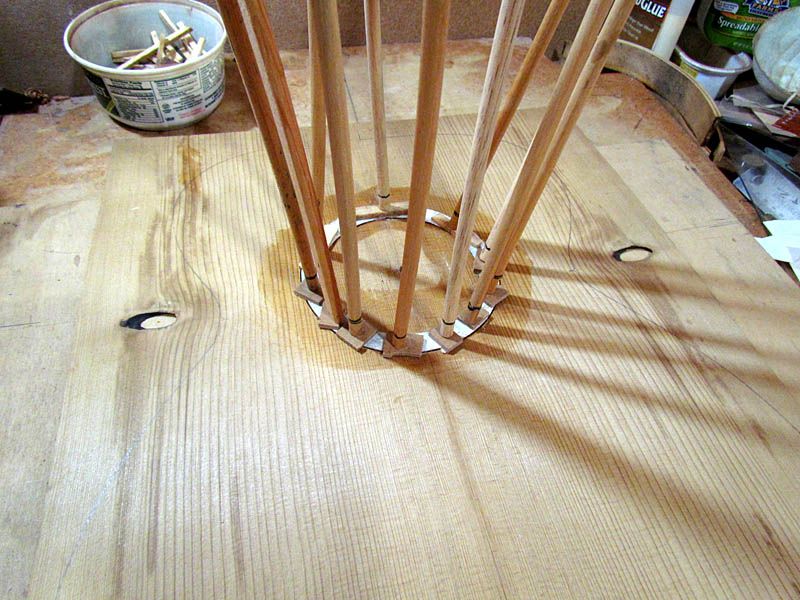
This top has a few sap stains. Handling it reminds me of working with a pane of glass. I will be using a segmented end grain white oak bark rosette.

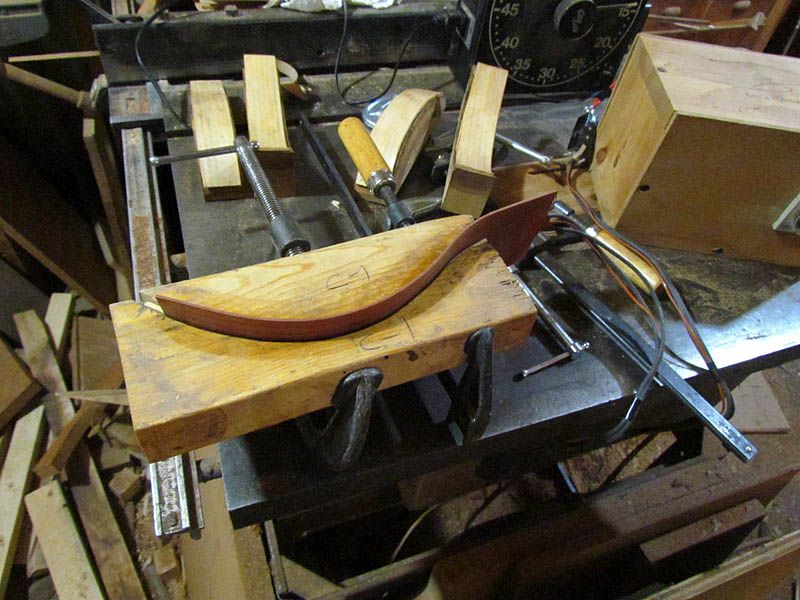
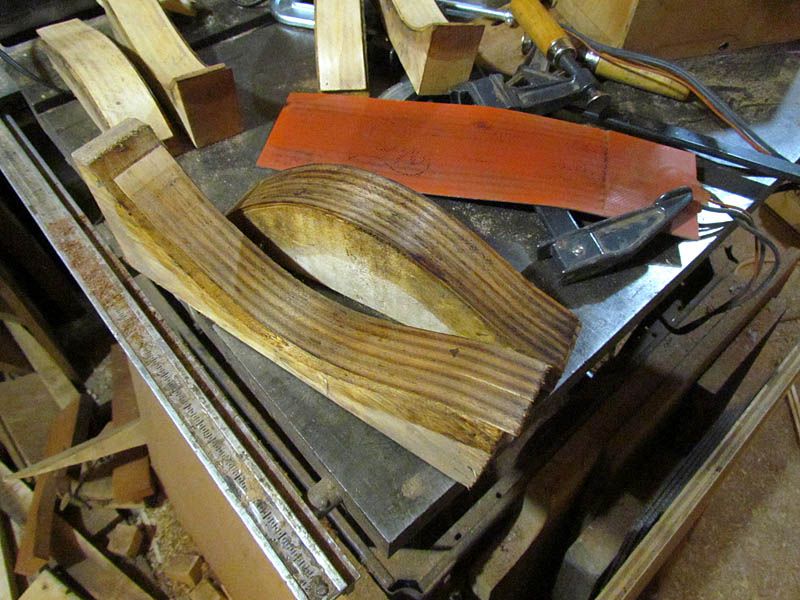
Here is the neck blank, back plates, and sides
Image
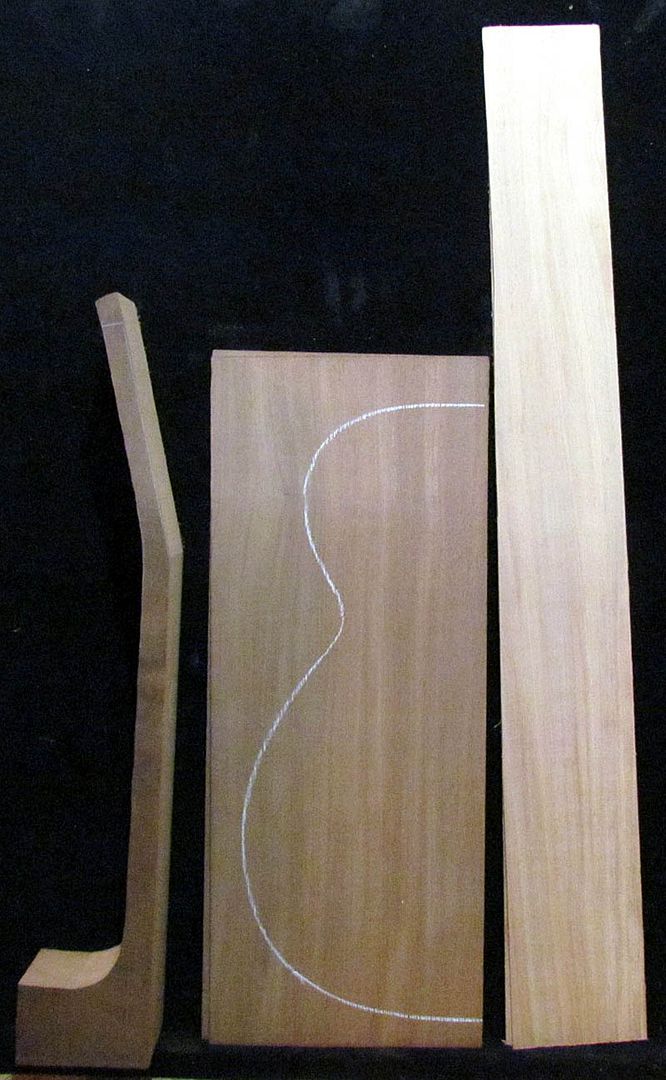
Note that the sides have not been thermally modified. This will be done after bending and I will fully detail and describe the process.

Stay tuned, I hope to be able to keep this build moving. Jump in at any time with questions, comments, and suggestions.

G

User avatar
whitespruce
Site Admin
Posts: 4367
Joined: Thu Aug 21, 2008 6:53 am
Include Off Topic: Yes
Location: Northern Minnesota, USA

Re: Documenting my first total thermally modified build

Post by whitespruce » Sun Sep 20, 2015 6:33 pm

Moving on a bit. we were at a friend's house most of the day helping pick grapes, but I managed a bit of shop time today.

As most of you know, my top bracing pattern uses 3 curved braces that are laminated from 2 pieces of 1/8" thick spruce. Since I will be using thermally modified wood, I needed to make thermally modified curved brace stock. I usually soak the 1/8" spruce for a few hours and clamp it in a 2-piece mold after heating it with a mini heating blanket. Then glue up in the same mold. I did basically the same thing except after I let the curved pieces dry overnight, I replaced the heating blanket and gave it a 10 minute cycle at 190 degrees C, like this

Image

After the heating cycle

Image
The dark lines are not wood grain...the heating elements in the blanket left the darker lines. Next time I will add a layer of aluminum foil to spread the heat.

Another one being heat treated

Image
The piece sitting on the clamps is a thermally modified Osage Orange bridge plate

I then spread glue and clamped these up (no photos)

Next I will work on the rosette.

G

User avatar
printer2
Posts: 430
Joined: Sat Jun 15, 2013 3:18 pm
Include Off Topic: Yes
Location: Fred in Winnipeg

Re: Documenting my first total thermally modified build

Post by printer2 » Sun Sep 20, 2015 7:23 pm

Baked rosette? Just kidding, actually thought of doing some wood just to get different colors. Cherry turns a nice shade and really brings out the flame in Maple as we saw in the other thread. Looking forward to the bark rosette, heck the whole build. We need to do a few more builds with this stuff to get a handle on the process. Can't wait till you get to carving the neck. Curious to here how it goes.

User avatar
Pat Foster
Moderator
Posts: 1724
Joined: Sun Nov 30, 2008 12:19 pm
Include Off Topic: Yes
Location: Spokane, Eastern Washington
Contact:

Re: Documenting my first total thermally modified build

Post by Pat Foster » Mon Sep 21, 2015 6:54 am

Looking forward to this one, Grant. thanks!

Pat
"The large print giveth, and the small print taketh away." — Tom Waits
__________________________________

http://www.patfosterguitars.com

User avatar
whitespruce
Site Admin
Posts: 4367
Joined: Thu Aug 21, 2008 6:53 am
Include Off Topic: Yes
Location: Northern Minnesota, USA

Re: Documenting my first total thermally modified build

Post by whitespruce » Mon Sep 21, 2015 8:25 pm

Moving on to the rosette. This will be a segmented ring of end grain white oak bark with an inner and outer b/w/b veneer line sequence.

I first made a pile of 1/8" thick bark slices from the end of a thick bark chunk. Then I drew a rough layout pattern on paper and started cutting and gluing bark segments
Image
Glued them to each other and to the paper pattern.

A closer look
Image
Just cut to rough shape and sanded the edges for a good fit

The last segment ready to glue
Image

All glued up
Image

Next, I trimmed the paper and taped it to a piece of 1/4" plywood and ran it through my thickness sander to even up the surface
Image

And then, gave it a good coat of shellac
Image

Then taped it down to a board with a pivot pin and routed the ring
Image

Here is the finished ring
Image

Then I routed the channel in the top and glued it in....
Image
....paper side up. Tomorrow I will sand it almost flush and route channels for the b/w/b rings and glue them in

Thanks for looking,

G

User avatar
Dennis Leahy
Dishwasher
Posts: 7082
Joined: Thu Aug 21, 2008 1:59 am
Include Off Topic: Yes
Location: looking for a place to live

Re: Documenting my first total thermally modified build

Post by Dennis Leahy » Mon Sep 21, 2015 10:36 pm

Looking excellent. You make it look easy, Grant.
Dennis Leahy

User avatar
Joe Sustaire
Moderator
Posts: 2640
Joined: Sat Aug 23, 2008 6:41 pm
Include Off Topic: Yes
Location: Talihina, Oklahoma

Re: Documenting my first total thermally modified build

Post by Joe Sustaire » Tue Sep 22, 2015 8:22 am

Thanks for the step by step on your bark rosette Grant!
Can't wait to see it sanded....
"I tell you we are here on earth to fart around, and don't let anyone tell you any different!"
Kurt Vonnegut

Dean Kumbalek
Posts: 137
Joined: Sat Aug 23, 2008 5:42 pm
Include Off Topic: Yes
Location: rural Wisconsin countryside

Re: Documenting my first total thermally modified build

Post by Dean Kumbalek » Fri Sep 25, 2015 9:54 am

I also appreciate the step by step.

Thanks for that Grant.

Dean

Post Reply