
It's going to be a beauty Grant! Great wood and I always like to see your bracing system. Thanks for showing another build.
Brian
2 new bar fret guits, sound file added
-
BRuddy
- Posts: 1104
- Joined: Mon Aug 25, 2008 6:31 pm
- Include Off Topic: Yes
- Location: Keweenaw Bay, MI (the Upper Peninsula, eh?)
Re: 2 new bar fret guits
Brian R, N8ZED
"Still traveling through the universe at 33.7 million kilometers a day on Starship Earth - and enjoying the ride!."
"Still traveling through the universe at 33.7 million kilometers a day on Starship Earth - and enjoying the ride!."
-
whitespruce

- Site Admin
- Posts: 4367
- Joined: Thu Aug 21, 2008 6:53 am
- Include Off Topic: Yes
- Location: Northern Minnesota, USA
Re: 2 new bar fret guits
Thanks for the comments, Brian. That back is really gonna pop under a finish. I have 5 8/4 billets from this log. They are all slightly different, but all have the same general features (yes, including a few bug holes).
I have been showing this bracing pattern for a decade, and so far, I don't think anybody has tried it. Maybe I need to provide more details and a more complete step-by-step. I would sure like to see a few others try it and give some feedback. I recognize that it is more work than a standard X-brace, but sometimes you only get out what you are willing to put in.
If there is interest, I will start a topic with drawings, measurements and any other specs and walk anybody through this who is interested.
Any takers?
G
-
whitespruce
- Site Admin
- Posts: 4367
- Joined: Thu Aug 21, 2008 6:53 am
- Include Off Topic: Yes
- Location: Northern Minnesota, USA
Re: 2 new bar fret guits
Continuing on....
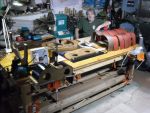
Here are the back laminated linings with the show edge rounded over and all sanded
Just need to trim to length and glue them in.
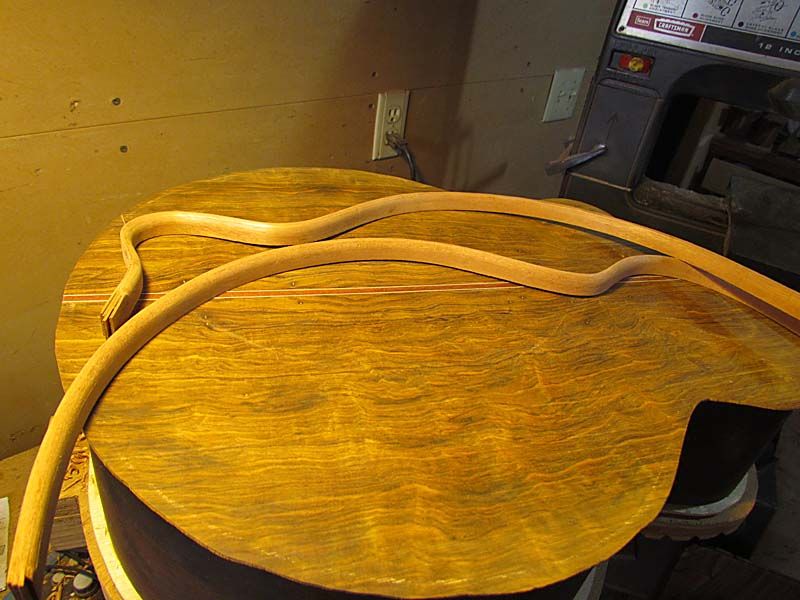
But first, I need to trim up the side profile. I did a rough side profiling before I bent the sides, so there is nothing drastic left to do. Just need to center the back radius dish on top of the sides and run a yellow pencil around to mark a more exact profile
And here it is marked
A block plane makes quick work along the sides
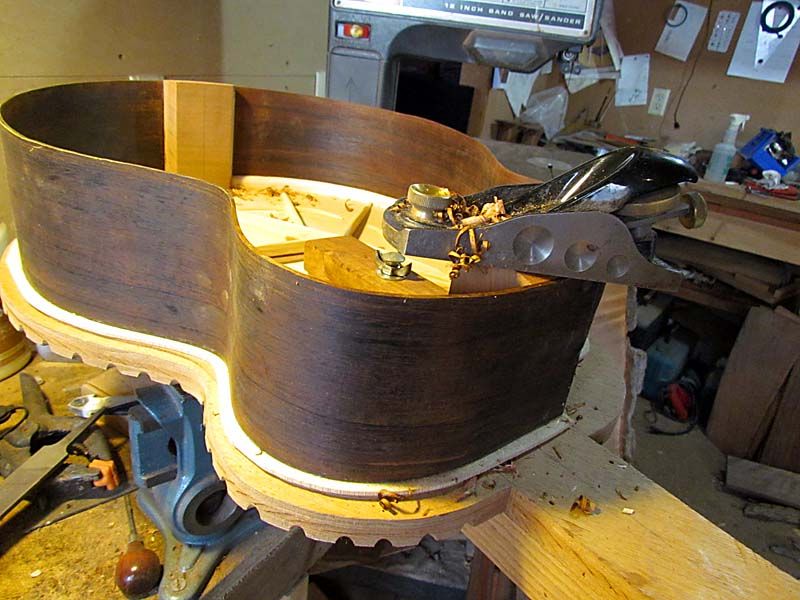
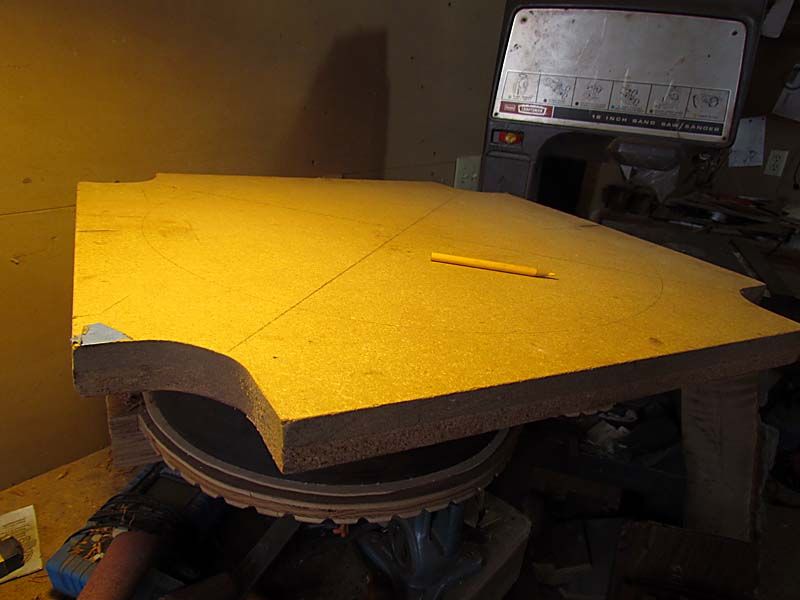
But I need a bit more care on the end blocks to get the contour correct
So I replace the radius dish and put coarse sandpaper on top of the blocks and move the dish and sandpaper back and forth
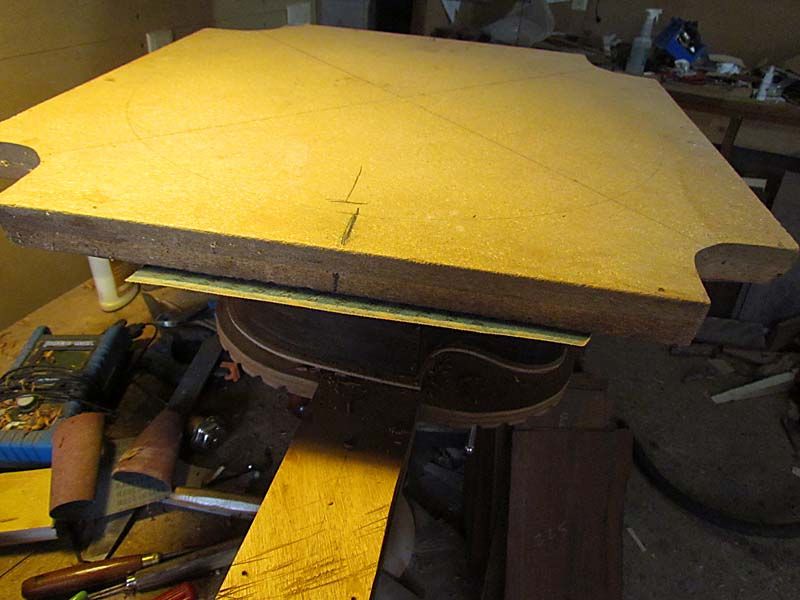
Here it is almost down
I will finish it the rest of the way after I glue in the linings and give everything a final sanding.
Now I will start bracing the back.
G
Here are the back laminated linings with the show edge rounded over and all sanded
Just need to trim to length and glue them in.
But first, I need to trim up the side profile. I did a rough side profiling before I bent the sides, so there is nothing drastic left to do. Just need to center the back radius dish on top of the sides and run a yellow pencil around to mark a more exact profile
And here it is marked
A block plane makes quick work along the sides
But I need a bit more care on the end blocks to get the contour correct
So I replace the radius dish and put coarse sandpaper on top of the blocks and move the dish and sandpaper back and forth
Here it is almost down
I will finish it the rest of the way after I glue in the linings and give everything a final sanding.
Now I will start bracing the back.
G
-
whitespruce
- Site Admin
- Posts: 4367
- Joined: Thu Aug 21, 2008 6:53 am
- Include Off Topic: Yes
- Location: Northern Minnesota, USA
Re: 2 new bar fret guits
I said that I would explain my back bracing in more detail, so here is the start.
For a review, here is what the finished product looks like
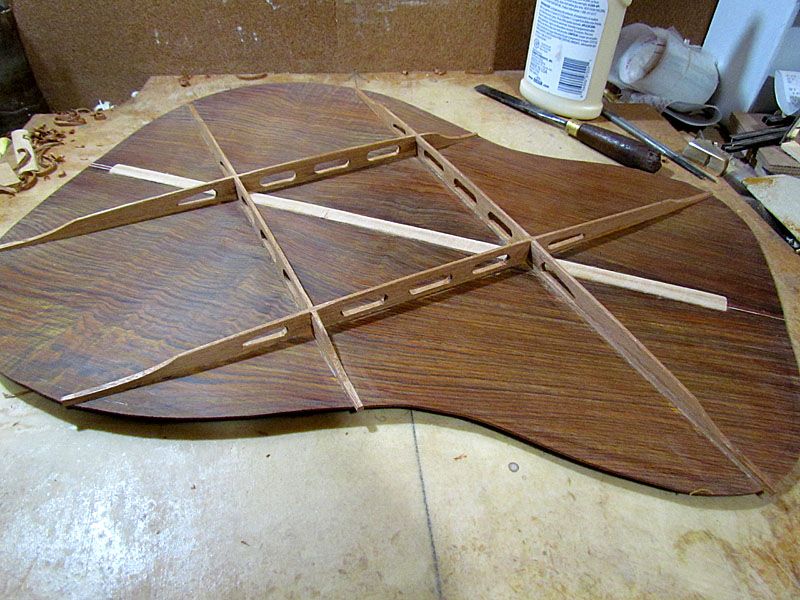
My original version was the same, but without the openings. I like the looks of the new version better, but have no idea if it performs any differently. A bit lighter in weight, but probably nothing significant.
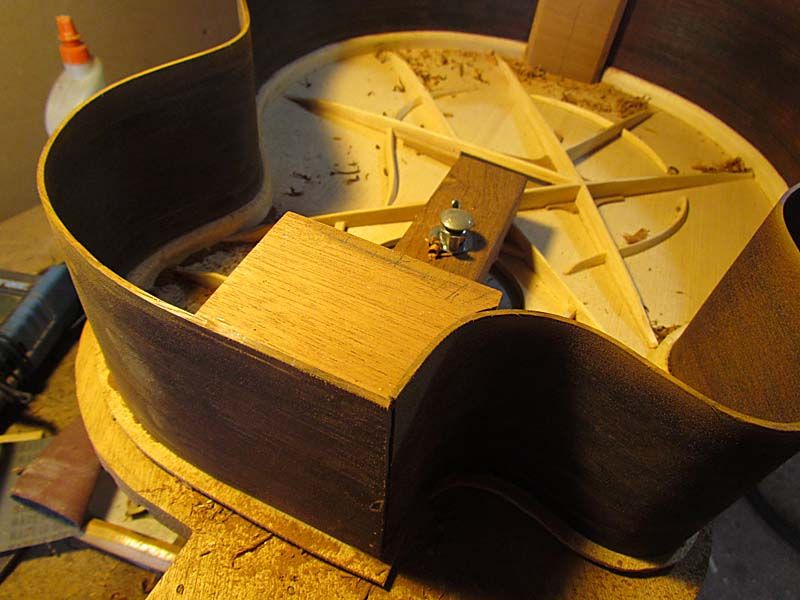
The layout is simple. The center is just a square, rotated 45 degrees.
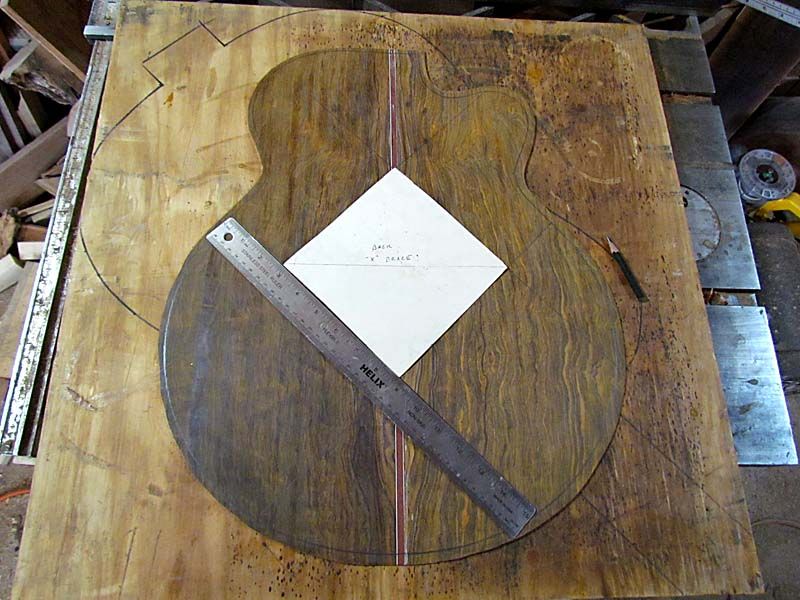
And the "legs" are just extended to the edge. On my larger bodied guitars, I use a 6" square. If you are building smaller instruments, you might want to reduce this a bit, maybe to 5 1/2' for an OM. For location, I put the upper end approximately on the center of the soundhole. Again, adjusting this a bit might better fit your body shape.
I glue these braces up from laminations. When I built them solid, I used 5 laminations, 3/16" wide by 1/8" tall. I rip these from scrap mahogany. I don't worry about grain orientation. Walnut would probably look nice, too, and if you want light colors, you could use basswood or spruce.
With the present version, I use 4 laminations. The first, third and fourth are the same 3/16" by 1/8". The second lamination is 3/16" wide by 3/8" tall and is where the openings are formed.
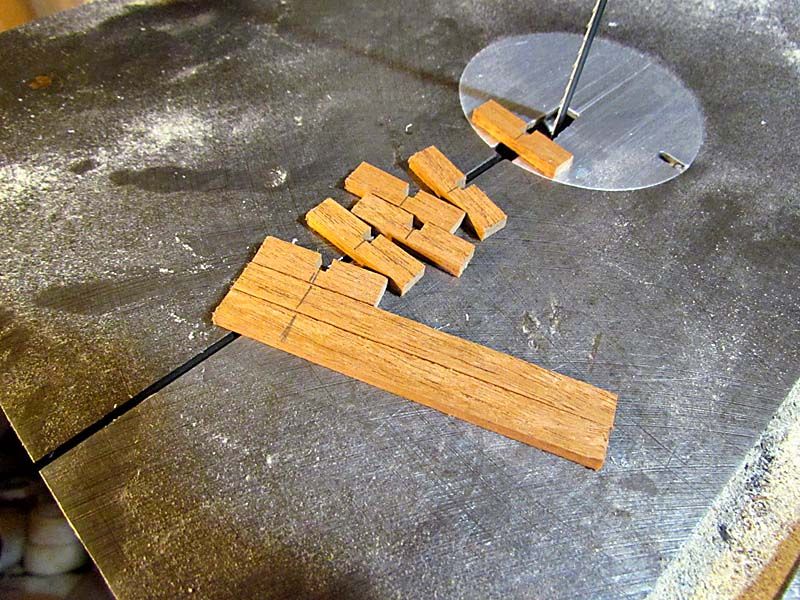
This layer requires 22 pieces, and I cut and shape them before I start bracing
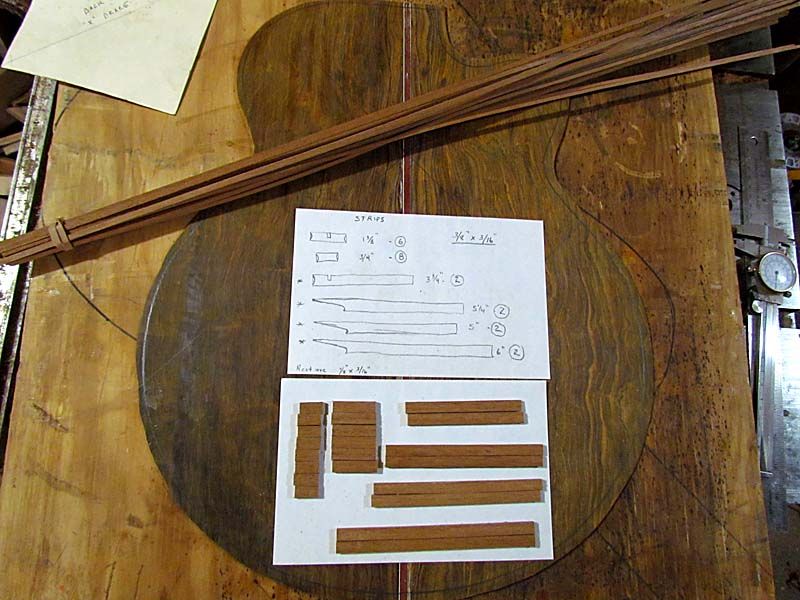
There are 8 pieces, 3/4" long and 6 pieces 1 3/8" long. The other (longer) pieces will vary in length depending on your body shape and size. For my jumbo shape there are 2 pieces 3 3/4" long, 2 pieces 5" long, 2 pieces 5 1/4" long and 2 pieces 6" long.
The 1 3/8 " pieces get notched to cross at the X's. The 3 3/4" pieces also get notched (11/16" from the end) to form half of the outer X's. The other long pieces get the "bird mouth" shape at one end to form the longer openings.
Here is how these pieces fit in the layout
I will show the shaping of the ends of these pieces in the next post and then we can get on with the glue-up.
G
For a review, here is what the finished product looks like
My original version was the same, but without the openings. I like the looks of the new version better, but have no idea if it performs any differently. A bit lighter in weight, but probably nothing significant.
The layout is simple. The center is just a square, rotated 45 degrees.
And the "legs" are just extended to the edge. On my larger bodied guitars, I use a 6" square. If you are building smaller instruments, you might want to reduce this a bit, maybe to 5 1/2' for an OM. For location, I put the upper end approximately on the center of the soundhole. Again, adjusting this a bit might better fit your body shape.
I glue these braces up from laminations. When I built them solid, I used 5 laminations, 3/16" wide by 1/8" tall. I rip these from scrap mahogany. I don't worry about grain orientation. Walnut would probably look nice, too, and if you want light colors, you could use basswood or spruce.
With the present version, I use 4 laminations. The first, third and fourth are the same 3/16" by 1/8". The second lamination is 3/16" wide by 3/8" tall and is where the openings are formed.
This layer requires 22 pieces, and I cut and shape them before I start bracing
There are 8 pieces, 3/4" long and 6 pieces 1 3/8" long. The other (longer) pieces will vary in length depending on your body shape and size. For my jumbo shape there are 2 pieces 3 3/4" long, 2 pieces 5" long, 2 pieces 5 1/4" long and 2 pieces 6" long.
The 1 3/8 " pieces get notched to cross at the X's. The 3 3/4" pieces also get notched (11/16" from the end) to form half of the outer X's. The other long pieces get the "bird mouth" shape at one end to form the longer openings.
Here is how these pieces fit in the layout
I will show the shaping of the ends of these pieces in the next post and then we can get on with the glue-up.
G
-
whitespruce
- Site Admin
- Posts: 4367
- Joined: Thu Aug 21, 2008 6:53 am
- Include Off Topic: Yes
- Location: Northern Minnesota, USA
Re: 2 new bar fret guits
OK, getting the center lamination pieces shaped and ready.
First, the 1 3/8" pieces go in the X's, so they need to be notched. I mark the center and...

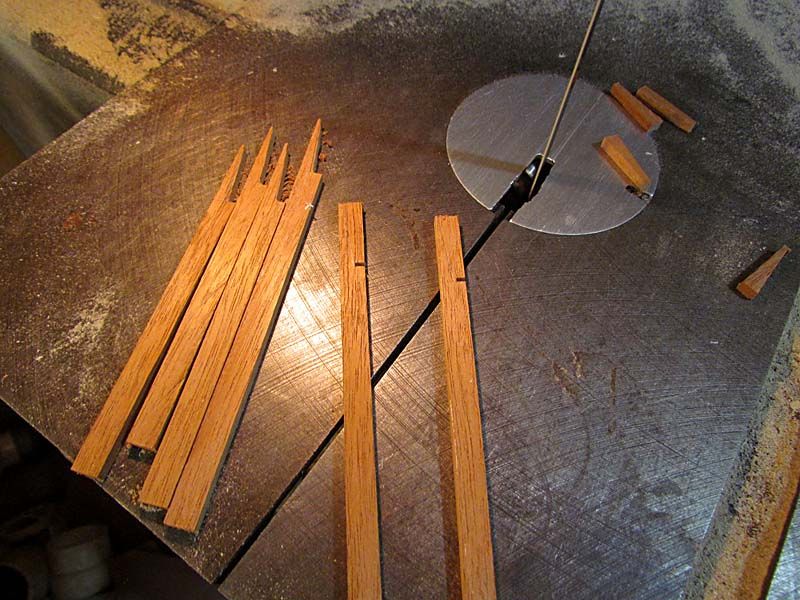
...eyeball a slightly undersized notch on the bandsaw
The 3 3/4" pieces get a notch also, same distance from an end
Then I touch up the notches with a small file until they fit
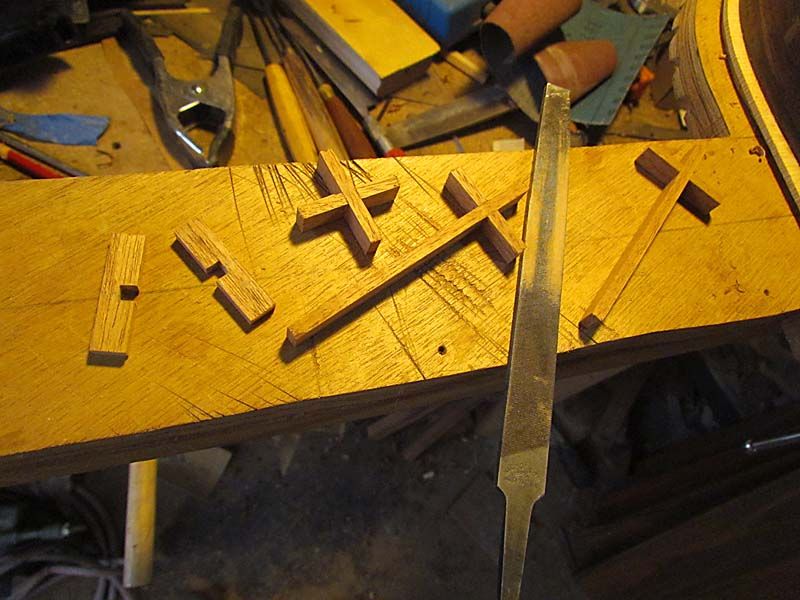
Once you get the hang of bandsawing the notch close to size, it takes only a few strokes of the file to clean things up for a nice fit
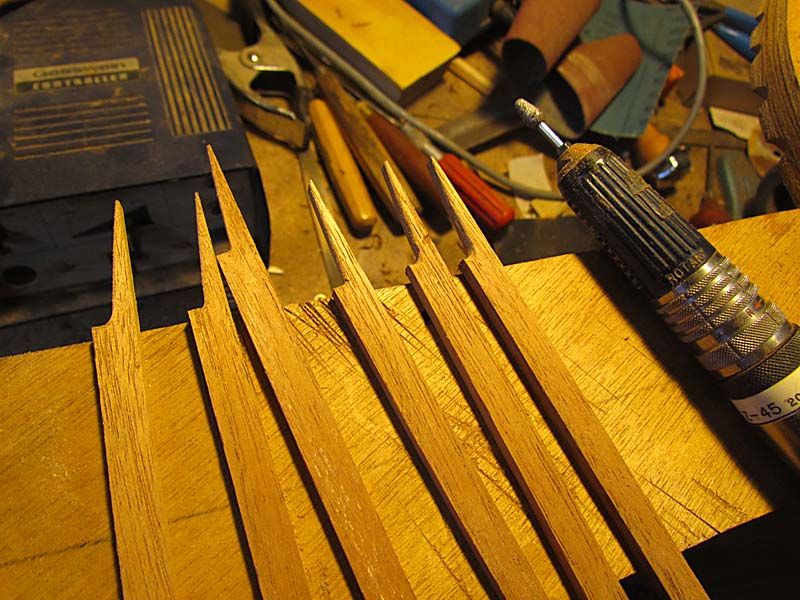
Now I need to shape the ends. For this I use a ruby studded bur in a rotary handpiece...like a fancy dremel
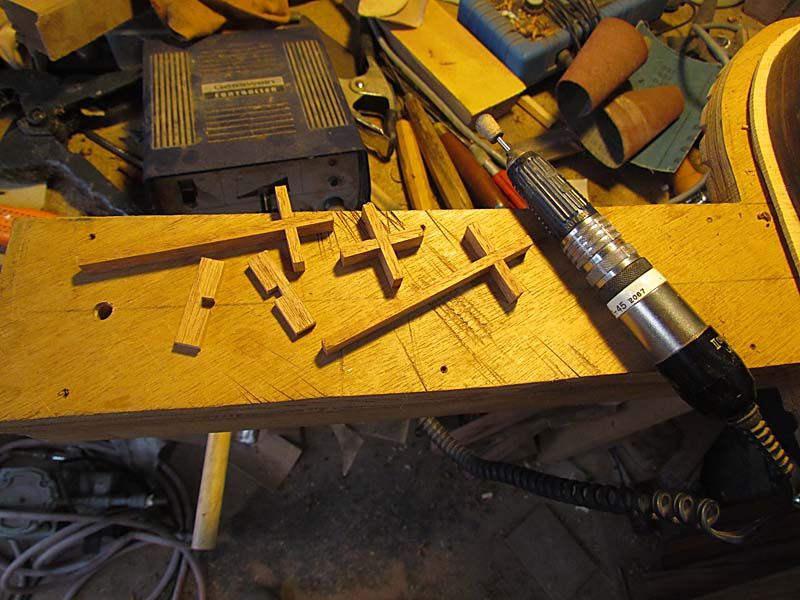
A small sanding drum or some other type of cutter would work. Lacking any of these, some medium grit sandpaper wrapped around a 1/4" dowel would work...just slower
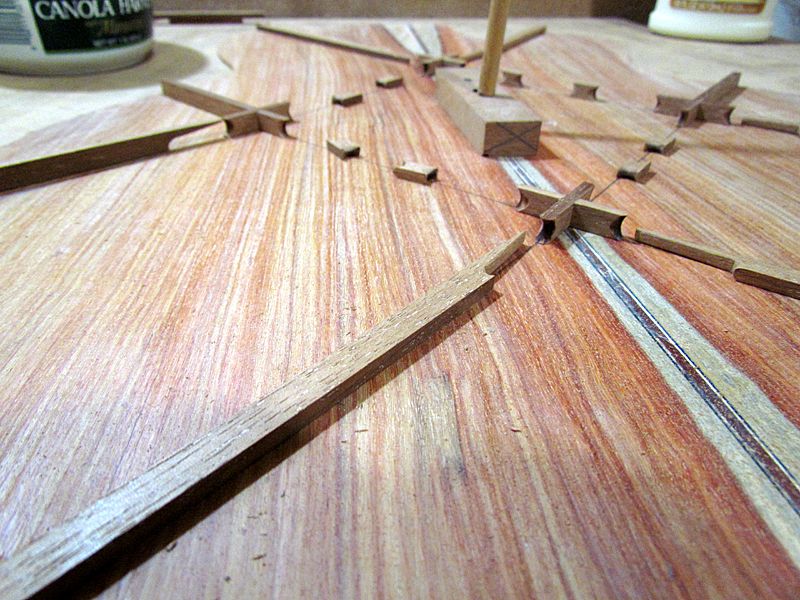
Here are a few done
The rest of the longer pieces just need the "bird's mouth" at one end. I rough out on the bandsaw
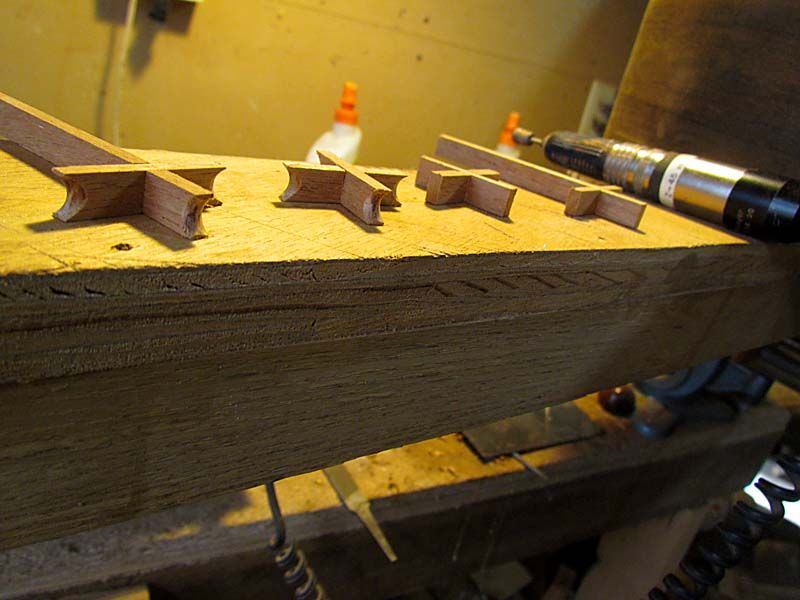
And finish up with a smaller rotary cutter and a small sanding block
The 2 on the right are done
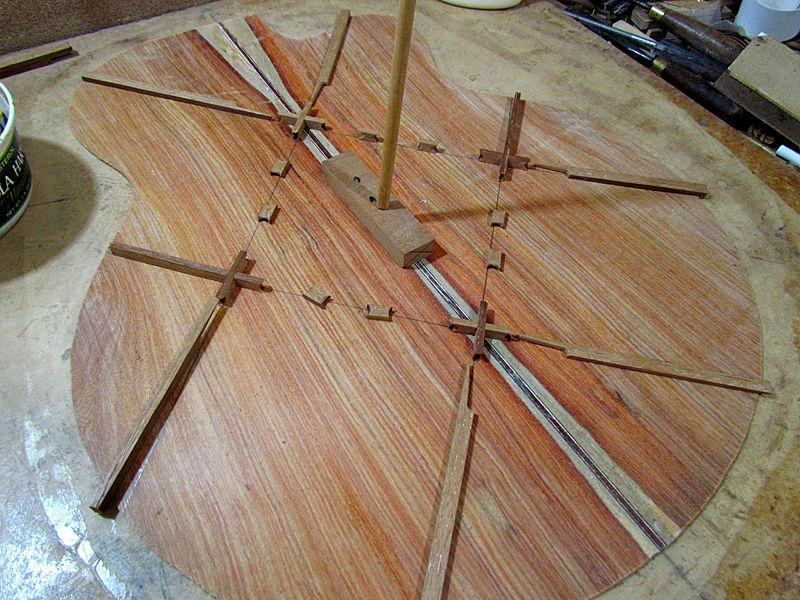
Here is everything ready for gluing up
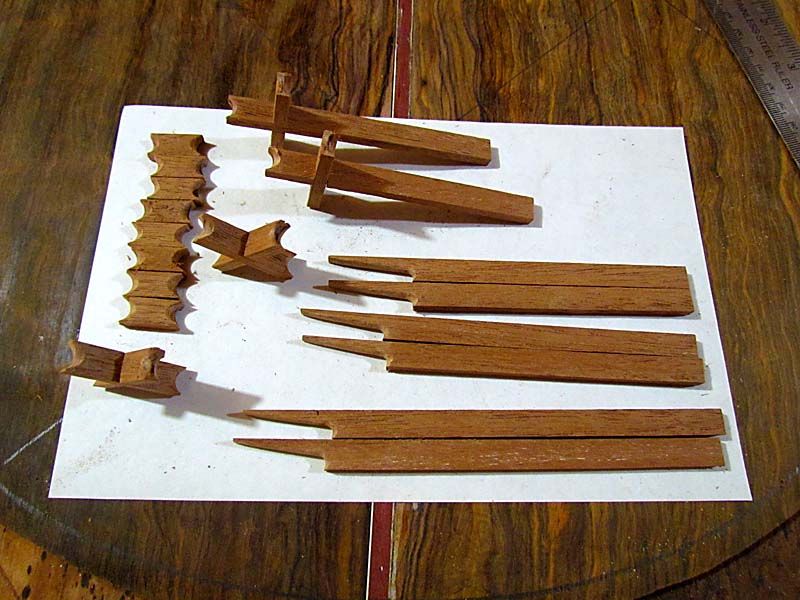
I didn't show it, but you can see I have also shaped the ends of the 3/4" pieces with the rotary cutter.
Now I just have to glue all of this to the back
Stay tuned,
G
First, the 1 3/8" pieces go in the X's, so they need to be notched. I mark the center and...
...eyeball a slightly undersized notch on the bandsaw
The 3 3/4" pieces get a notch also, same distance from an end
Then I touch up the notches with a small file until they fit
Once you get the hang of bandsawing the notch close to size, it takes only a few strokes of the file to clean things up for a nice fit
Now I need to shape the ends. For this I use a ruby studded bur in a rotary handpiece...like a fancy dremel
A small sanding drum or some other type of cutter would work. Lacking any of these, some medium grit sandpaper wrapped around a 1/4" dowel would work...just slower
Here are a few done
The rest of the longer pieces just need the "bird's mouth" at one end. I rough out on the bandsaw
And finish up with a smaller rotary cutter and a small sanding block
The 2 on the right are done
Here is everything ready for gluing up
I didn't show it, but you can see I have also shaped the ends of the 3/4" pieces with the rotary cutter.
Now I just have to glue all of this to the back
Stay tuned,
G
-
Dennis Leahy

- Dishwasher
- Posts: 7082
- Joined: Thu Aug 21, 2008 1:59 am
- Include Off Topic: Yes
- Location: looking for a place to live
Re: 2 new bar fret guits
Dennis Leahy
-
johnparchem
- Site Admin
- Posts: 967
- Joined: Sat Oct 02, 2010 8:26 am
- Include Off Topic: Yes
- Location: Seattle
- Contact:
Re: 2 new bar fret guits
An amazing process! I really like the results.
-
whitespruce
- Site Admin
- Posts: 4367
- Joined: Thu Aug 21, 2008 6:53 am
- Include Off Topic: Yes
- Location: Northern Minnesota, USA
Re: 2 new bar fret guits
Well, I have more done, but my laptop died. Power goes on but the screen stays blank and it does not boot up. And I don't have a way to download photos from my camera to this regular computer. So, until (if) I can get my laptop fixed, I can;t post anything 
G
G