
Size 2 Martin build coming late October
-
Matt Shumway

- Posts: 421
- Joined: Tue Aug 11, 2009 10:25 pm
- Include Off Topic: Yes
- Location: Potatoes
Re: Size 2 Martin build coming late October
Everyone is doing these V joints... I may have to get in on this sometime.
---- <('-'<) <('-')> (^'-')> (^'-'^) <('-'^) (>'-'<) (^'-'<) <('-'^) (>'-'<) (>'-'^) ----
-
whitespruce

- Site Admin
- Posts: 4367
- Joined: Thu Aug 21, 2008 6:53 am
- Include Off Topic: Yes
- Location: Northern Minnesota, USA
Re: Size 2 Martin build coming late October
Well, since the shop was all heated up, I did a bit more on this one today.
First, I made a half body pattern out of acrylic...since I made a nice pattern, looks like I will be building a few more of these down the line. No photos of the pattern, but now I can make a bending form, so will show things then.
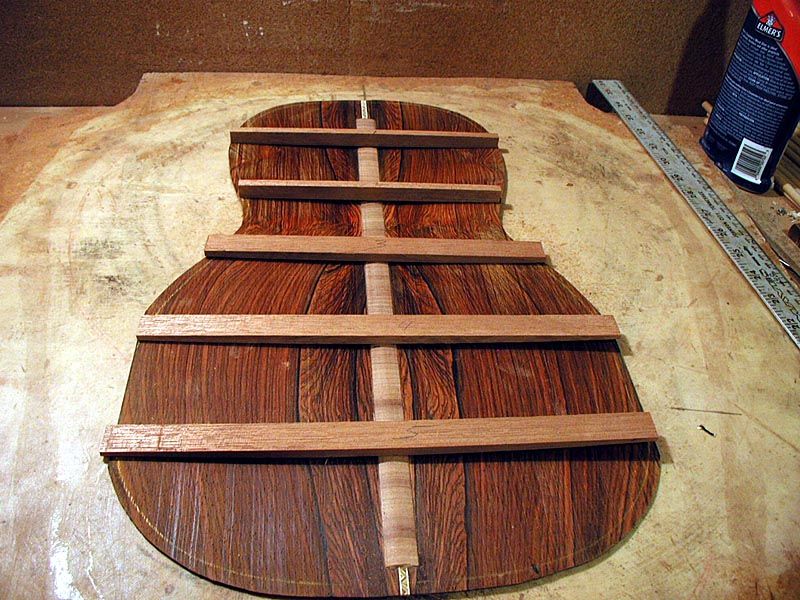
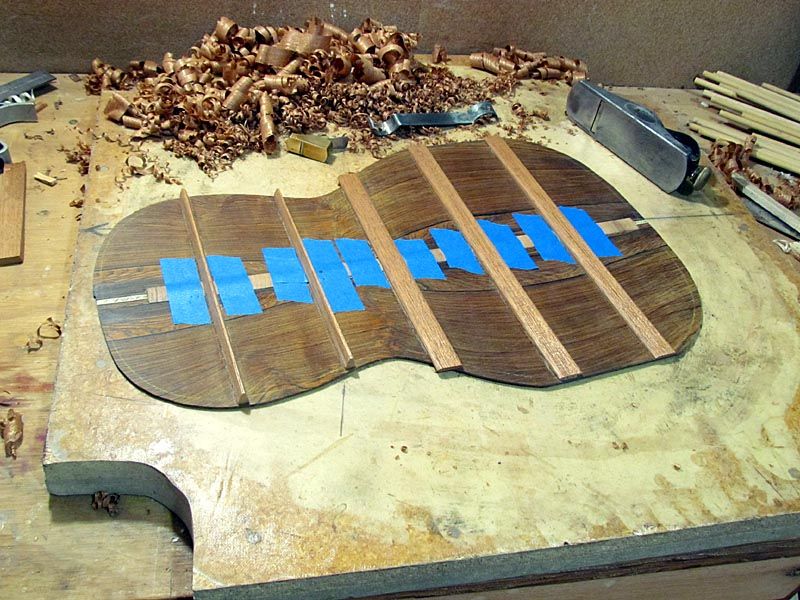
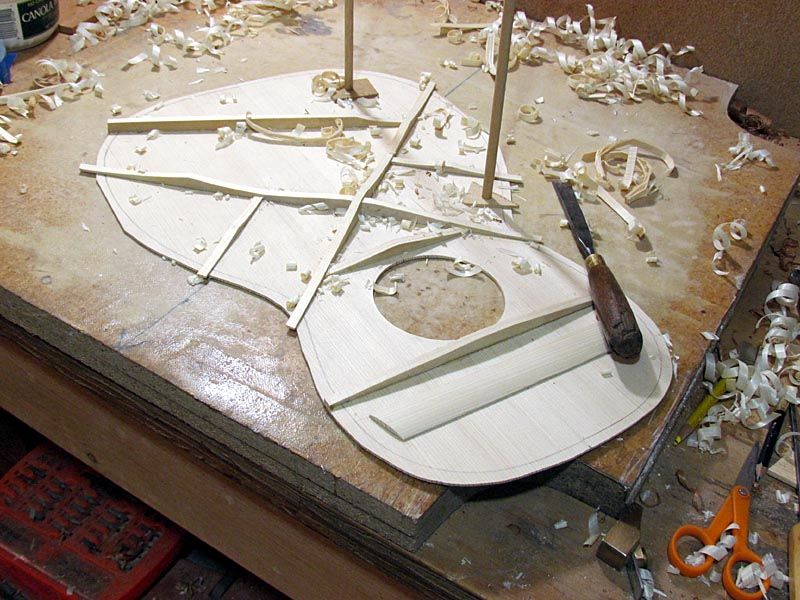
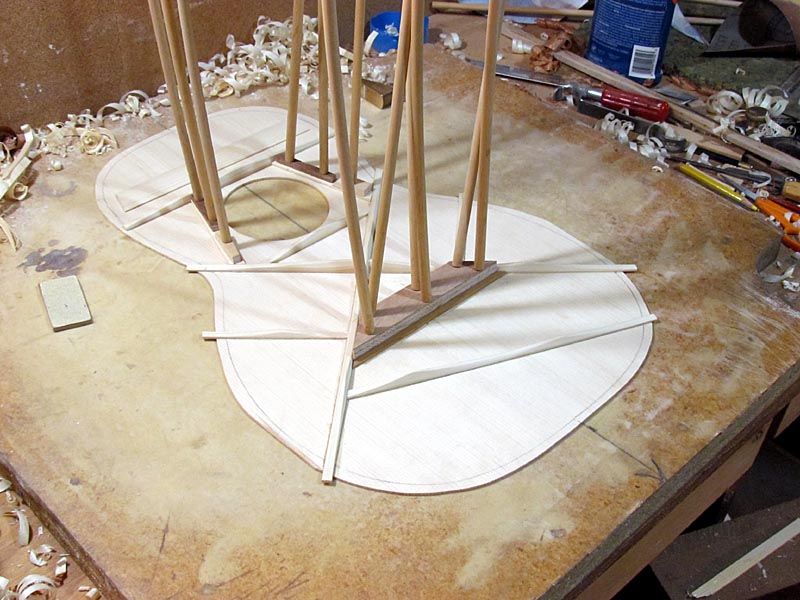
Then I laid out the top bracing pattern
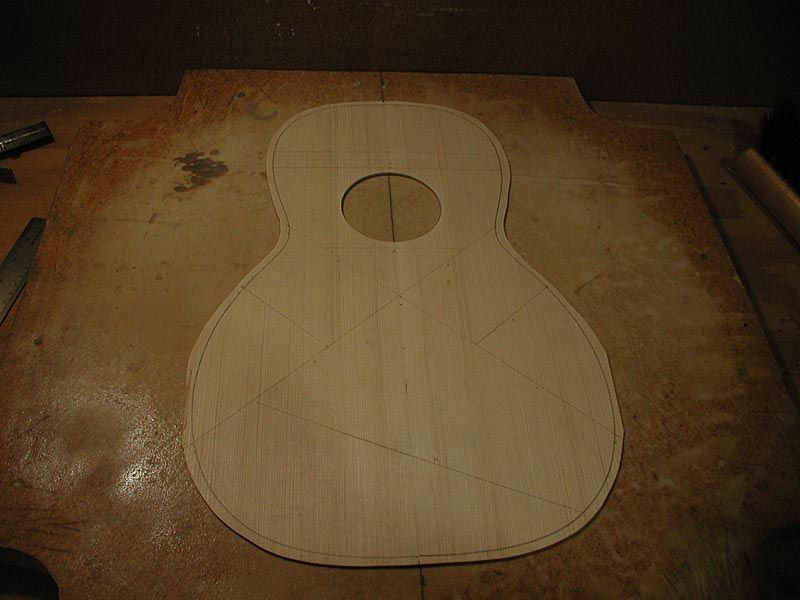
Since I have the original on hand, I was careful to get things measured accurately
Then I took some bracing stock that I had cut to size and braced her up
Here it is except for the upper braces which I will do tomorrow
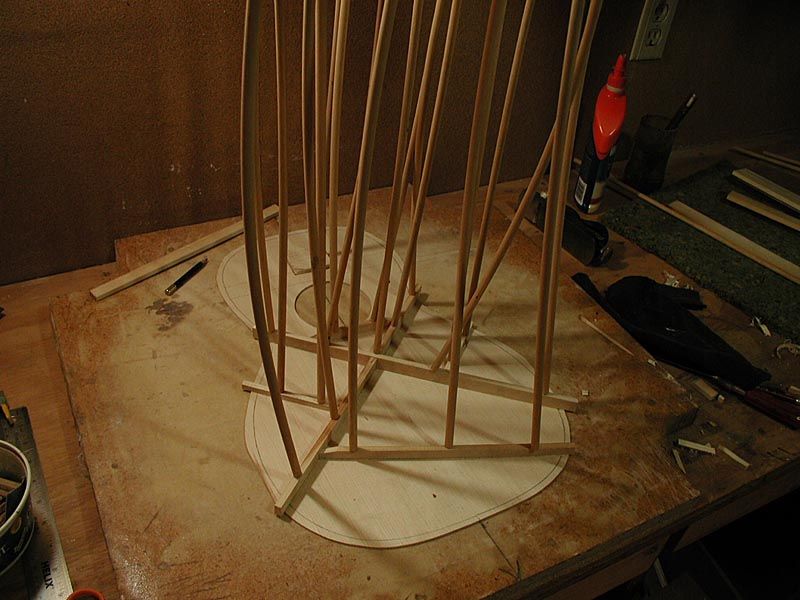
This went really fast. I will try to keep this one moving along slow and steady, so stay tuned,
G
First, I made a half body pattern out of acrylic...since I made a nice pattern, looks like I will be building a few more of these down the line. No photos of the pattern, but now I can make a bending form, so will show things then.
Then I laid out the top bracing pattern
Since I have the original on hand, I was careful to get things measured accurately
Then I took some bracing stock that I had cut to size and braced her up
Here it is except for the upper braces which I will do tomorrow
This went really fast. I will try to keep this one moving along slow and steady, so stay tuned,
G
-
whitespruce
- Site Admin
- Posts: 4367
- Joined: Thu Aug 21, 2008 6:53 am
- Include Off Topic: Yes
- Location: Northern Minnesota, USA
Re: Size 2 Martin build coming late October
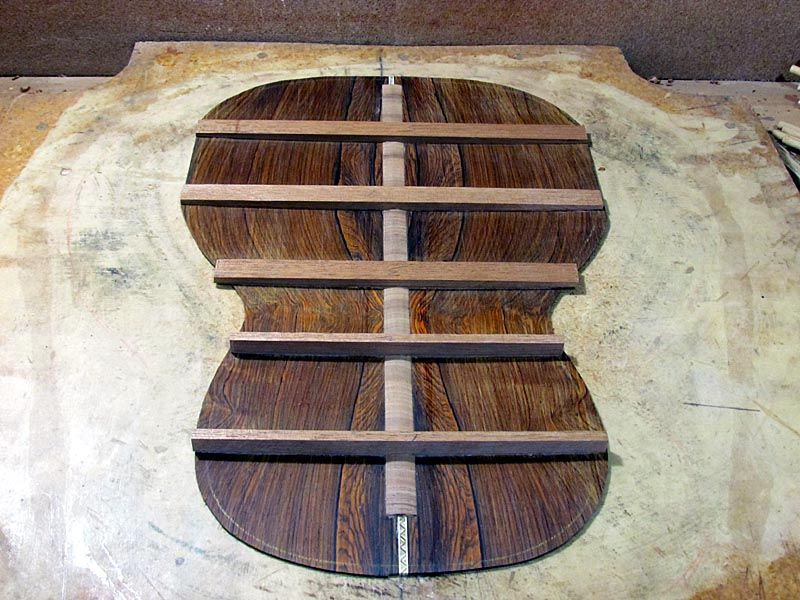
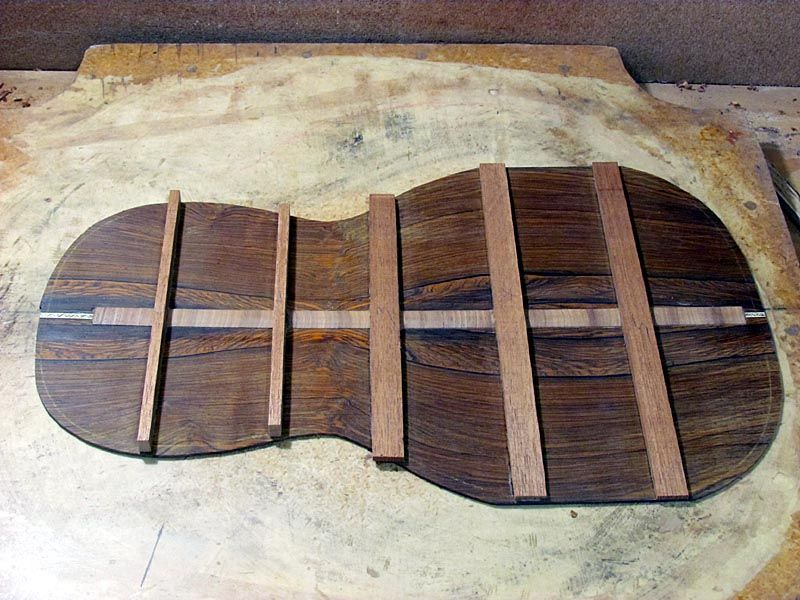
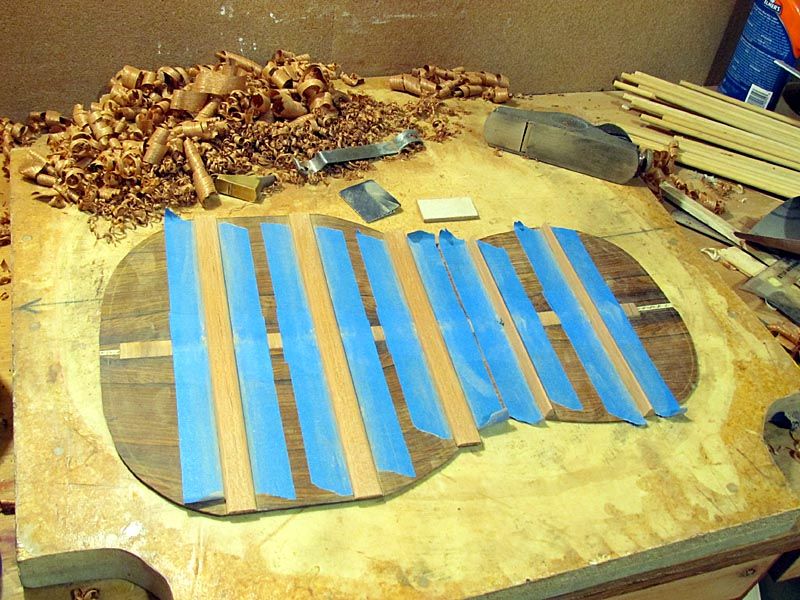
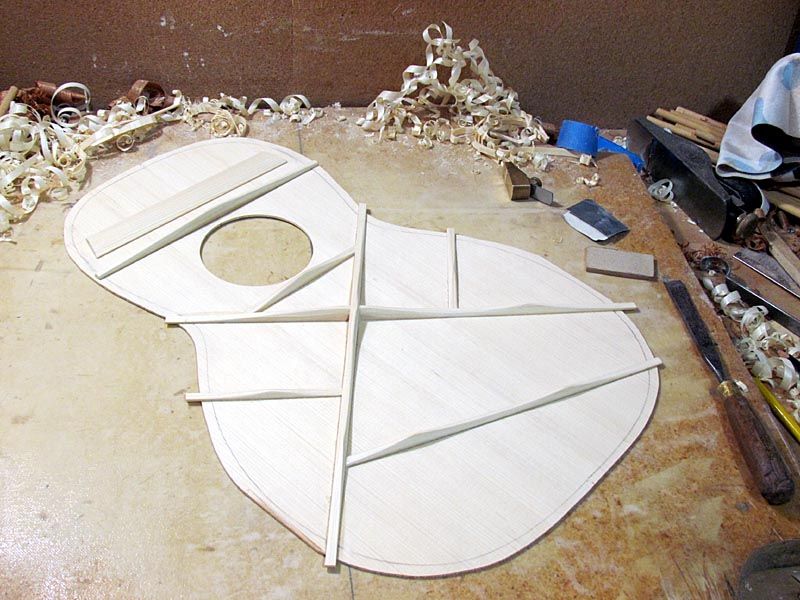
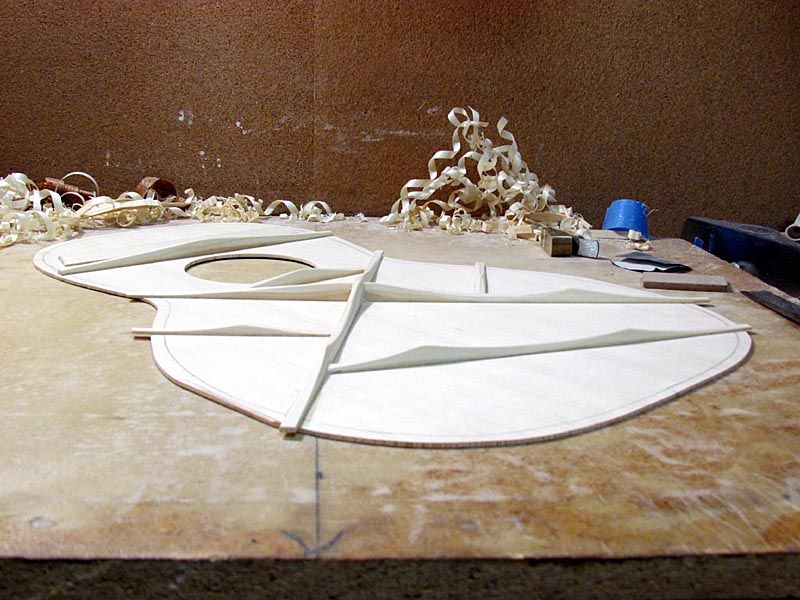
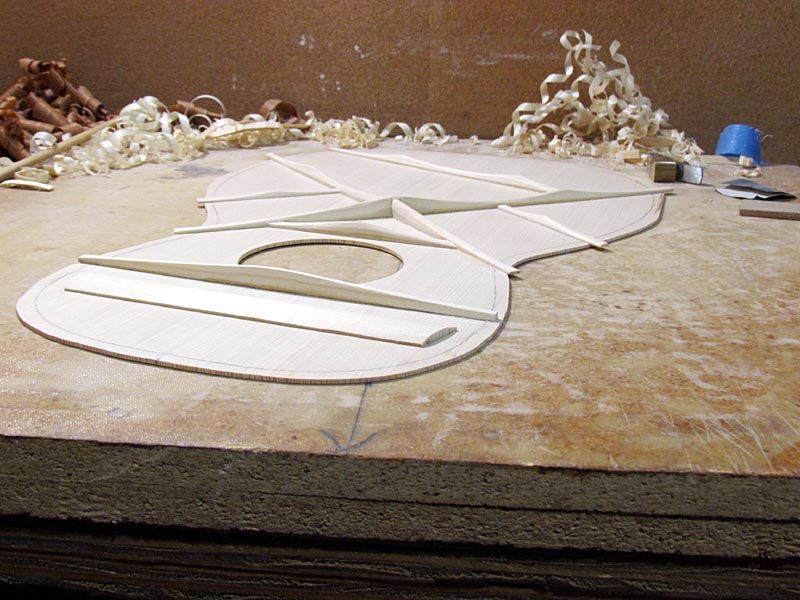
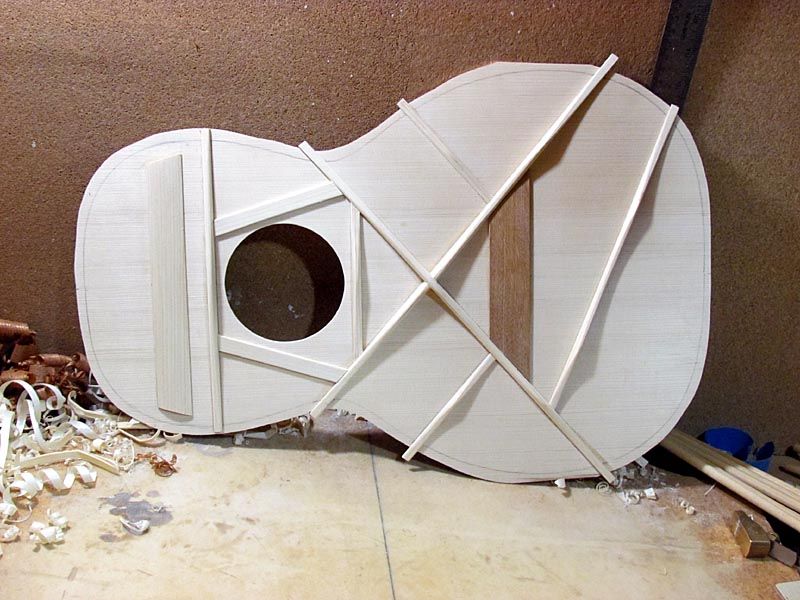
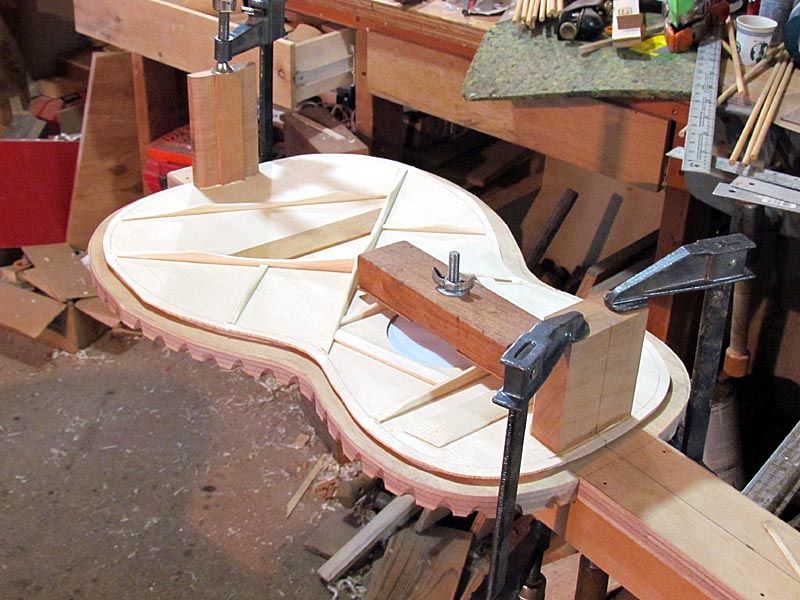
Well, I actually glued on the upper braces last night and let them sit overnight. Here are a couple of shots of the uncarved braces
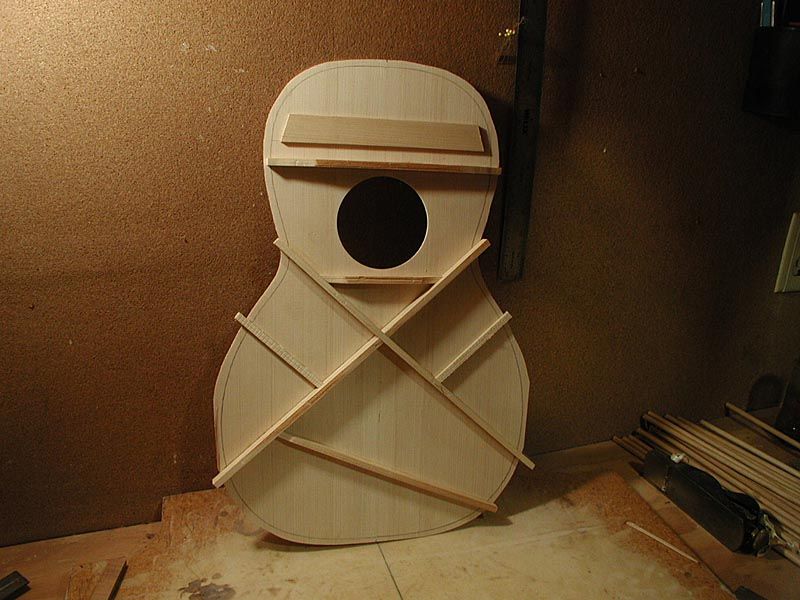
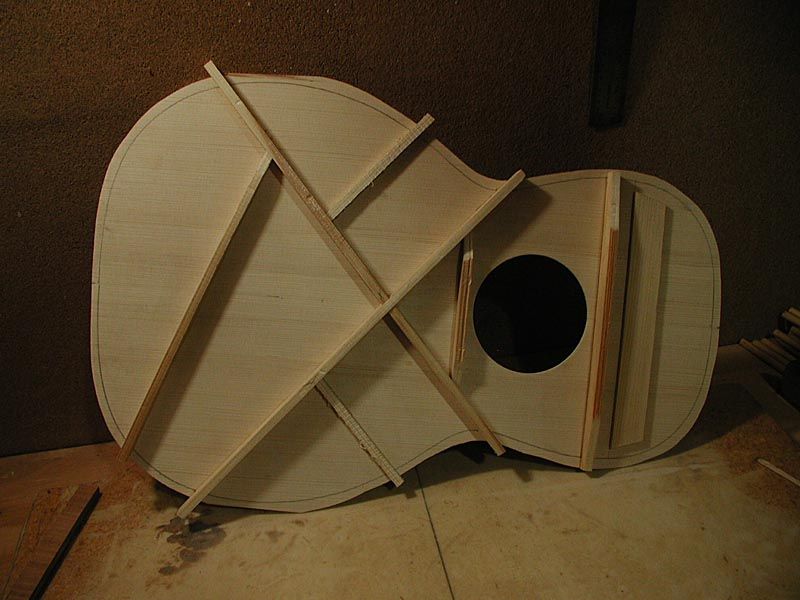
Still need to glue on the bridge plate and the 2 small pieces alongside of the soundhole. Right now these are about 3 times their finished size. These small Martins were braced really light.
Here is a shot of my acrylic template

Like I said, these small guitars are gonna stick on me, and they are fast and easy to build, plus they don't require full sized wood....lots of pluses in addition to the fact that they sound good.
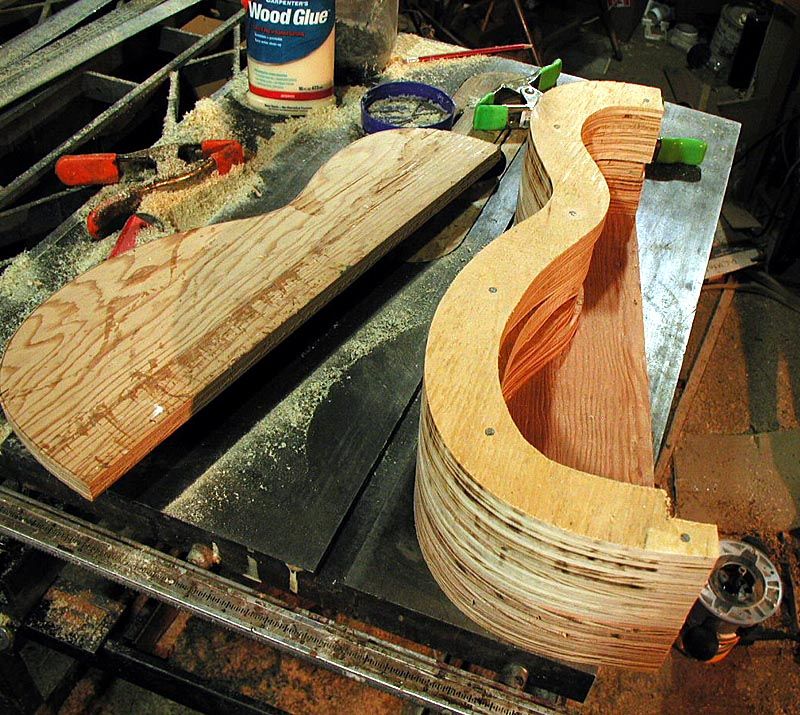
I also made my bending form today. Just used a bunch of scrap 3/4" plywood

Basically just a solid layer on the outsides with 6 "hollow" layers in the center
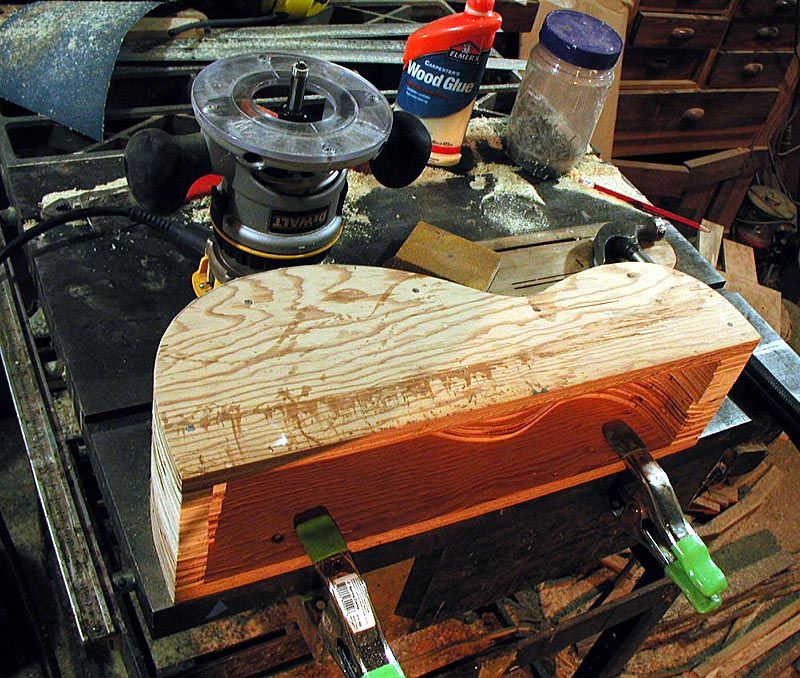
I just make the first outside piece very carefully to the pattern and sand the edge down smooth. Then the rest of the layers are cut rough and a bit oversize, glued and nailed on one at a time and sized down with a pattern bit in a router...sanded smooth and the next layer added, and so on...
...here it is ready for the final outside piece
And all together
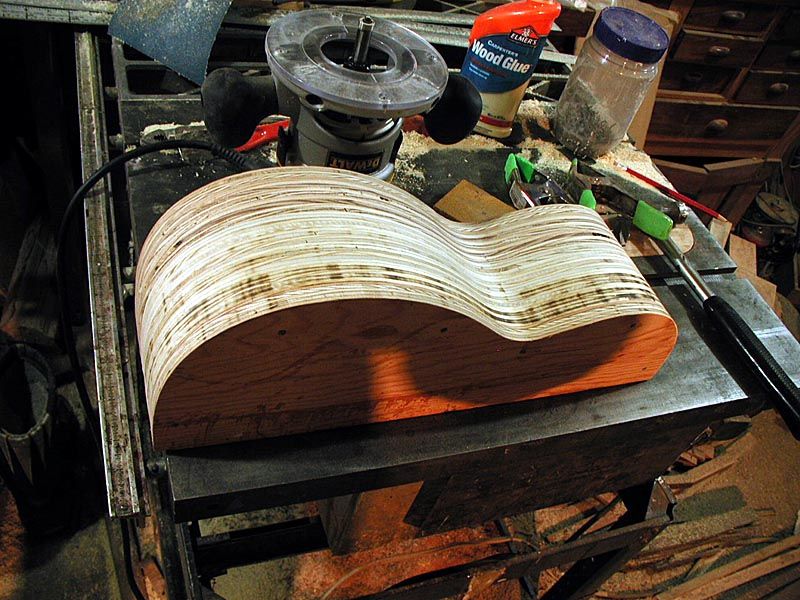
Nothing fancy, but functional and rock solid.
Gotta sort through archaeological ceramic samples tomorrow to get ready to send them in to get dates run, but will take a break to glue in the back braces.
G
Still need to glue on the bridge plate and the 2 small pieces alongside of the soundhole. Right now these are about 3 times their finished size. These small Martins were braced really light.
Here is a shot of my acrylic template
Like I said, these small guitars are gonna stick on me, and they are fast and easy to build, plus they don't require full sized wood....lots of pluses in addition to the fact that they sound good.
I also made my bending form today. Just used a bunch of scrap 3/4" plywood
Basically just a solid layer on the outsides with 6 "hollow" layers in the center
I just make the first outside piece very carefully to the pattern and sand the edge down smooth. Then the rest of the layers are cut rough and a bit oversize, glued and nailed on one at a time and sized down with a pattern bit in a router...sanded smooth and the next layer added, and so on...
...here it is ready for the final outside piece
And all together
Nothing fancy, but functional and rock solid.
Gotta sort through archaeological ceramic samples tomorrow to get ready to send them in to get dates run, but will take a break to glue in the back braces.
G
-
whitespruce
- Site Admin
- Posts: 4367
- Joined: Thu Aug 21, 2008 6:53 am
- Include Off Topic: Yes
- Location: Northern Minnesota, USA
Re: Size 2 Martin build coming late October
OK, I been slackin' 
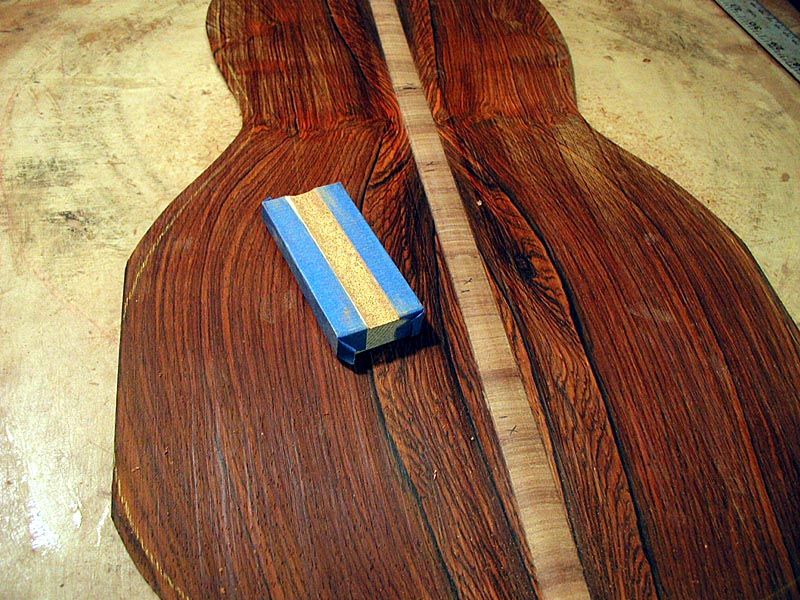
Well, actually I have been working on this, but just not posting as I should. So I will post some progress - The Back Braces
Now, this is a small guitar, but it does not want for back braces. The original has 5 back braces, and I am following it as best as I can
Here are the mahogany brace blanks, same wood as I made the neck out of
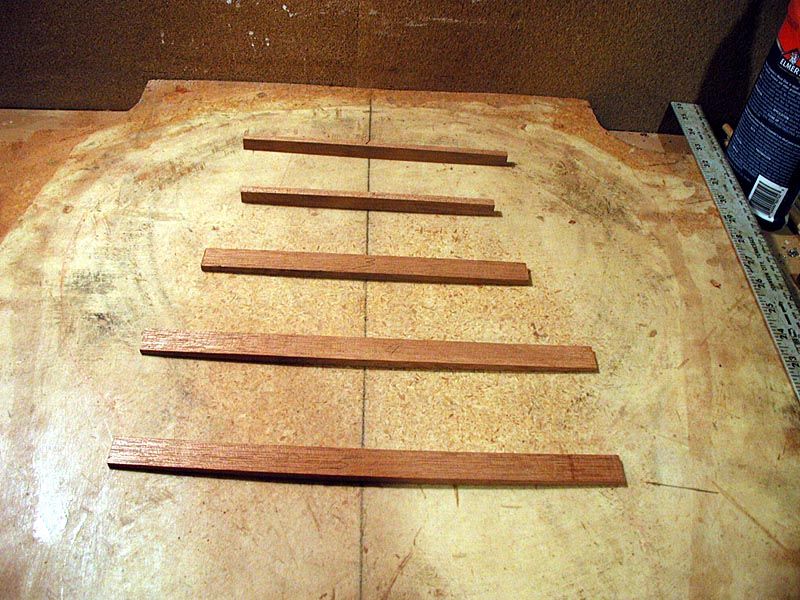
I laid them across my radius dish and marked the curve with a pencil. Then I rough planed them to the line and finished them with sandpaper in the dish mold
I glued on the center reinforcement strip and made one of those sanding gizmotches to round it down. I think it was Dave L that I copied this from
Then I laid the braces on and marked the center strip with a knife cut where I had to chisel it out
Here is the chiseling
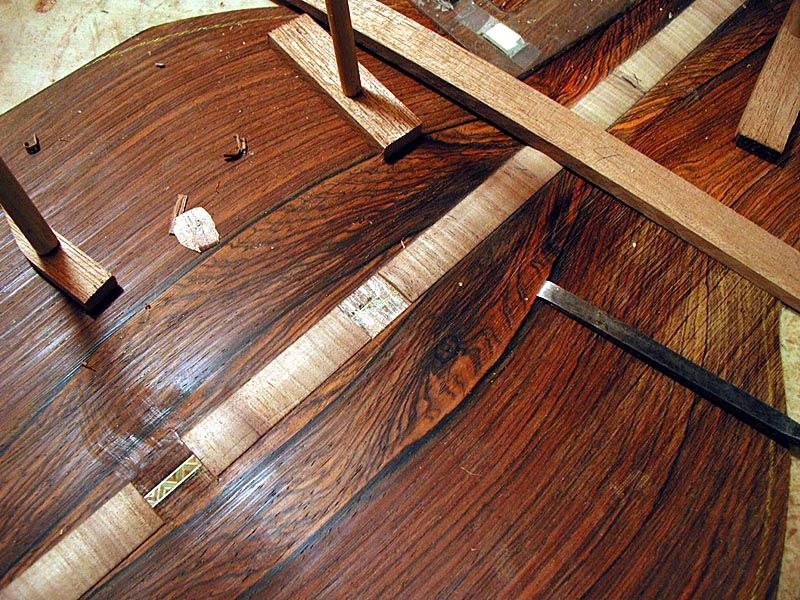
One thing to mention again...the back is cocobolo and I just glued with Elmer's Carpenter's Wood Glue and I did not bother to clean off the wood first. As you can see, the center strip did not just pop off - I had to shave it all off...
...and then scrape the last bit off with a razor blade
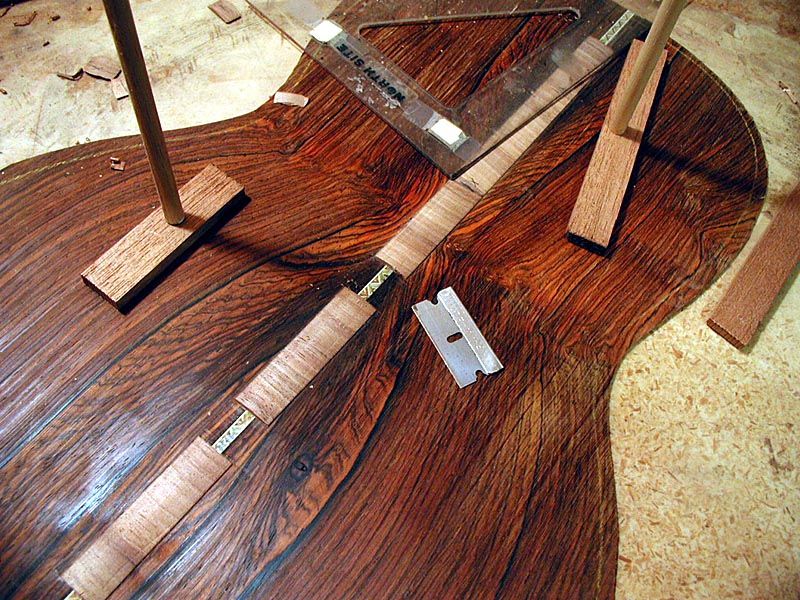
So forget all the acetone, fresh sanded surface, epoxy crap and just get some Elmers. Oh, and I joined the back plates with the same glue and the joined back laid around the shop over a month before I glued on the reinforcement strip...and it did not come apart
So here it is ready to glue in the braces

And the actual deed
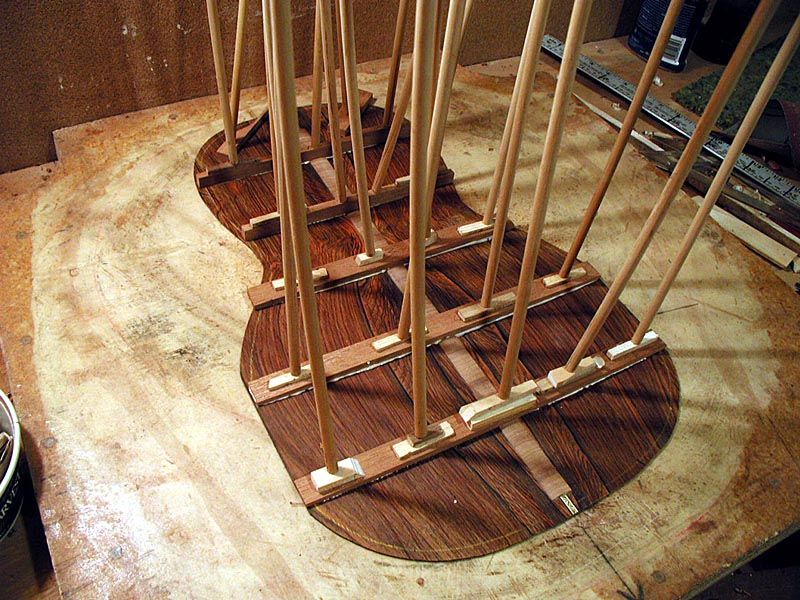
The glue is dry and I gotta start working these down
First order of business is to thin them down a bit
Big pile of shavings
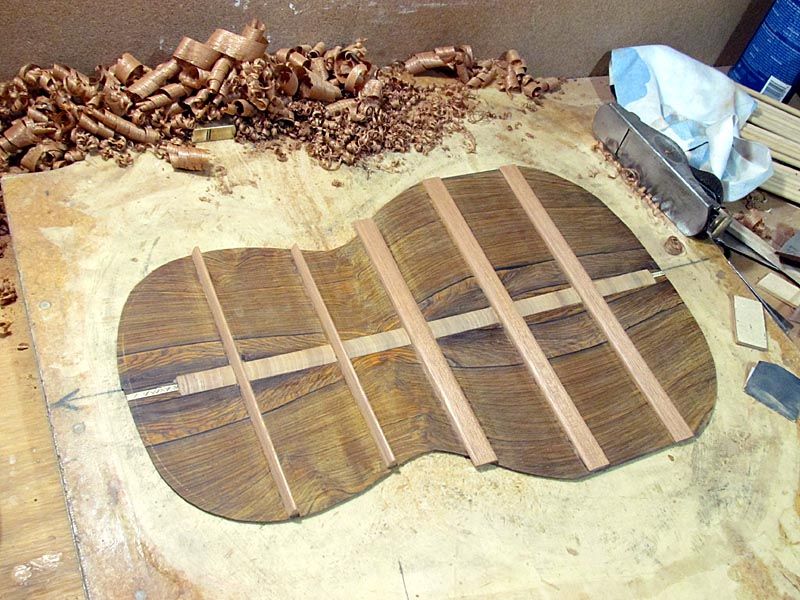
Then I taped over the center strip and started rounding the braces
I taped all along the braces for the final shaping and sanding
The shaving pile got pretty big...I probably took off at least half of the brace wood
So here is the final result
I have a lot more done, actually will be closing the box maybe tomorrow, but I gotta edit a bunch of photos before I can post any more. Got a new camera and just figured out how to get the photos onto the computer last night.
So, more to come
G
Well, actually I have been working on this, but just not posting as I should. So I will post some progress - The Back Braces
Now, this is a small guitar, but it does not want for back braces. The original has 5 back braces, and I am following it as best as I can
Here are the mahogany brace blanks, same wood as I made the neck out of
I laid them across my radius dish and marked the curve with a pencil. Then I rough planed them to the line and finished them with sandpaper in the dish mold
I glued on the center reinforcement strip and made one of those sanding gizmotches to round it down. I think it was Dave L that I copied this from
Then I laid the braces on and marked the center strip with a knife cut where I had to chisel it out
Here is the chiseling
One thing to mention again...the back is cocobolo and I just glued with Elmer's Carpenter's Wood Glue and I did not bother to clean off the wood first. As you can see, the center strip did not just pop off - I had to shave it all off...
...and then scrape the last bit off with a razor blade
So forget all the acetone, fresh sanded surface, epoxy crap and just get some Elmers. Oh, and I joined the back plates with the same glue and the joined back laid around the shop over a month before I glued on the reinforcement strip...and it did not come apart
So here it is ready to glue in the braces
And the actual deed
The glue is dry and I gotta start working these down
First order of business is to thin them down a bit
Big pile of shavings
Then I taped over the center strip and started rounding the braces
I taped all along the braces for the final shaping and sanding
The shaving pile got pretty big...I probably took off at least half of the brace wood
So here is the final result
I have a lot more done, actually will be closing the box maybe tomorrow, but I gotta edit a bunch of photos before I can post any more. Got a new camera and just figured out how to get the photos onto the computer last night.
So, more to come
G
-
whitespruce
- Site Admin
- Posts: 4367
- Joined: Thu Aug 21, 2008 6:53 am
- Include Off Topic: Yes
- Location: Northern Minnesota, USA
Re: Size 2 Martin build coming late October
A bit more catching up - Carving the top braces.
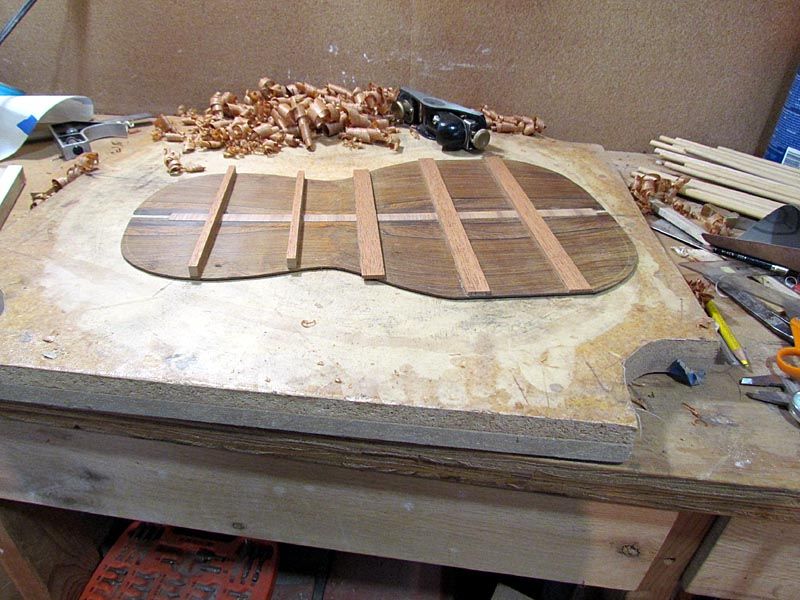
Well, I left these a few posts back looking pretty chunkey. Time to get rid of some of the excess wood. The braces on these small Martin's are really quite small, so I start by getting the height down to size
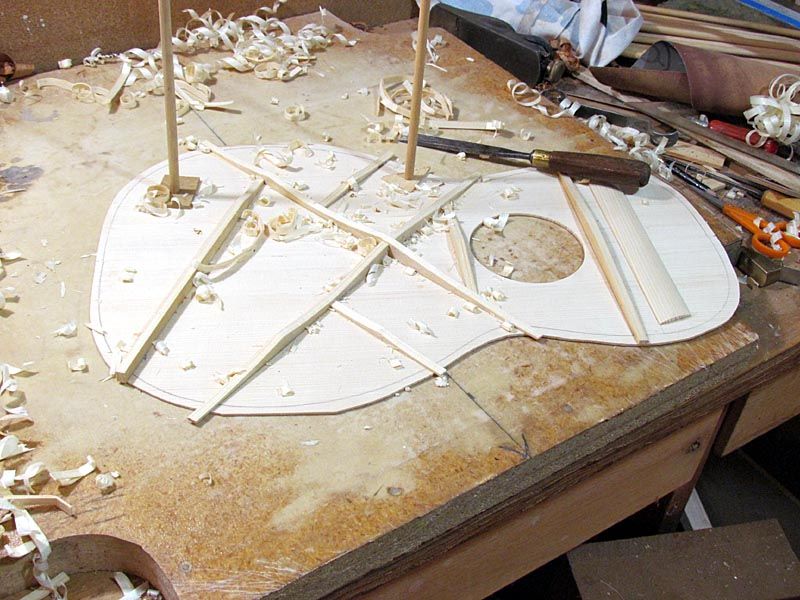
Most of this is chisel work and with nice straight grained brace stock, it goes pretty fast.
Then I use a small plane to get the cross section right
Some final touch-up in the hard to reach spots and it is time for sanding
So these braces are ready to go
Now just need a bridge plate and the small braces along the sound hole. I made the bridge plate out of osage orange
Here is the last glue up
And here is the final top ready to go
Any questions or comments, fire away.
Next I gotta bend the sides.
G
Well, I left these a few posts back looking pretty chunkey. Time to get rid of some of the excess wood. The braces on these small Martin's are really quite small, so I start by getting the height down to size
Most of this is chisel work and with nice straight grained brace stock, it goes pretty fast.
Then I use a small plane to get the cross section right
Some final touch-up in the hard to reach spots and it is time for sanding
So these braces are ready to go
Now just need a bridge plate and the small braces along the sound hole. I made the bridge plate out of osage orange
Here is the last glue up
And here is the final top ready to go
Any questions or comments, fire away.
Next I gotta bend the sides.
G
-
whitespruce
- Site Admin
- Posts: 4367
- Joined: Thu Aug 21, 2008 6:53 am
- Include Off Topic: Yes
- Location: Northern Minnesota, USA
Re: Size 2 Martin build coming late October
Bending the Sides
So I thicknessed the sides down to about .075", planed the top edge dead straight, and profiled the back edge.
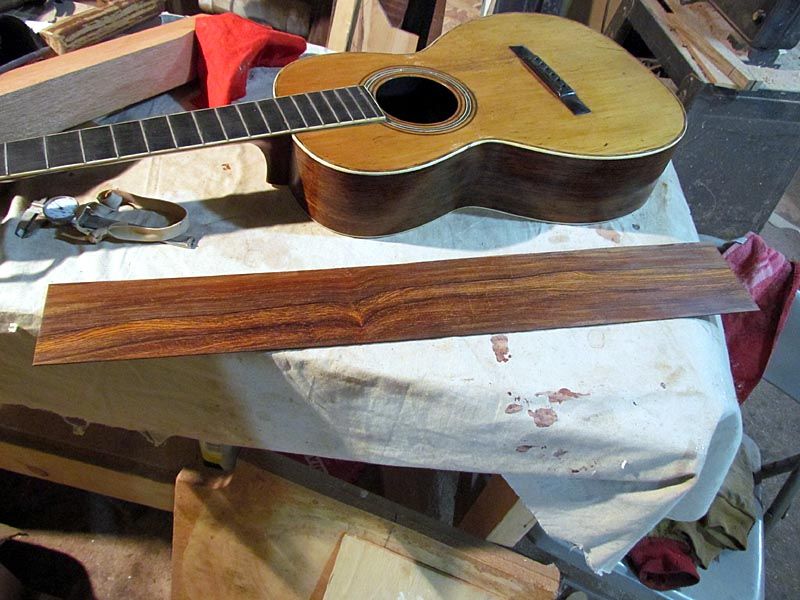
I left the width about 3/16" oversize to allow some "wiggle room"
Now when I bend cocobolo, I soak the wood in hot water for a bit first. We learned this bending Dennis' Angelina II sides And I don't care if some folks say to bend with as little water as possible...this works for me and I am stickin' to it
So after dipping a side in hot water that is on the wood stove for about 5 minutes, I shake off the excess, wrap in white kraft paper and aluminum foil, and place it between spring steel slats, with the blanket on top of the wood, but inside of the slats.
For cocobolo, I usually set the temp about 300 degrees. Here is the side in the bender
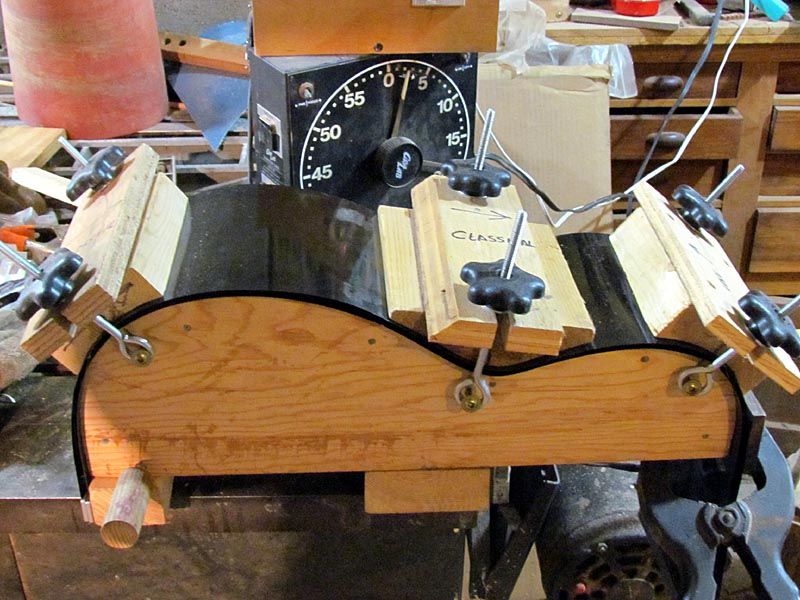
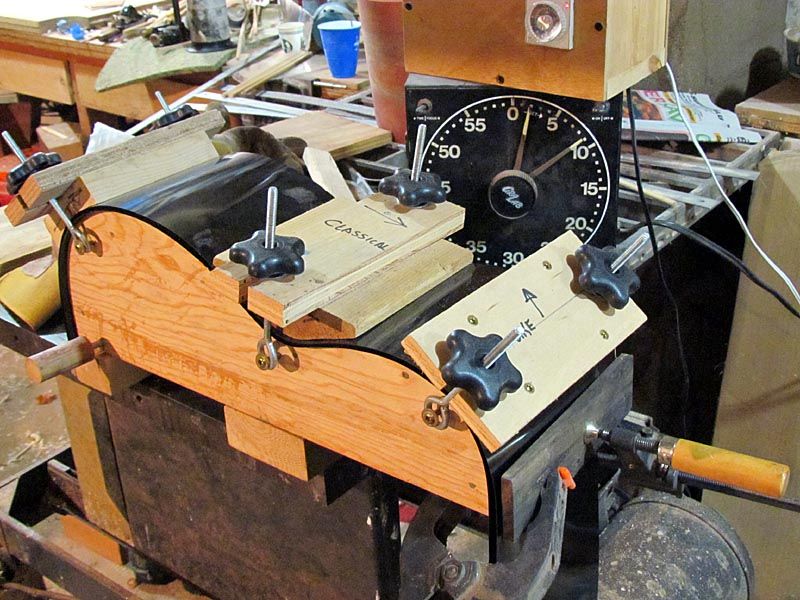
I crank everything down fairly tight leaving the waist a bit loose and tighten that down last. I run the timer for 15 minutes and usually have the bend done in the first 3 or 4 minutes. Any other questions on my process, just ask.
Here are the sides after bending, clamped onto the form.
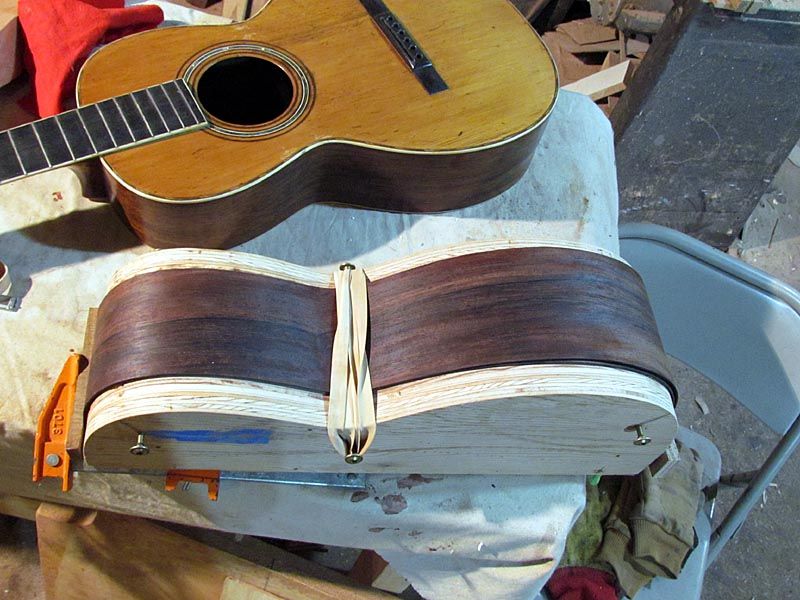
Now the major parts are ready and it is time to start assembling.
G
So I thicknessed the sides down to about .075", planed the top edge dead straight, and profiled the back edge.
I left the width about 3/16" oversize to allow some "wiggle room"
Now when I bend cocobolo, I soak the wood in hot water for a bit first. We learned this bending Dennis' Angelina II sides
So after dipping a side in hot water that is on the wood stove for about 5 minutes, I shake off the excess, wrap in white kraft paper and aluminum foil, and place it between spring steel slats, with the blanket on top of the wood, but inside of the slats.
For cocobolo, I usually set the temp about 300 degrees. Here is the side in the bender
I crank everything down fairly tight leaving the waist a bit loose and tighten that down last. I run the timer for 15 minutes and usually have the bend done in the first 3 or 4 minutes. Any other questions on my process, just ask.
Here are the sides after bending, clamped onto the form.
Now the major parts are ready and it is time to start assembling.
G
-
whitespruce
- Site Admin
- Posts: 4367
- Joined: Thu Aug 21, 2008 6:53 am
- Include Off Topic: Yes
- Location: Northern Minnesota, USA
Re: Size 2 Martin build coming late October
OK, since this guitar is smaller than any that I have built, I can't use any of my current building boards, so I have to make a new one. A fairly simple process, but I will show it anyhow.
First, I cut out the board from decent 3/4" plywood, allowing about an inch oversize
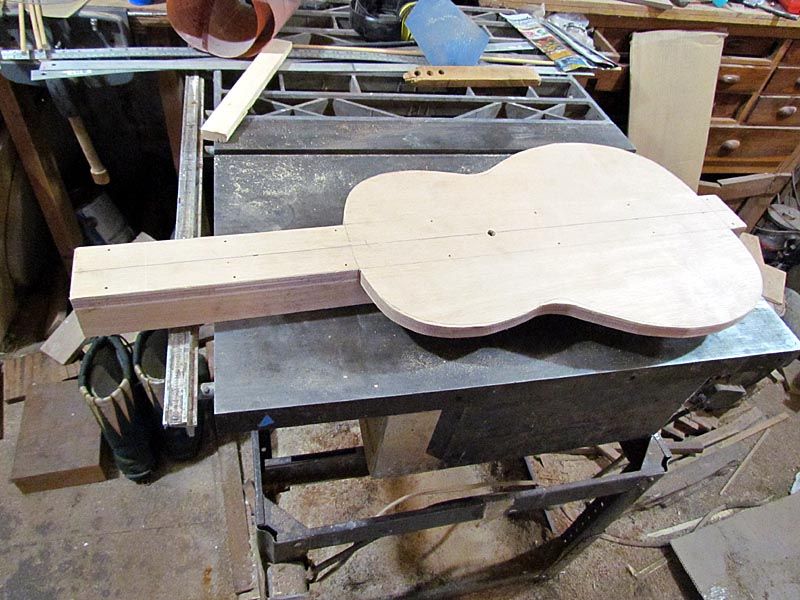
And I glue and nail on 2 straight 1 1/2" wide strips on the bottom side to add a bit of strength
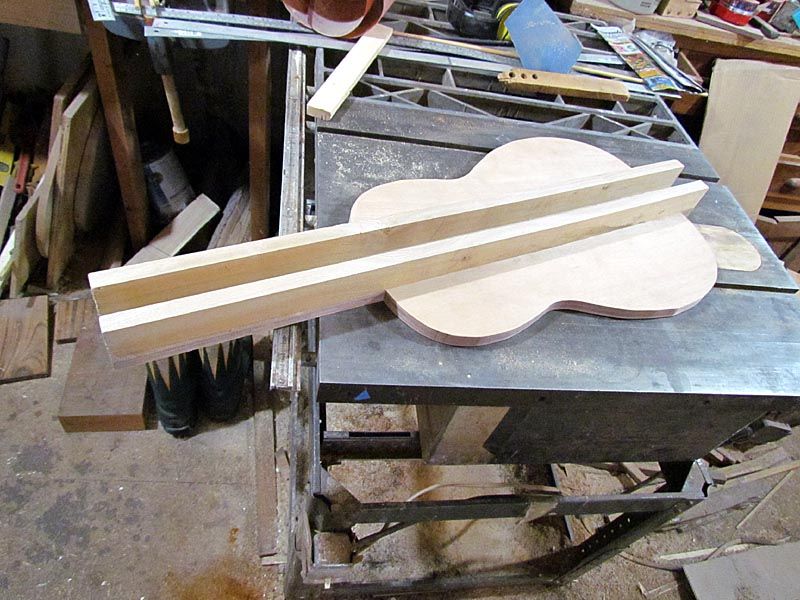
Then I grind in some divots around the lower edge to keep my "roping" from slipping when I glue on the back
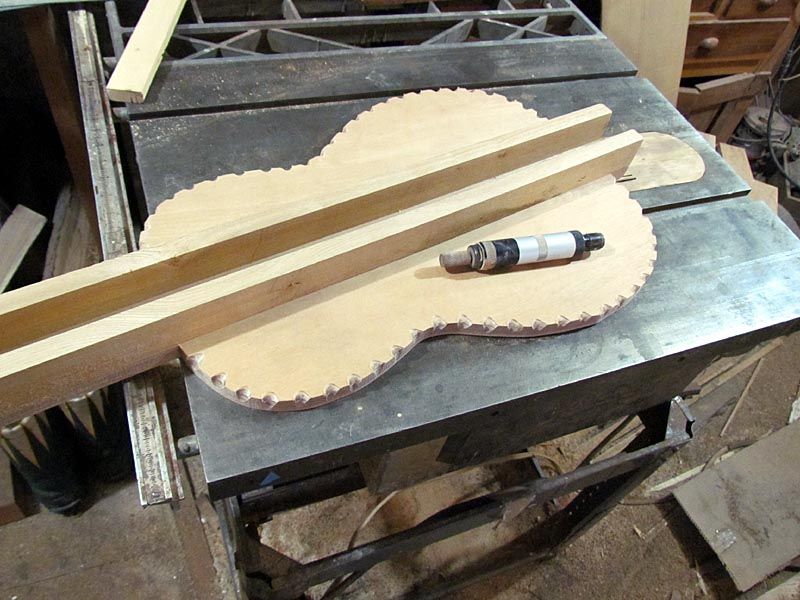
The Foredom handpiece shows the cutter that I made the divots with. Just need to drill a hole at the center location of the sound hole, and it is ready for action.
I use a paper template with a 1/8" thick cork shim around the edge to support the edges of the top during the assembly
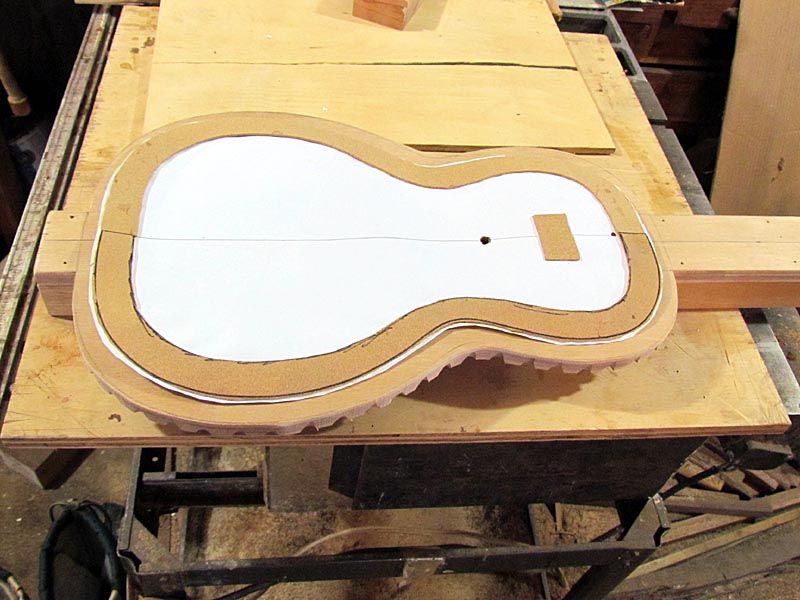
This keeps the dome of the top from flattening out.
Here are the neck and tail blocks cut and shaped from mahogany
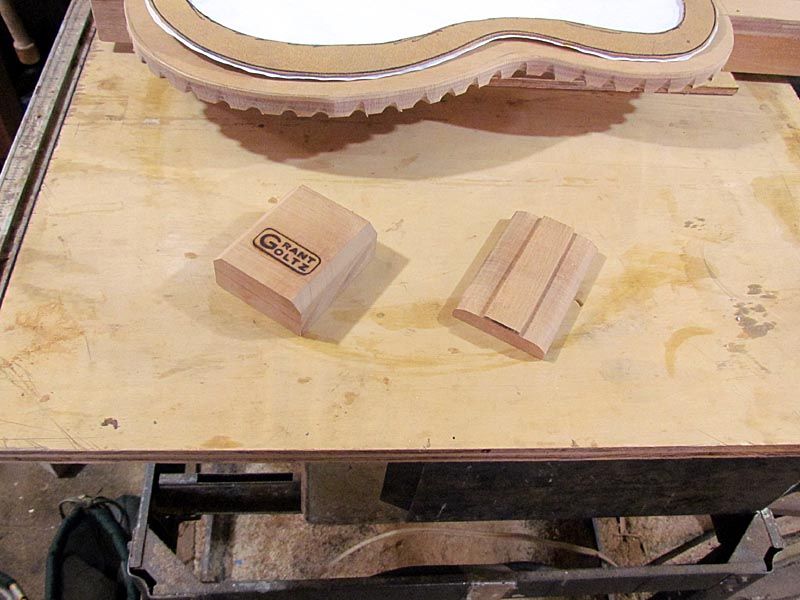
I used an old branding iron from my bird carving days to brand my name in the neck block. Think I will get a new one made that is a bunch smaller for this.
Next, I clamp the top to the work board
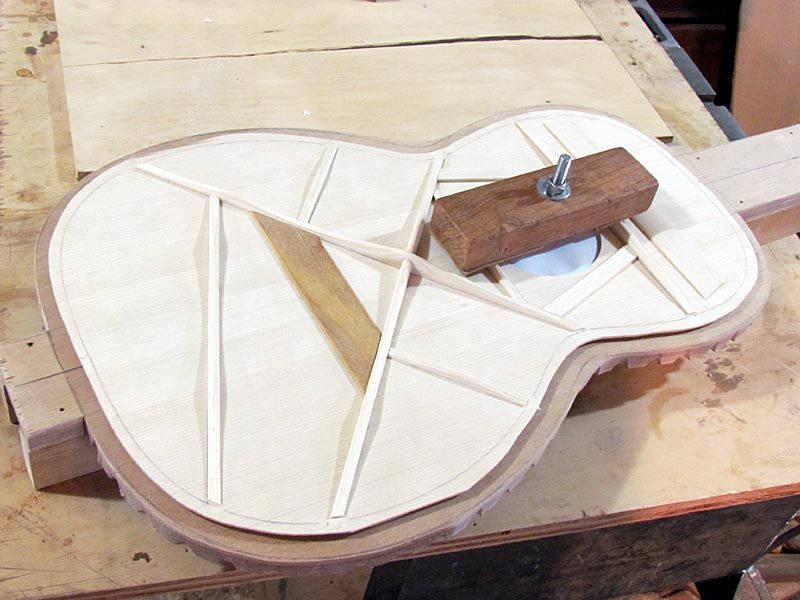
Here is a dry clamp-up of the blocks to make sure everything fits correctly

And here it is with glue
The critical part is to make sure the neck block is square with the center line of the guitar.
So now I will be gluing on the sides, but I need to edit some more photos first, so this is all for today.
G
First, I cut out the board from decent 3/4" plywood, allowing about an inch oversize
And I glue and nail on 2 straight 1 1/2" wide strips on the bottom side to add a bit of strength
Then I grind in some divots around the lower edge to keep my "roping" from slipping when I glue on the back
The Foredom handpiece shows the cutter that I made the divots with. Just need to drill a hole at the center location of the sound hole, and it is ready for action.
I use a paper template with a 1/8" thick cork shim around the edge to support the edges of the top during the assembly
This keeps the dome of the top from flattening out.
Here are the neck and tail blocks cut and shaped from mahogany
I used an old branding iron from my bird carving days to brand my name in the neck block. Think I will get a new one made that is a bunch smaller for this.
Next, I clamp the top to the work board
Here is a dry clamp-up of the blocks to make sure everything fits correctly
And here it is with glue
The critical part is to make sure the neck block is square with the center line of the guitar.
So now I will be gluing on the sides, but I need to edit some more photos first, so this is all for today.
G
-
Lefty

- Moderator
- Posts: 1632
- Joined: Sat Aug 23, 2008 9:09 pm
- Include Off Topic: Yes
- Location: Riverside,ca
Re: Size 2 Martin build coming late October
Wow! By the size of that branding iron I guess you must be carving live sized emus.
Nice work Grant. I have a couple questions...
Back when you were carving the back braces after they had been glued on there was a small metal tool on the bench. Was that to just shave and kinda round over the edges of the braces? Looked like a bottle opener on steroids.
Do you bend one side or two sides at a time?
Thanks,
Lefty
No money Nathan. No money Marty. Just a roof over my head and a rockin chair by the fire.
(Mose Harper)
Steve "Lefty" Leff
(Mose Harper)
Steve "Lefty" Leff