Sapelle, Italian Bevel

Guitars by Todd Lunneborg of Andover, MN
User avatar
tlguitars
Posts: 333
Joined: Tue Sep 02, 2008 11:57 am
Include Off Topic: Yes
Location: Andover Minnesota
Contact:

Re: Sapelle, Italian Bevel

Post by tlguitars » Sat Sep 27, 2008 10:37 am

So, Kid's 2nd birthday, today, all done (party last weekend) and now I get to get back to work-- minus posting time.

So heres the neck with the waste cut out. I use a 13 degree headstock, for those who may be wondering.

Image

This next photo shows my locator jig inplace. I'll explain the layout in the next couple of photo's.

Image

I've been using this jig to set the locator holes for the fretboard. The 2 holes are mirrored on the fretboard so all I have to do is use 2 short dowels to pin the fretboard on and it's perfect/ on center from nut to 14th fret. The most important thing to me on a "custom" guitar is the neck. I've felt the small inconsistencies in some makers necks that just make a superior guitar by a superior maker not worth the purchase my mind because the flow of the neck was gouged. And believe me I’m extremely nit-picky, I’m not afraid to say it, I’m a neck Dork.

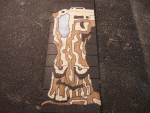
So I'm trying to jig everything out to the point where I can be extremely certain that my own consistency will be there, layed out correctly, as close to 100% of the time as I can get it. So here’s the 2 locating holes. The second shot shows my waste cutline and where my dovetail will end.

Image

Image

I've got to go stack some hay for the father inlaw, just called. More tomorrow.

User avatar
tlguitars
Posts: 333
Joined: Tue Sep 02, 2008 11:57 am
Include Off Topic: Yes
Location: Andover Minnesota
Contact:

Re: Sapelle, Italian Bevel

Post by tlguitars » Sun Sep 28, 2008 7:20 pm

So after getting some nice hay rash I finally get to work. I route away my binding waste, who needs a scraper!!!

Image

So the final bevel details, most of them anyway. Basically all of my preshape work goes out the window, because it's only to get rid of waste material. It's all guess work basically, the previous steps. There is really only one place where I have to cleanly fit the seams together but other then that one joint I can relax and just sand an mold, free hand. The basic idea is that your building a shelf/ roof topper and to finish it your simply going to sand up the side and off the top to make the bevel laminate appear to be seated in it's final position. The major note here is the word "appear." Because I'm not fitting it to the purfling, all I'm doing in the previous steps is removing waste so when I go to apply the laminte my tape will have enough surface to get a tight pull. Here's the glue... I loathe gluey fingers :evil:

Image

I place my laminate and tape the center into place and then work toward the ends.

Image
Image

Notice the built in over hang on the top. The bevel is not seated like a puzzle piece. This is whay I now think this is really easy. The bevel is just leaning up against the top and side purfling. While waiting for the glue to tack up (15-20 minutes) I got a wild idea and figured I'd try something. So here's 2 shots of what might come later (plus a hint).

Image
Image

Now that the glue has tacked enough to hold the bevel on but it's not dry I'll remove the tape and sand the bevel edges to "seat" the bevel. I've got an old kitchen laminate that's cut to my top shape that I'll use to shield the top as I sand. I use 220 grit paper and it's smooth enough that it doesn't cut the lam, just the wood. I should mention that the lamanite does slick up the sand paper so I do use 3-4 papers.

Image
Image
Image

Now that I have a shelf on the side and the top I can see where my gaps are and I can then fill with more glue, and retape the bevel, and leave it to dry.

Image
Image
Image
Image

Here's a shot of the bevel transition. So from the binding to the bevel laminate. I should say that my bevel cracked in a couple of places so I had to make some filler pieces and place them in by hand. I also had to build up the Rosewood right in the transition in order to have enough wood so my bevel tansition could be smoothe as the 45 degree angle cut through. You can see I still have a small gluey pocket to fill with Rosewood powder but this photo should give the gist of what I was trying to accomplish.

Image
Last edited by tlguitars on Sun Sep 28, 2008 7:28 pm, edited 1 time in total.

User avatar
Dennis Leahy
Dishwasher
Posts: 7082
Joined: Thu Aug 21, 2008 1:59 am
Include Off Topic: Yes
Location: looking for a place to live

Re: Sapelle, Italian Bevel

Post by Dennis Leahy » Sun Sep 28, 2008 7:28 pm

Hi Todd,

This is like watching a close-up magician: I "see" it, but I still don't know how to do it. Sure looks cool!

Dennis
Dennis Leahy

User avatar
Joe Sustaire
Moderator
Posts: 2640
Joined: Sat Aug 23, 2008 6:41 pm
Include Off Topic: Yes
Location: Talihina, Oklahoma

Re: Sapelle, Italian Bevel

Post by Joe Sustaire » Sun Sep 28, 2008 8:59 pm

Sure does look good Todd, but I agree with Dennis, gonna take some studying to sink in. :D

Thanks,
Joe
"I tell you we are here on earth to fart around, and don't let anyone tell you any different!"
Kurt Vonnegut

User avatar
tlguitars
Posts: 333
Joined: Tue Sep 02, 2008 11:57 am
Include Off Topic: Yes
Location: Andover Minnesota
Contact:

Re: Sapelle, Italian Bevel

Post by tlguitars » Tue Sep 30, 2008 3:27 pm

Hey Eban, Forgot to say thanks for the birthday wishes to the kids!!! :)

Thanks a lot.

Todd

User avatar
tlguitars
Posts: 333
Joined: Tue Sep 02, 2008 11:57 am
Include Off Topic: Yes
Location: Andover Minnesota
Contact:

Re: Sapelle, Italian Bevel

Post by tlguitars » Mon Oct 06, 2008 4:24 pm

More from this weekend. Finished my binding and the bevel transitions came out clean with I am happy with the results. I also glued in the truss rod filler. Sorry the 1st photo is fuzzy but I squared off the bevel end so I can butt joint my binding right up against it. Which there isn't a prefinished taped while glueign photo of, sorry. So the fuzzy prep will have to do.

Image

I then took the binding remainder that was supposed to be on the bevel side and flipped it so it would work for my treble side binding. That way I'll have a disapearing overlay right near the curve of the treble side that will never be seen. Here's a photo of the taper sanded into the binding just after it was glued into place.

Image

Then I went and binded the top portion of the treble side and overlayed the binding right onto the taper.

Image

While I was waiting for the binding to dry I cut my maple stock for my truss rod filler. I put the curve of my rod slot onto the filler and tested my fit. Then I glued it in.

Image

Image

After this I went back to my binding and routed the top and the sides flush. And I routed through my overlay to get my smoothe secret seam binding.

Image

Heres finished photos of the butt joint right up against the bevel and the overlay binding. Once I finish it the line will dissapear.

Image

Image

Thats what I got for now. Until later. Todd

User avatar
MrZ
Posts: 125
Joined: Sat Aug 23, 2008 6:24 pm
Include Off Topic: Yes
Location: Fort Worth Great State Texas

Re: Sapelle, Italian Bevel

Post by MrZ » Mon Oct 06, 2008 9:33 pm

That is looking gooood.
Z

User avatar
Dennis Leahy
Dishwasher
Posts: 7082
Joined: Thu Aug 21, 2008 1:59 am
Include Off Topic: Yes
Location: looking for a place to live

Re: Sapelle, Italian Bevel

Post by Dennis Leahy » Mon Oct 06, 2008 11:24 pm

Hi Todd,

Slick trick on that stealth binding seam!

Dennis
Dennis Leahy

Post Reply