Size 2 Martin build coming late October

Guitars by Grant Goltz of Hackensack, MN
User avatar
Joe Sustaire
Moderator
Posts: 2640
Joined: Sat Aug 23, 2008 6:41 pm
Include Off Topic: Yes
Location: Talihina, Oklahoma

Re: Size 2 Martin build coming late October

Post by Joe Sustaire » Wed Dec 01, 2010 7:41 am

Yeah, that is a nice tute Grant!
Sure helps wrap my mind around these things to watch it unfold like that.

And here we thought you'd just been kicked back on the porch dozing all this time. :lol:

Joe
"I tell you we are here on earth to fart around, and don't let anyone tell you any different!"
Kurt Vonnegut

User avatar
Stephen M Boone
Posts: 292
Joined: Sun Sep 13, 2009 9:52 am

Re: Size 2 Martin build coming late October

Post by Stephen M Boone » Wed Dec 01, 2010 8:41 am

This is great! I love to see all the little details put together. I am going to have to make some cool purfs like this soon.

User avatar
Marcus McGuinness
Posts: 265
Joined: Tue Sep 22, 2009 2:54 am
Include Off Topic: Yes
Location: Málaga, Spain

Re: Size 2 Martin build coming late October

Post by Marcus McGuinness » Wed Dec 01, 2010 11:05 am

Nice work, Grant.
That's a real "now why didn't I think of that?" idea with the blue tape to lay up those tiny tiles. Brilliant.

Mac

User avatar
Dennis Leahy
Dishwasher
Posts: 7082
Joined: Thu Aug 21, 2008 1:59 am
Include Off Topic: Yes
Location: looking for a place to live

Re: Size 2 Martin build coming late October

Post by Dennis Leahy » Wed Dec 01, 2010 3:03 pm

Grant, very cool detail in the backstrip. When you set your mind to something, you make it happen.

Dennis
Dennis Leahy

User avatar
Edward Taylor
Posts: 378
Joined: Sun Aug 16, 2009 12:02 pm
Include Off Topic: Yes
Location: Ontario, Canada

Re: Size 2 Martin build coming late October

Post by Edward Taylor » Wed Dec 01, 2010 4:58 pm

Incredible work on that backstrip, and oh man that coco... :drool:

This is going to be fun to see!
As the famed philosopher, Pogo Possum’s friend Porky, observed, “There’s only two possibilities: Either we is the most intelligent life in the universe, or there is life out there which is more intelligent than we are. Either way, it’s a mighty sobering thought.”

User avatar
Dennis Mitchell
Posts: 1912
Joined: Wed Nov 26, 2008 5:59 pm
Include Off Topic: Yes
Location: Republic of Texas
Contact:

Re: Size 2 Martin build coming late October

Post by Dennis Mitchell » Wed Dec 01, 2010 7:22 pm

This is becoming some serious wood porn and eye candy! :mrgreen:
Dennis Mitchell

"Music is a moral law. It gives soul to the universe, wings to the mind, flight to the imagination, a charm to sadness, gaiety and life to everything. It is the essence of order and lends to all that is good and just and beautiful."
PLATO

User avatar
whitespruce
Site Admin
Posts: 4367
Joined: Thu Aug 21, 2008 6:53 am
Include Off Topic: Yes
Location: Northern Minnesota, USA

Re: Size 2 Martin build coming late October

Post by whitespruce » Wed Dec 01, 2010 10:28 pm

Thanks everybody for the comments. If you have questions on anything, please ask away.

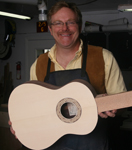
Well, I needed a break today form the other stuff I was doing in the shop (sorting artifacts in the archaeology lab), so I worked on the rosette.

The style 27 Martins from the late 19th century had the same rosette as the first style 45 later had (remember the 1-45 replica that Gary Demos built), There are 2 outer rings b/w/b/w/b (wood) and an inner ring with an abalone center and b/ivory/b/w/b going out on either side. The only thing I am doing differently is to use ivoroid instead of ivory.

Here is what the original looks like
Image
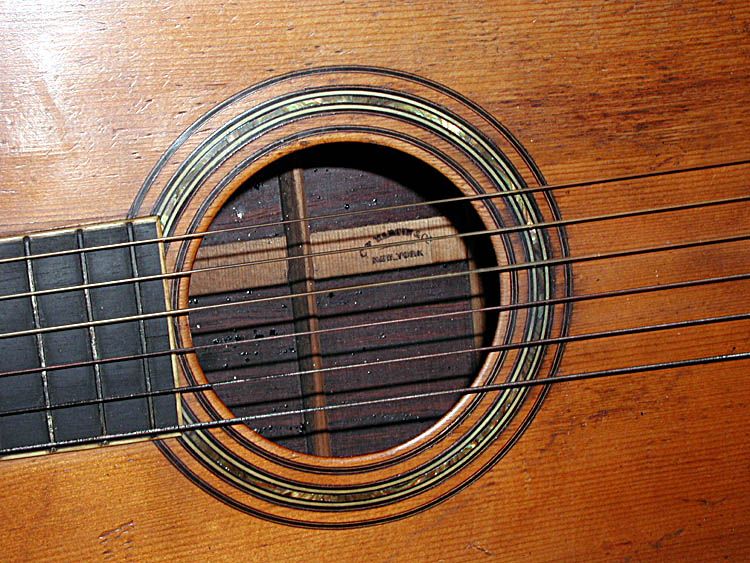
Also check the photo near the top of my last post

Since the color of the abalone on the original does not seem to really match any of the presently commercially available choices, I cut my own from red abalone shells. So here is the process
Image
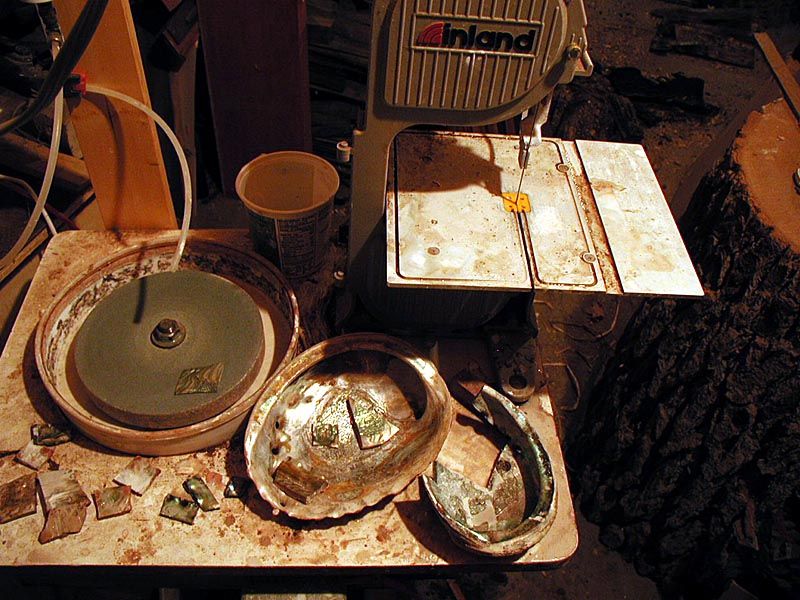
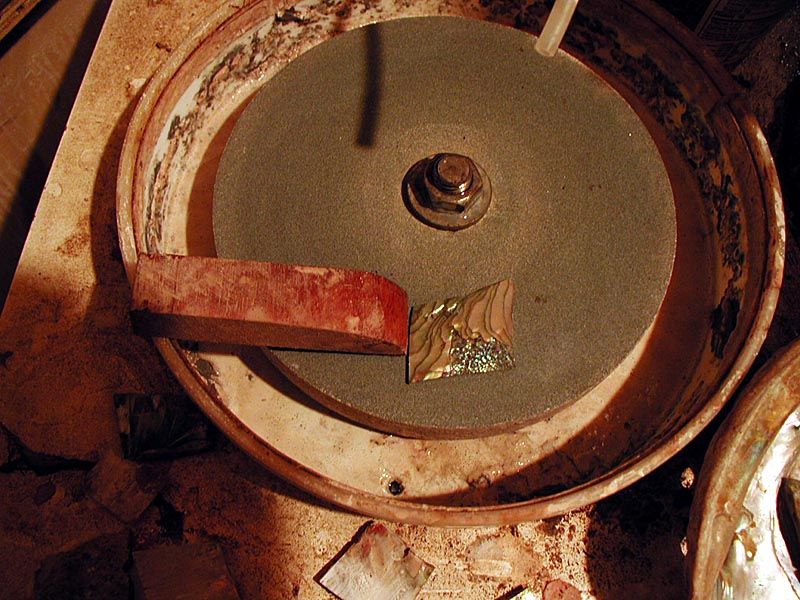
Basically saw out rough pieces from the shell with the diamond bandsaw, sizing them to be reasonably flat. Then grinding the inner surface level on the wet wheel.

Then I bandsaw a slightly over-thick slab off that face.....
Image

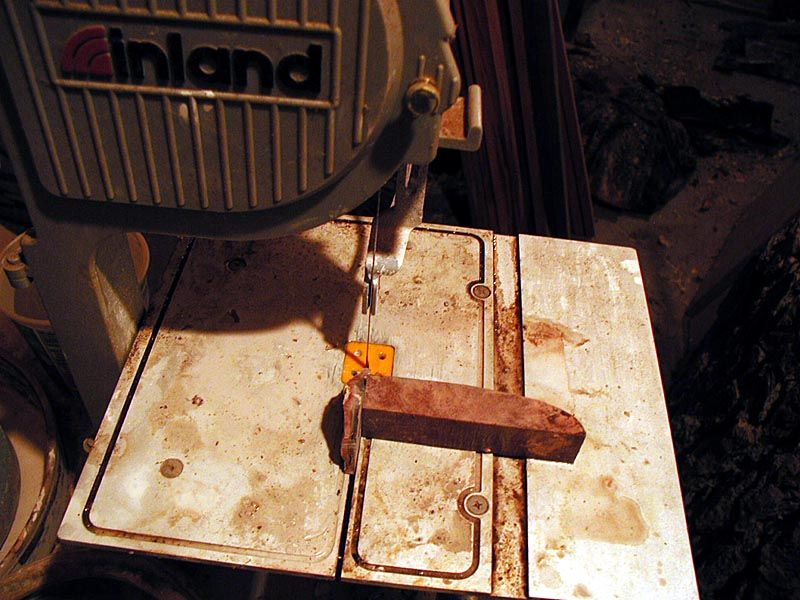
....and grind the sawn face until the thickness is correct
Image
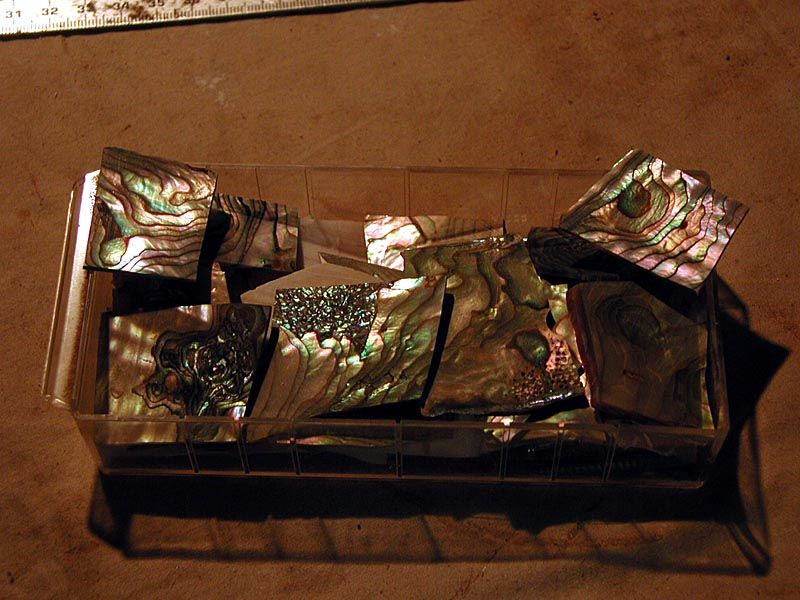
This actually does not take much time, and....

.....you soon have a nice pile of abalone slabs
Image

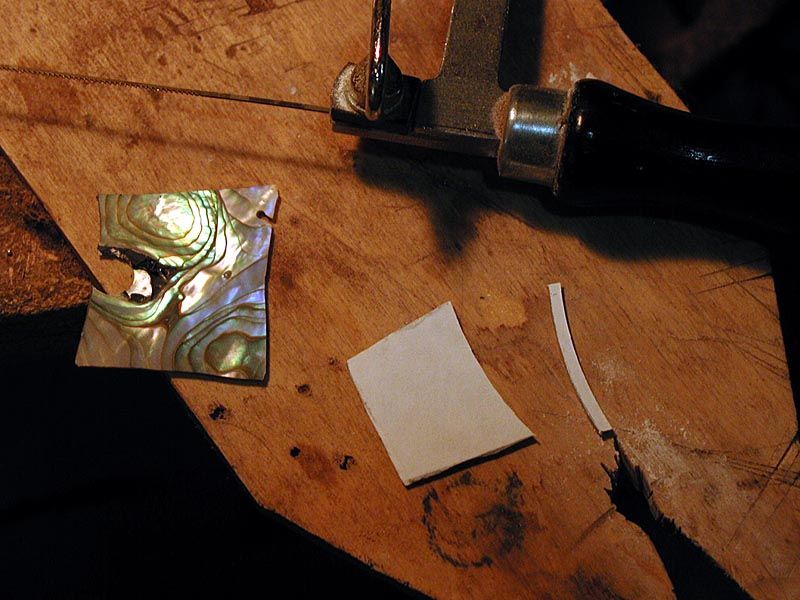
So I select a slab with the color and pattern I want, stick a blank paper label on one face and cut and sand a curve on one edge that matches the curve I need for the rosette pieces
Image
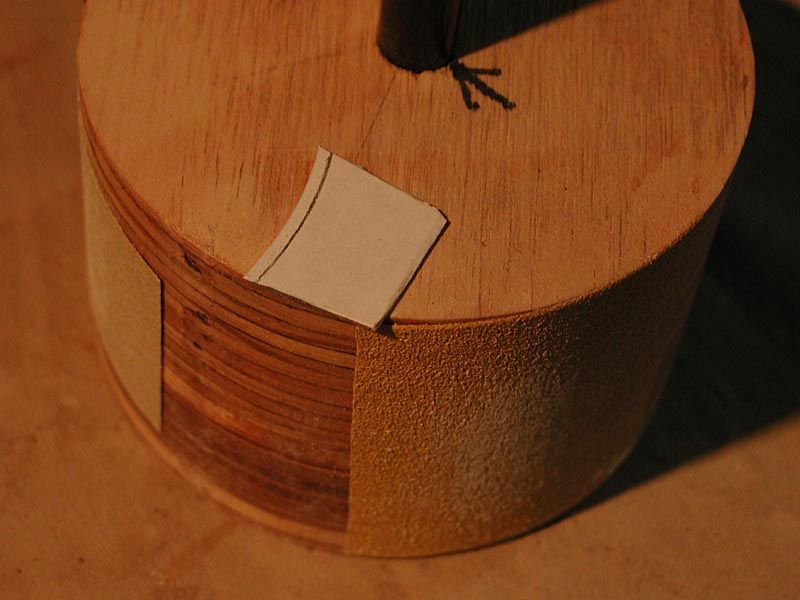
Then I mark out a strip just eyeballing it. The sandpaper stuck on the round block is what I use to shape the edge

And saw it off
Image

Here is a bunch of strips
Image

Then I sand the sawn edge on another curved block (forgot to photo this) until the strips are the correct width. They end up like this
Image
I did all of the abalone a month ago, so that was all ready to go

So I So this morning, I sanded the top
Image

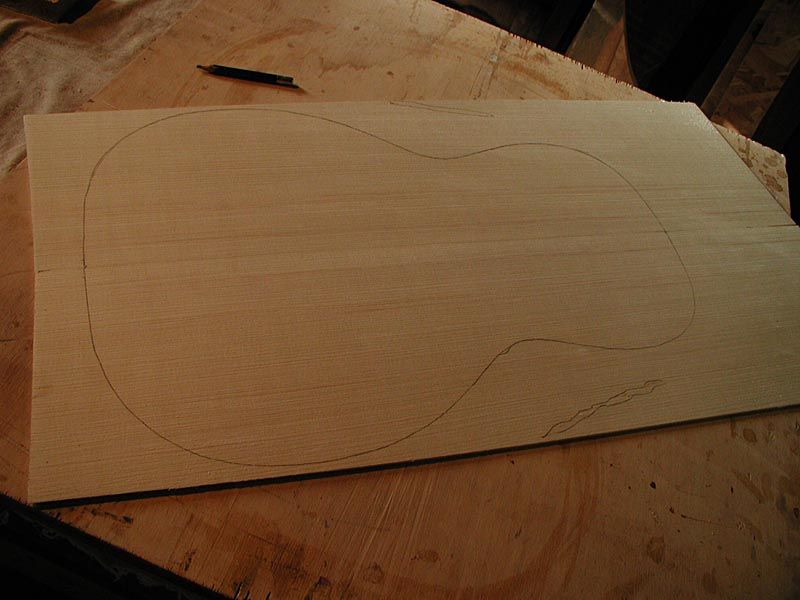
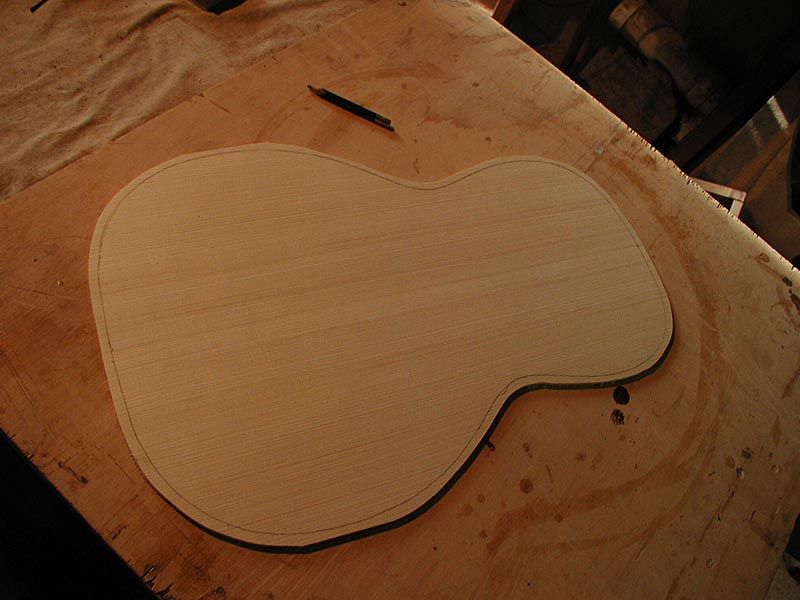
And cut out the outline oversize
Image

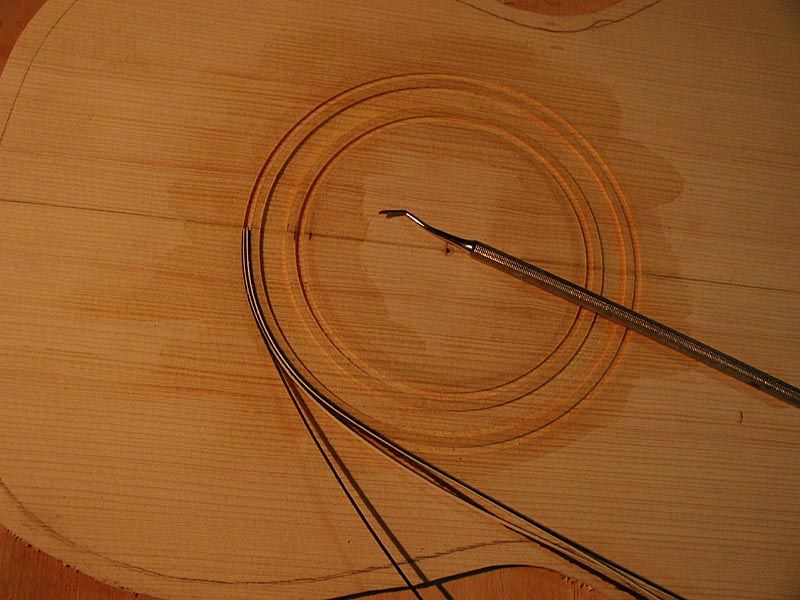
Then I marked out the soundhole and the rosette rings
Image

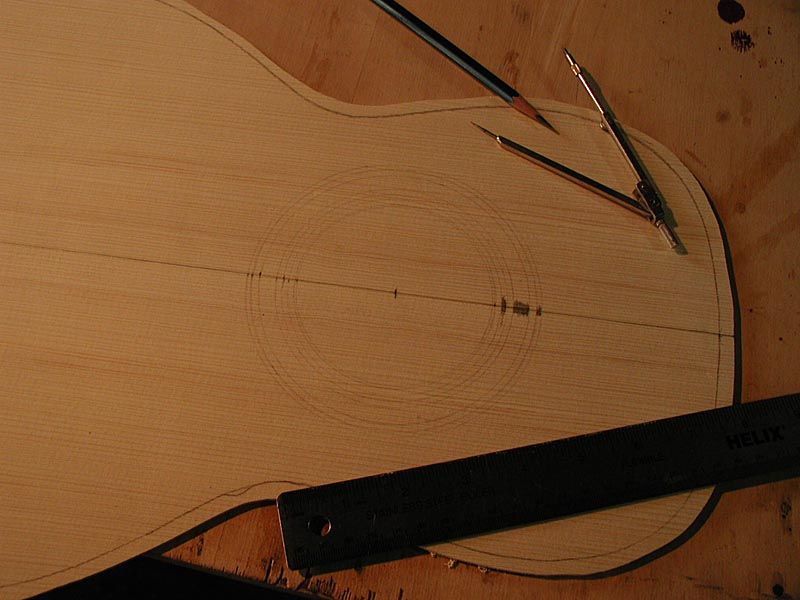
I don't have a nice new fancy circle cutting jig like most of the folks here seem to have, but my old standby works quite well
Image

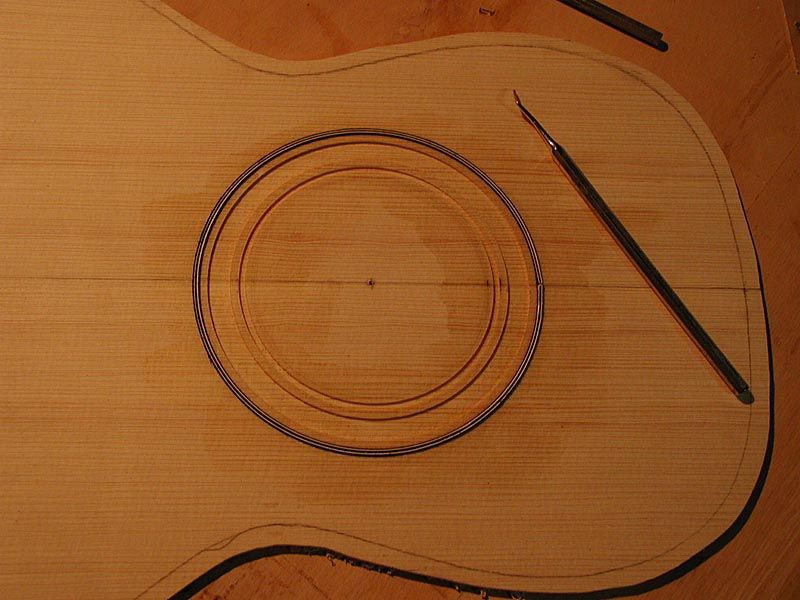
Here are the channels, all routed
Image

Some of the veneer lines in the rosette rings are narrower than others, so I had to thin down some veneer to make those from. I just sanded them thinner with a big sanding block
Image
It only took a few minutes....

....then I cut some strips
Image

So here is the first ring started
Image
5 strips, the center black strip is from thicker veneer. I am putting these in dry, I will flood everything with thin CA later. Notice that I have sealed the channels with shellac
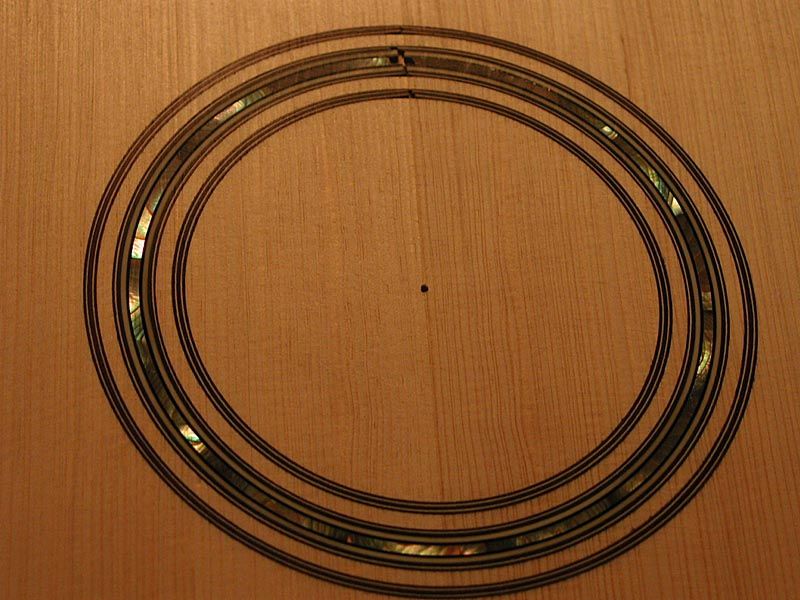
First ring done
Image

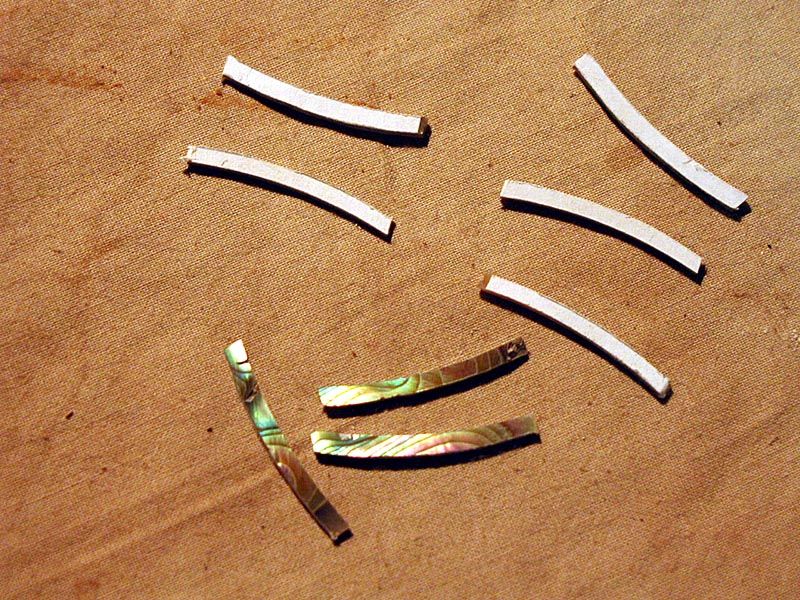
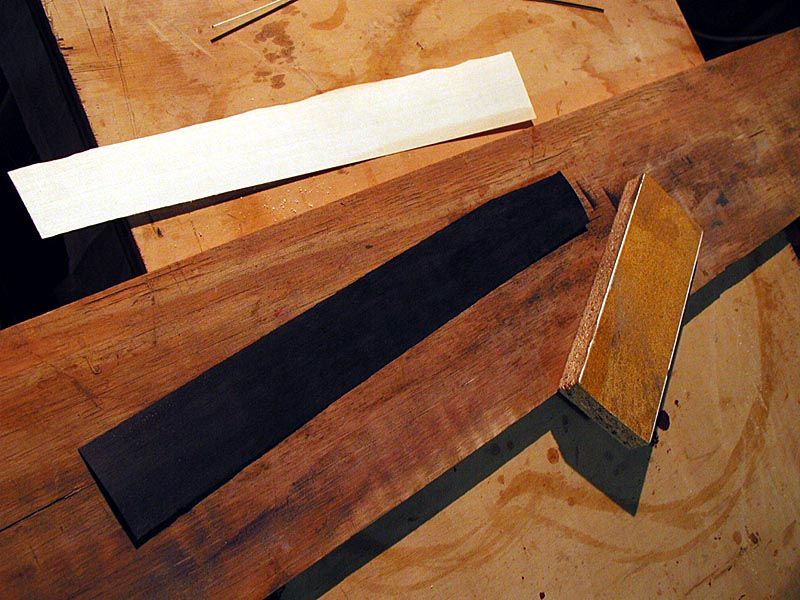
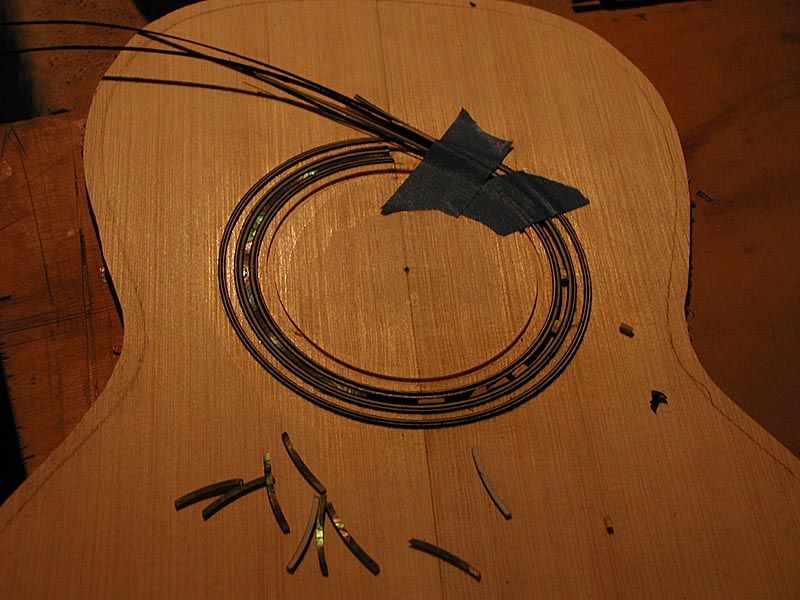
So now to do the middle ring. On each side of the abalone ring, I am using an ivoroid strip that has a thinner black line on one face, the black line borders the abalone. Outside of this is a thicker black strip and then thinner white and black strips.

So I start both sets of these strips in the channel with litttle wood blocks holding the center open for the abalone
Image
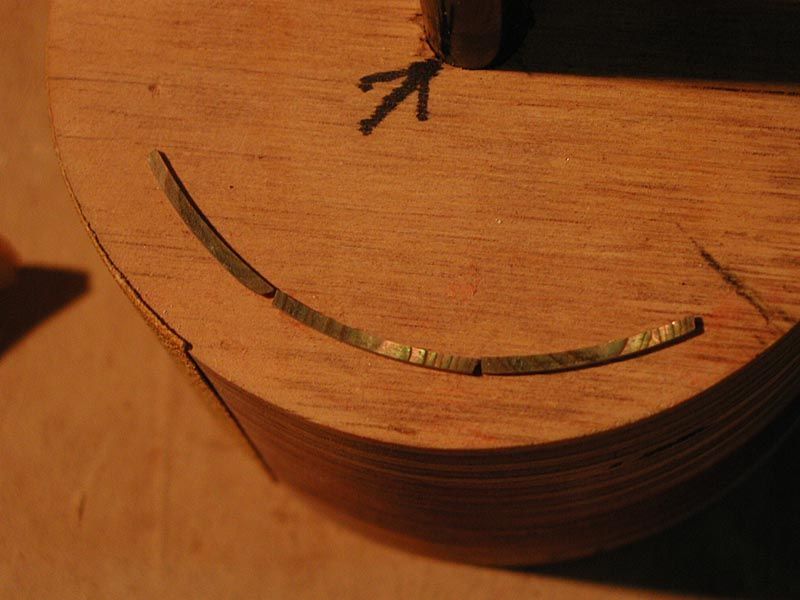
Then I slide the wood blocks apart to put in the first abalone segment, and work around

Here is half of the abalone in place
Image

3/4 done
Image

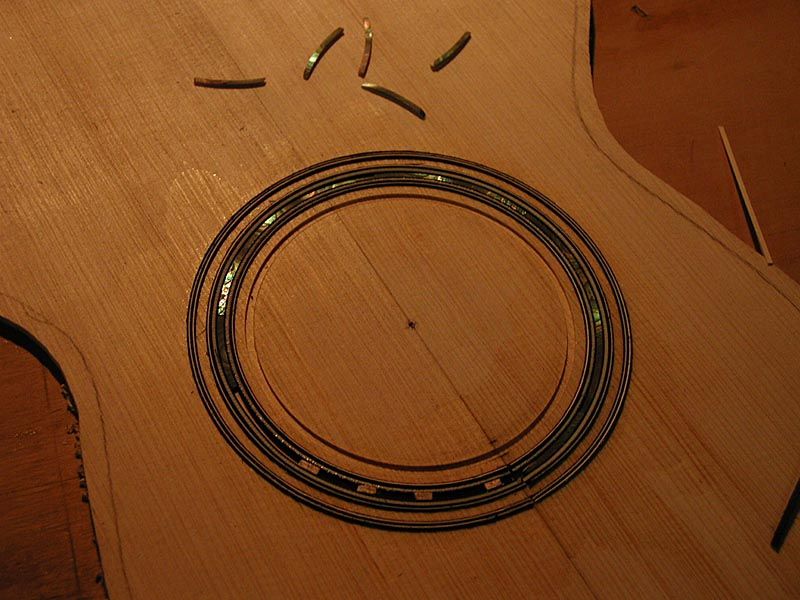
Center ring complete
Image

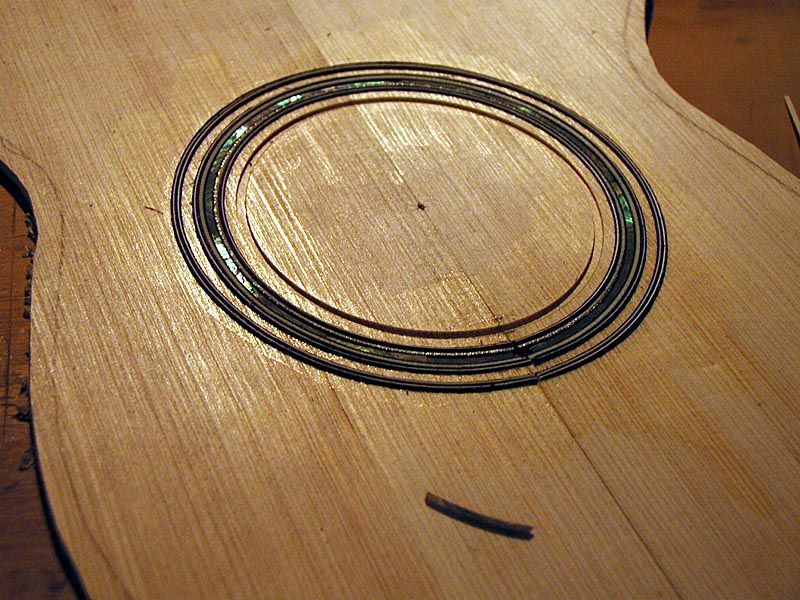
And the last ring done, just like the first
Image
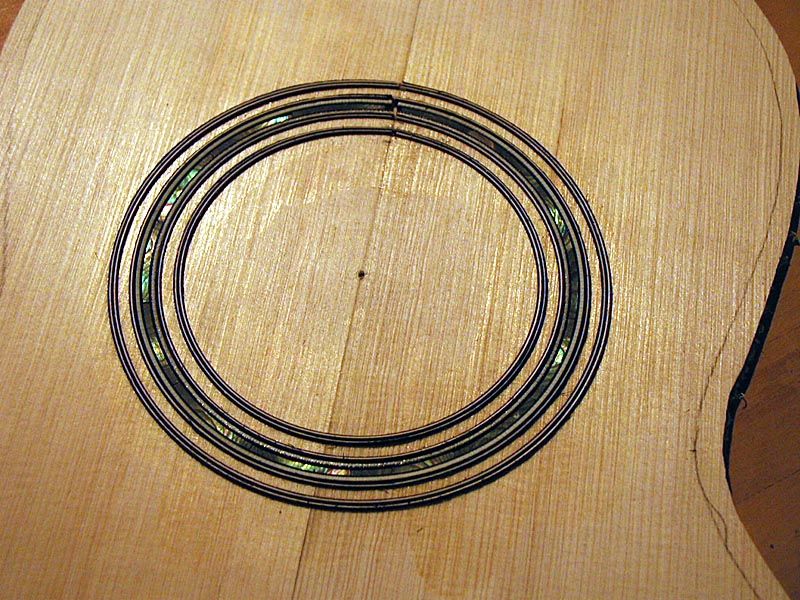
I then flooded everything with CA and let it dry

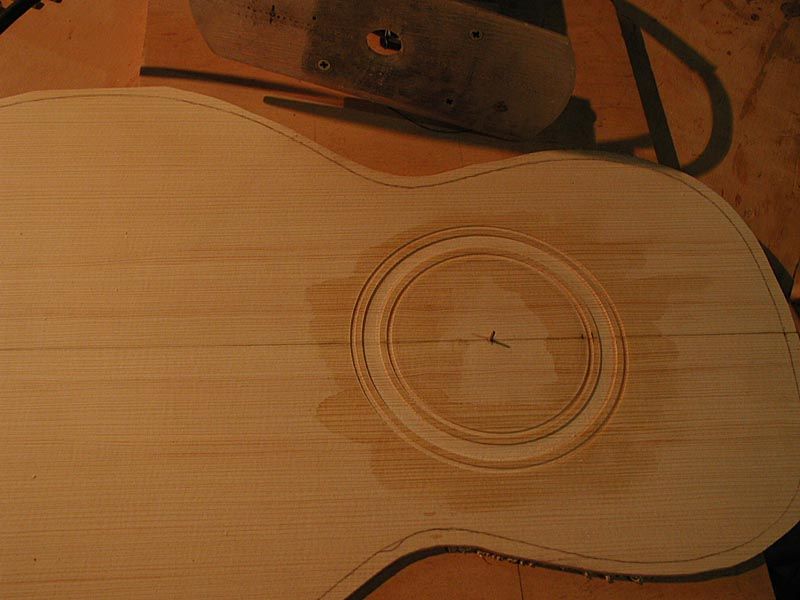
So then I planed the rosette close to level and ran it through the sander
Image
Then I went over everything with a scraper

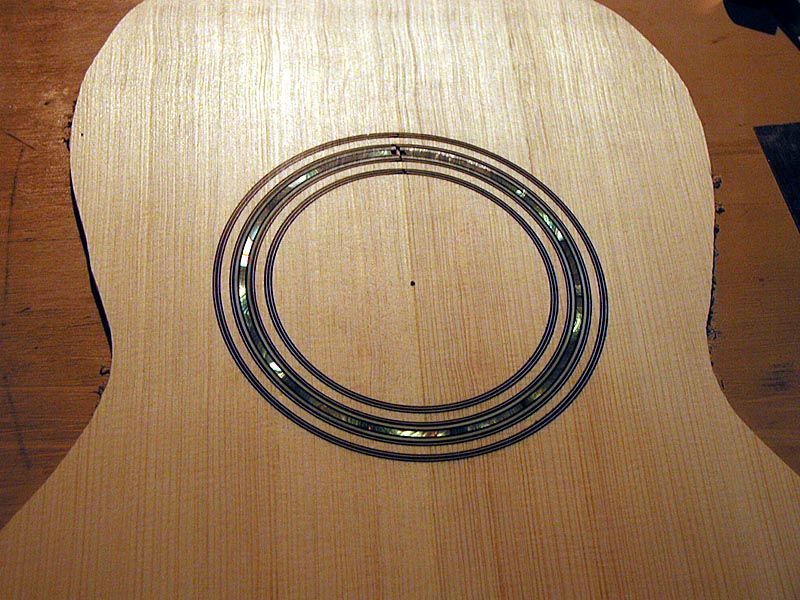
Here is a closer look at the finished rosette
Image

So tomorrow, I go back to sorting artifacts and contemplate the next step on this guitar.

Thanks for looking,

G

User avatar
garydemos
Posts: 140
Joined: Sat Aug 23, 2008 6:36 pm
Include Off Topic: Yes
Location: Hilliard, OH
Contact:

Re: Size 2 Martin build coming late October

Post by garydemos » Thu Dec 02, 2010 3:38 am

Looks great Grant! Placing the rosette rings dry and then flooding with CA glue - what a good idea. I'm going to remember that for the next one. Love the back-strip too.
Gary

Post Reply