
Hi Ray,
Excellent recovery, and a great reminder to all of us. Thank you for displaying your mistakes, as it is a much more powerful learning tool for all of us than reading through a book where nothing ever goes wrong. Your head is definitely where the sun does shine!
(Oh, and I think Josh's guitar is American Black Walnut. That stark creamy white sapwood may be throwing you off, but that is how Walnut sapwood can look if the wood is not steamed.)
Dennis
Curly Maple Cutaway for Debbie
-
Dennis Leahy

- Dishwasher
- Posts: 7082
- Joined: Thu Aug 21, 2008 1:59 am
- Include Off Topic: Yes
- Location: looking for a place to live
Re: Curly Maple Cutaway for Debbie
Dennis Leahy
Re: Curly Maple Cutaway for Debbie
Some days I think I'm a very good teacher...Dennis wrote:Hi Ray,
... Thank you for displaying your mistakes, as it is a much more powerful learning tool for all of us than reading through a book where nothing ever goes wrong...
Dennis
Thanks for the encouraging words guys. I'm sure someday I'll look back on this and laugh. Hopefully it won't be that semi-hysterical kinda laugh of someone who has gone off the deep end.
Raymond
I wondered why the baseball kept getting bigger. Then it hit me.
-
Josh Slaughter
- Posts: 46
- Joined: Thu Aug 28, 2008 12:49 pm
- Include Off Topic: Yes
- Location: Jamestown Tn.
Re: Curly Maple Cutaway for Debbie
Dennis,
You are correct, that is american black walnut. I love that sapwood.
Josh
You are correct, that is american black walnut. I love that sapwood.
Josh
Re: Curly Maple Cutaway for Debbie
Ordered the Shim Stock today... Don't remember who pointed them out to me, but MCS International had 6" wide by 100" long for $11.Eben wrote:Oh man...
Hey - Over trial and error, I don't ever use shim stock thicker than .010", and as you noted, you can and should see them sag as they get plastic, and be able to feel what the wood is doing as you bend - I do think that's critical.
E
And based on feedback from Hugh, Tim and Grant, I'll be trying 0.080 thick sides next time around. Thanks boyz.
Raymond
I wondered why the baseball kept getting bigger. Then it hit me.
-
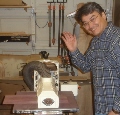
stevens

- Posts: 242
- Joined: Sat Aug 23, 2008 9:18 pm
- Include Off Topic: Yes
- Location: Bend, Oregon as of December 2012
- Contact:
Re: Curly Maple Cutaway for Debbie
Ray,
You are one up on me with the twice bent side. I haven't tried that yet.
On the sides I did bend wrong I was able to just use em as the were.
That is something you just can't do where you contour the side before bending.
Looking forward to seeing the new shell inlay rosette go on this one.
Steve
You are one up on me with the twice bent side. I haven't tried that yet.
On the sides I did bend wrong I was able to just use em as the were.
That is something you just can't do where you contour the side before bending.
Looking forward to seeing the new shell inlay rosette go on this one.
Steve
Remember it's the process of building you must love.
Re: Curly Maple Cutaway for Debbie
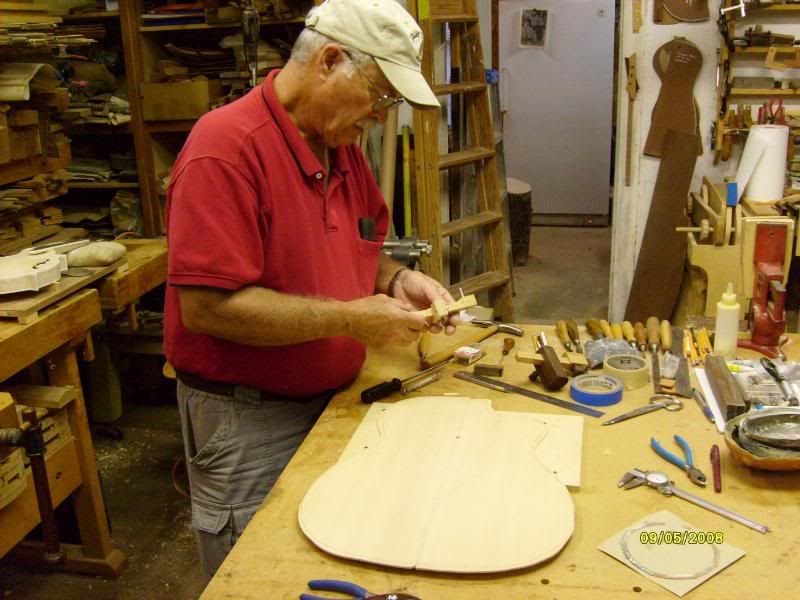
The Rosette -
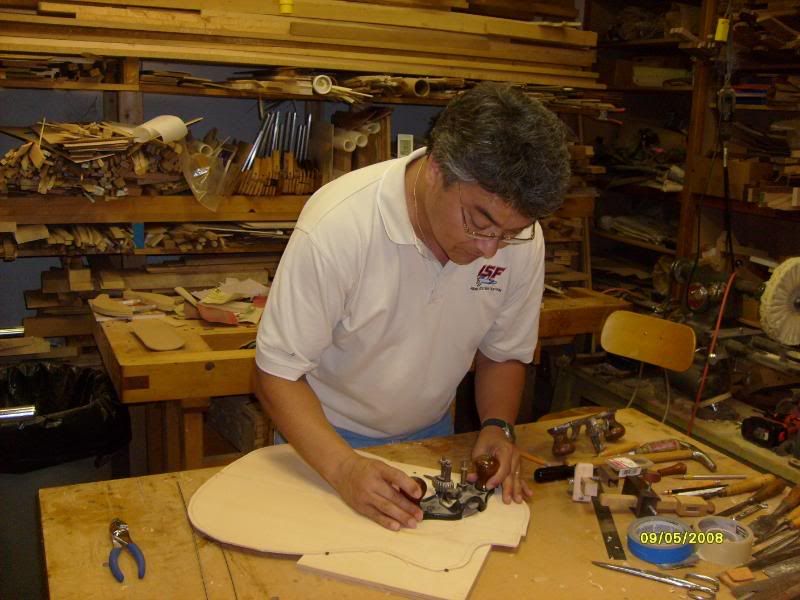
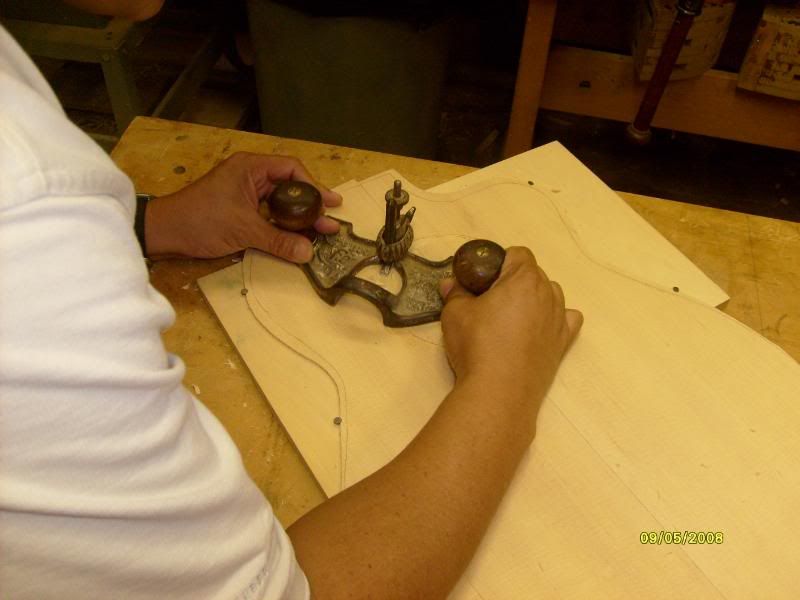
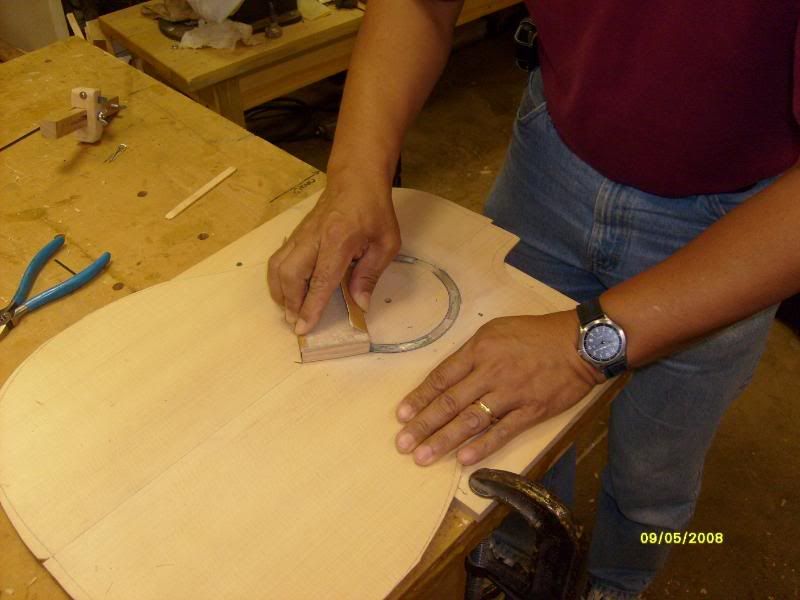
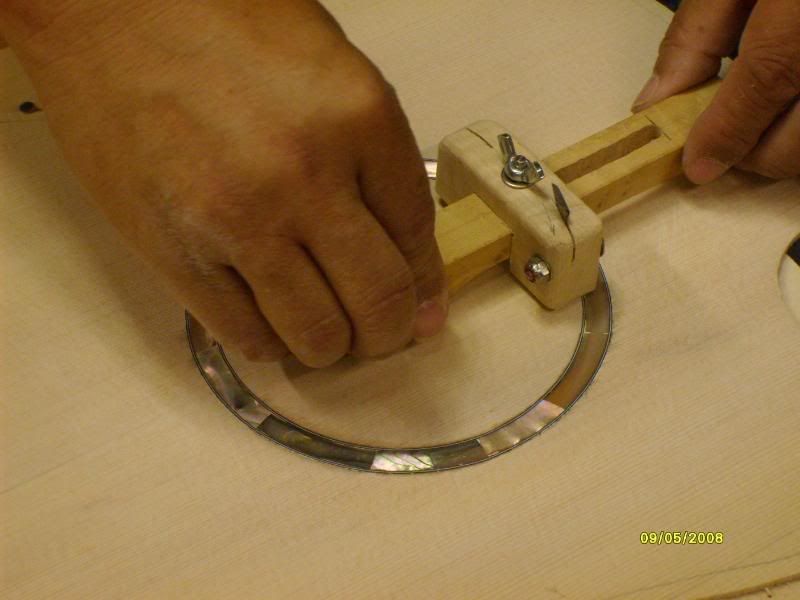
Awhile back Steve Stevens had set aside a rosette cutter for me that he had made. This weekend I went to visit and while I was there we decided to cut the rosette for this guitar. Here is a picture of Steve trying to remember how the jig was supposed to work... On the table you can see his improved version of the cutter that is the reason this one was available to give away.
The circle cutter is basically a 1/4" shaft with an adjustable arm that contains an exacto knife blade pinched in a slot with a locking nut and screw to hold it in place. I didn't take any pictures of the initial cutting, but we'll see more of the tool itself again when I cut out the soundhole. For the sides of the rosette channel we took the pink abalone rosette and measured the width, plus the b/w/b purfling on the inside and outside. Used the tool to cut both the inner and outer circles and then Steve pulled out some of his router planes and we started cutting the rosette.
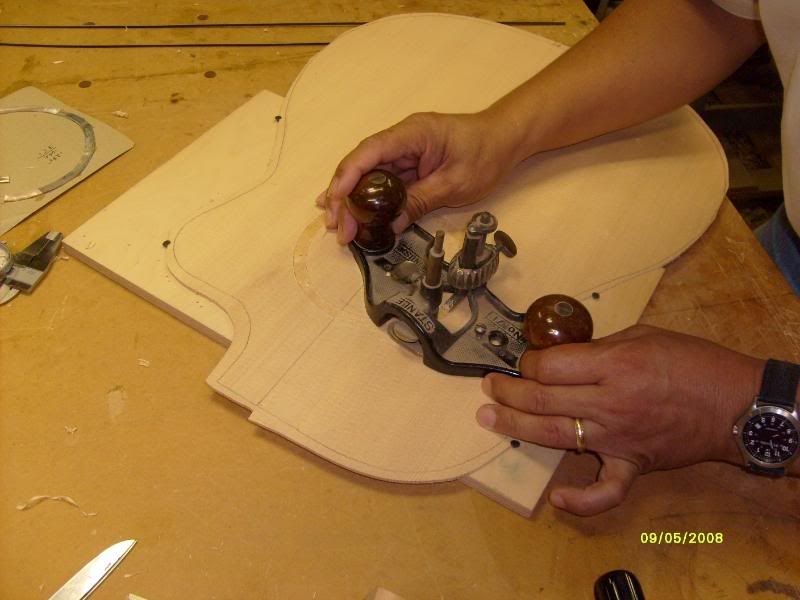
It took several times around lowering the router blade slightly after each pass before we were deep enough. Steve kept changing out the router plane for a sharper one as he went back and sharpened the one he replaced. Those router planes work remarkably well, and I'll be keeping my eye out for one in the future.
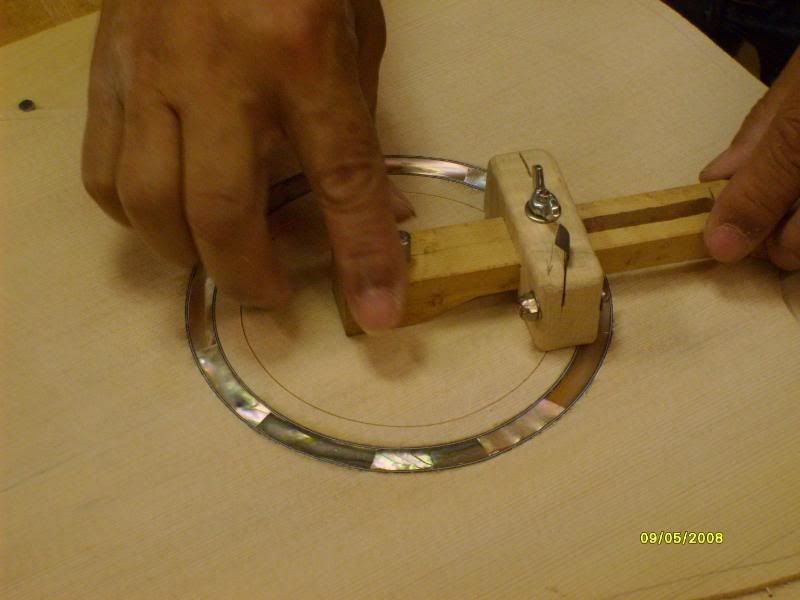
Our first test fit of the shell and purflings revealed however that we hadn't gone quite wide enough. I was surprised at how easily the circle cutter cut a smidge more off the inner circle, as many times such a slight increase in the cut will just cause the blade to flex out of the way. This simple cutter provided the cleanest looking rosette slot I've ever seen in person. In the future, I think I will use this to outline the rosette even if I'm going to use a dremel to route out the center section. Same thing for my soundholes which you will see later.
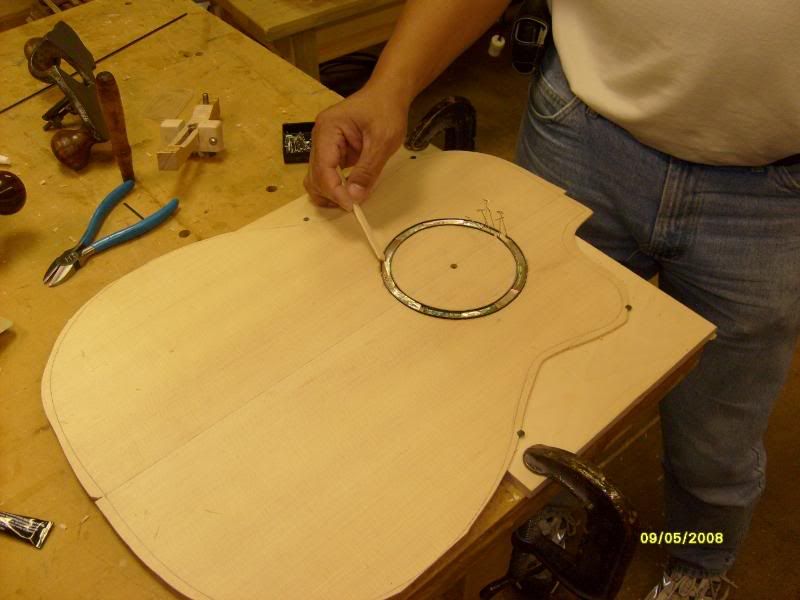
I've seen this next stage done multiple ways including gluing in the purflings first using a non-stick material to fill up the rosette and then coming back and adding the abalone, or using pins to locate the purfling to the outside edges, routing out the rosette channel in stages so that I install the purfling first and then route out the center portion... or install all three at the same time. Since we had 4 hands we opted for the latter. Steve held the purflings in place while I inserted the shell inbetween purfling strips. I occasionally had to sand the edge of a piece to get the seam to close up with minimal gap. Once installed we flooded the section with CA glue. I resisted the temptation to go back a second time with more CA glue as every time I do this I use too much and it seeps out onto the face of the soundboard.
Here I am making sure the shell and the purfling strips are all the way down.
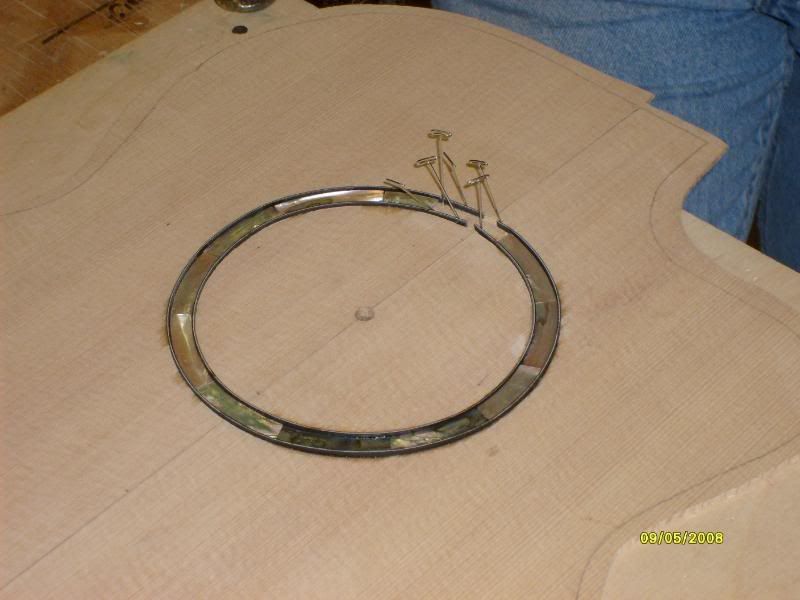
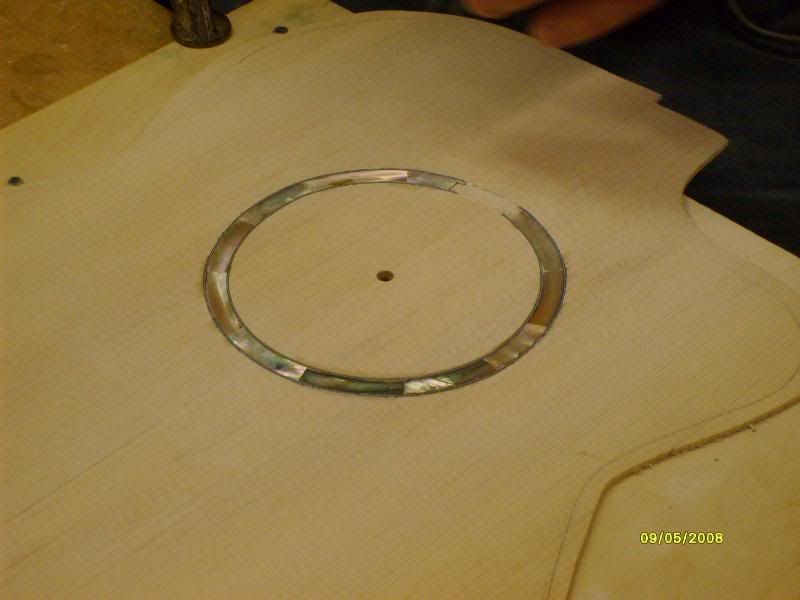
We used pins to hold the ends of the purfling in place while the glue dried.
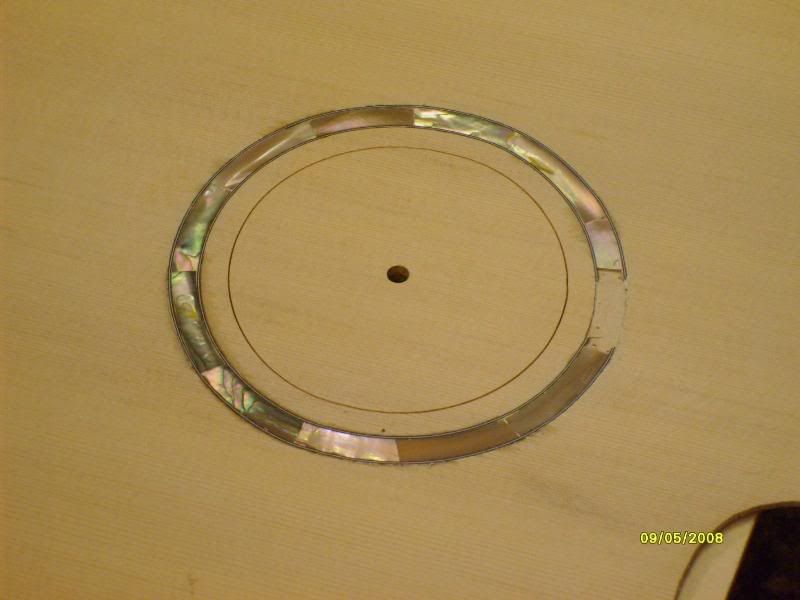
We came back the next morning and lightly scraped the purfling to close to the shell,
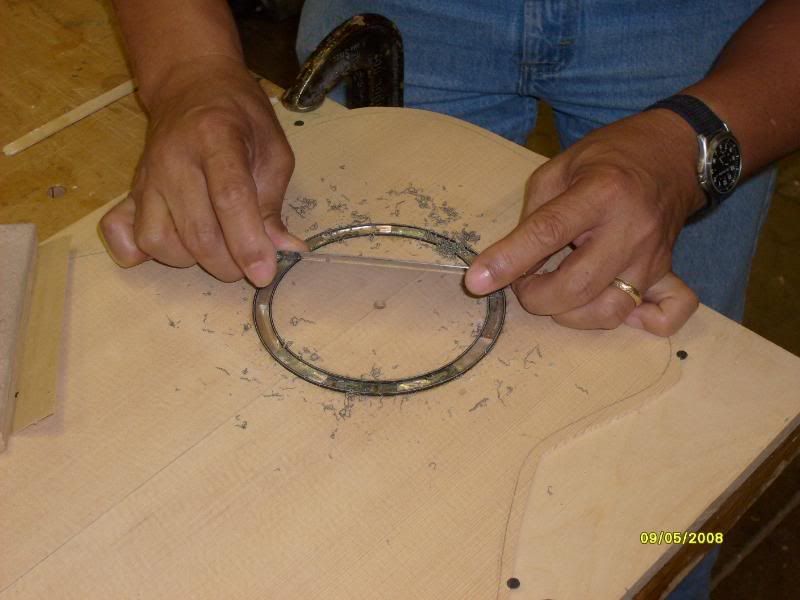
Then sanded the purfling and shell until it was flush with the top of the soundboard. To avoid sanding the surrounding top we used a flat piece of wood, and replaced the sandpaper often to maintain a sharp edge.
Reset the cutter to cut the soundhole.
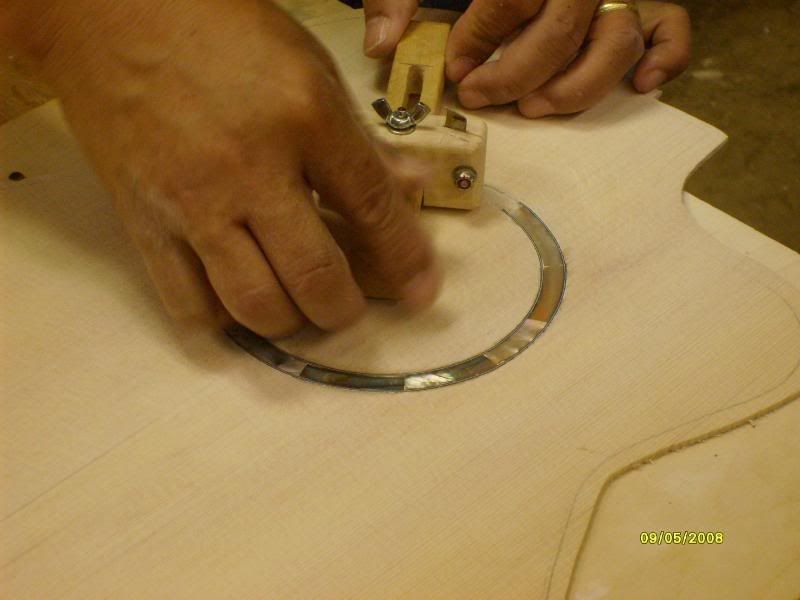
Set the cutter to approximately 2 inch radius and did a test cut near the top of the soundhole.
Once we were satisfied the cut was the right width we cut part way through the top all the way around the soundhole.

We then flipped the soundboard over and cut the same radius circle from the back. Once we had the outline on both sides we lowered the blade and repeated to cut the rest of the way through.
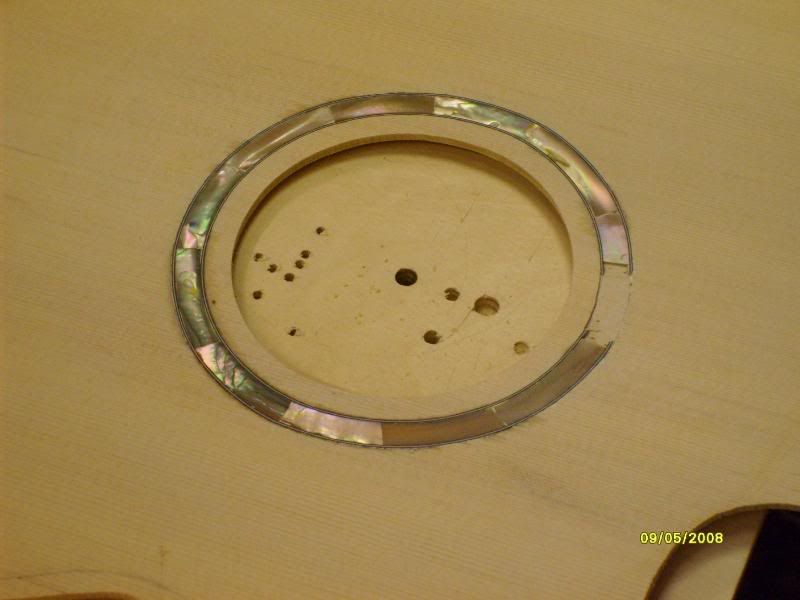
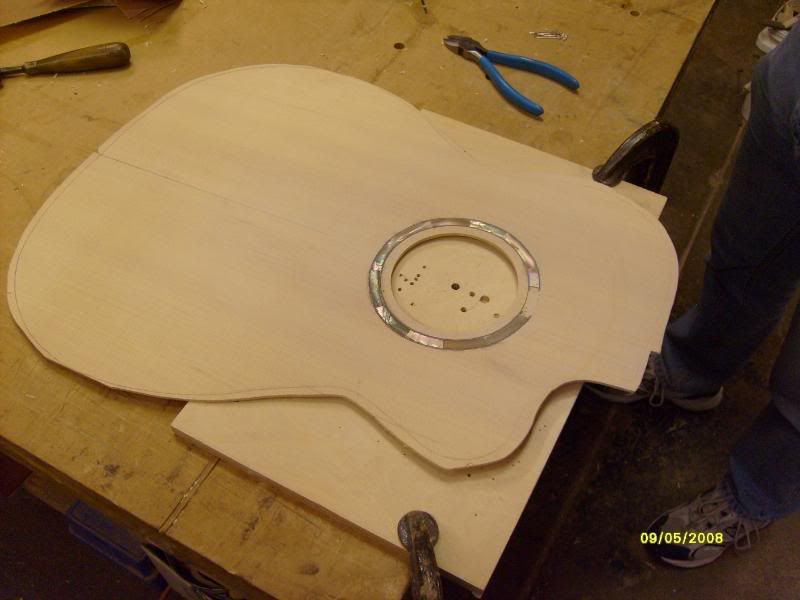
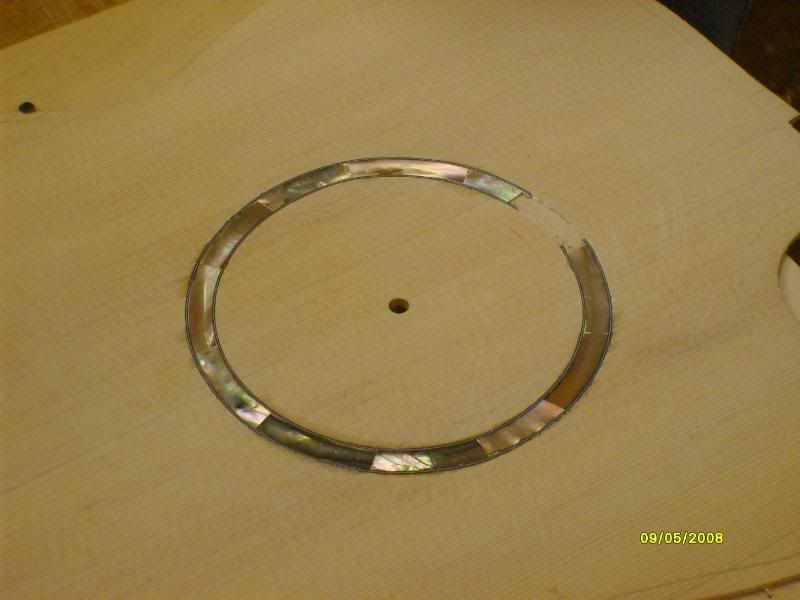
Notice how clean the cut on the soundhole...
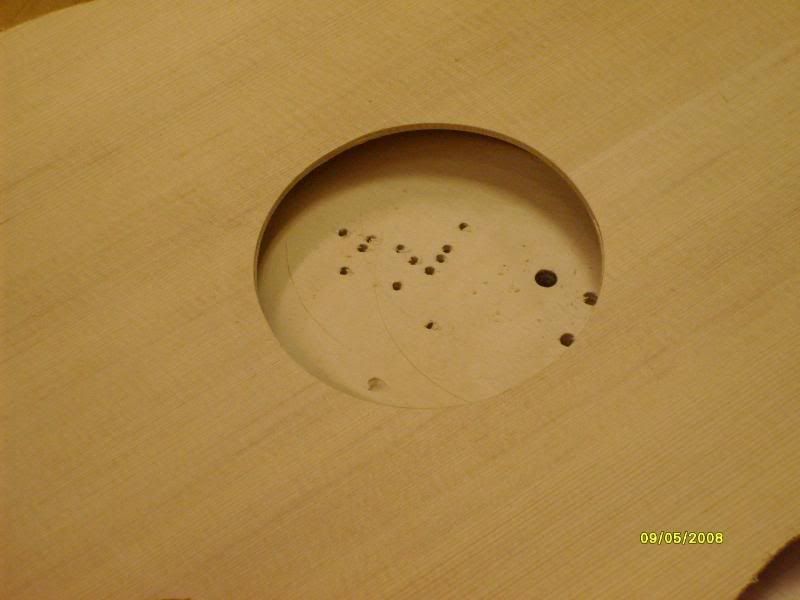
By far the cleanest rosette I've done yet. And there is something to be said for never having turned on a power tool to do it.
Raymond
Awhile back Steve Stevens had set aside a rosette cutter for me that he had made. This weekend I went to visit and while I was there we decided to cut the rosette for this guitar. Here is a picture of Steve trying to remember how the jig was supposed to work... On the table you can see his improved version of the cutter that is the reason this one was available to give away.
The circle cutter is basically a 1/4" shaft with an adjustable arm that contains an exacto knife blade pinched in a slot with a locking nut and screw to hold it in place. I didn't take any pictures of the initial cutting, but we'll see more of the tool itself again when I cut out the soundhole. For the sides of the rosette channel we took the pink abalone rosette and measured the width, plus the b/w/b purfling on the inside and outside. Used the tool to cut both the inner and outer circles and then Steve pulled out some of his router planes and we started cutting the rosette.
It took several times around lowering the router blade slightly after each pass before we were deep enough. Steve kept changing out the router plane for a sharper one as he went back and sharpened the one he replaced. Those router planes work remarkably well, and I'll be keeping my eye out for one in the future.
Our first test fit of the shell and purflings revealed however that we hadn't gone quite wide enough. I was surprised at how easily the circle cutter cut a smidge more off the inner circle, as many times such a slight increase in the cut will just cause the blade to flex out of the way. This simple cutter provided the cleanest looking rosette slot I've ever seen in person. In the future, I think I will use this to outline the rosette even if I'm going to use a dremel to route out the center section. Same thing for my soundholes which you will see later.
I've seen this next stage done multiple ways including gluing in the purflings first using a non-stick material to fill up the rosette and then coming back and adding the abalone, or using pins to locate the purfling to the outside edges, routing out the rosette channel in stages so that I install the purfling first and then route out the center portion... or install all three at the same time. Since we had 4 hands we opted for the latter. Steve held the purflings in place while I inserted the shell inbetween purfling strips. I occasionally had to sand the edge of a piece to get the seam to close up with minimal gap. Once installed we flooded the section with CA glue. I resisted the temptation to go back a second time with more CA glue as every time I do this I use too much and it seeps out onto the face of the soundboard.
Here I am making sure the shell and the purfling strips are all the way down.
We used pins to hold the ends of the purfling in place while the glue dried.
We came back the next morning and lightly scraped the purfling to close to the shell,
Then sanded the purfling and shell until it was flush with the top of the soundboard. To avoid sanding the surrounding top we used a flat piece of wood, and replaced the sandpaper often to maintain a sharp edge.
Reset the cutter to cut the soundhole.
Set the cutter to approximately 2 inch radius and did a test cut near the top of the soundhole.
Once we were satisfied the cut was the right width we cut part way through the top all the way around the soundhole.
We then flipped the soundboard over and cut the same radius circle from the back. Once we had the outline on both sides we lowered the blade and repeated to cut the rest of the way through.
Notice how clean the cut on the soundhole...
By far the cleanest rosette I've done yet. And there is something to be said for never having turned on a power tool to do it.
Raymond
I wondered why the baseball kept getting bigger. Then it hit me.
-
Lefty

- Moderator
- Posts: 1632
- Joined: Sat Aug 23, 2008 9:09 pm
- Include Off Topic: Yes
- Location: Riverside,ca
Re: Curly Maple Cutaway for Debbie
Raymond,
Neat little rosette cutter. I may try to make something like that. The sound or a router is not something I like to listen to any more than I have to.
As far as your earlier bending adventure, have you checked the temperature on your unit to see that it is getting as hot as you think it is?
Just an idea.
Lefty
No money Nathan. No money Marty. Just a roof over my head and a rockin chair by the fire.
(Mose Harper)
Steve "Lefty" Leff
(Mose Harper)
Steve "Lefty" Leff
-
Dennis Leahy
- Dishwasher
- Posts: 7082
- Joined: Thu Aug 21, 2008 1:59 am
- Include Off Topic: Yes
- Location: looking for a place to live
Re: Curly Maple Cutaway for Debbie
Excellent and well-documented no power tools rosette installation tutorial!
And it sure turned out beautifully!
Dennis
And it sure turned out beautifully!
Dennis
Dennis Leahy